
I learned that I can hatch quail eggs naturally without a quail eggs incubator. I often rely on a broody hen or create a DIY setup to hatch eggs at home. I always make sure the temperature stays close to 99.5°F and the humidity remains between 50% and 70%. A safe, clean nest helps the hen hatch the eggs successfully. Natural methods usually hatch 20–40% of eggs, while incubators can hatch 70–90%. I find this guide rewarding, even if hatching is challenging. For readers searching “hatch quail eggs without incubator” or “natural quail egg hatching,” this is exactly the approach I follow.
Key Takeaways
-
Natural hatching of quail eggs can be done using a broody hen or a DIY incubator. This method allows for a hands-on experience and fits “quail hatching without machine” searches.
-
Maintaining the right temperature (99.5°F) and humidity (50-70%) is crucial for successful hatching. Regular monitoring helps ensure the best conditions when you try to hatch quail eggs without an incubator.
-
Choosing a good broody hen, like a Silkie, increases the chances of successful hatching. Look for hens with strong maternal instincts when attempting broody hen quail eggs methods.
-
Turning the eggs at least three times a day is essential. This prevents the embryos from sticking to the shell and promotes healthy development during natural quail egg hatching.
-
Natural hatching may have a lower success rate (20-40%) compared to incubators (70-90%), but it offers a rewarding experience and requires less equipment—ideal for DIY quail egg incubator setups.
Natural Hatching Guide
What Is Natural Hatching
When I talk about natural hatching, I mean hatching eggs without an incubator. I either use a broody bird or try to simulate the natural conditions a mother bird would provide. This method lets me experience the process up close. I find it rewarding to watch the eggs develop and hatch under natural care—perfect for anyone asking how to hatch quail eggs without incubator.
Natural hatching relies on the broody hen to keep the eggs warm and humid. The hen turns the eggs several times a day, which helps the embryos develop. In contrast, incubators need me to set the temperature and humidity myself. I also have to turn the eggs or use an automatic turner. Both methods take about 18 days for quail eggs to hatch, but the natural way feels more hands-on and aligns with quail egg care best practices.
Here are some key differences I notice between natural hatching and using an incubator:
-
The broody hen controls temperature and humidity, while I must monitor these in an incubator.
-
Incubators often have automatic egg-turning, but hens do this naturally.
-
I find natural hatching costs less, but it gives me less control over the process.
I see some pros and cons with natural hatching:
-
Pros: low cost, natural experience, less equipment needed.
-
Cons: lower hatch rate, less control, and more risk of failure—reflected in typical quail egg hatching success rate ranges.
Quail vs Other Poultry
When I try to hatch quail eggs, I notice that quail have weaker maternal instincts than chickens or ducks. Most quail hens do not go broody. They rarely sit on their eggs long enough for them to hatch. Chickens, on the other hand, often show strong brooding behavior. They make better mothers and can hatch eggs more reliably for those exploring broody hen quail eggs techniques.
Here are some differences I have seen:
-
Quail are poor mothers and often do not brood their eggs.
-
Chickens keep some maternal instincts and can hatch eggs naturally.
-
I usually need to use alternative methods for quail, like incubating eggs without an incubator or using a broody chicken.
-
Quail eggs may hatch better in controlled environments, but the chicks need extra care after hatching.
If you want to try natural hatching, my hatching guide can help you understand the steps and challenges. I encourage you to try these methods and enjoy the process of watching your quail eggs hatch.
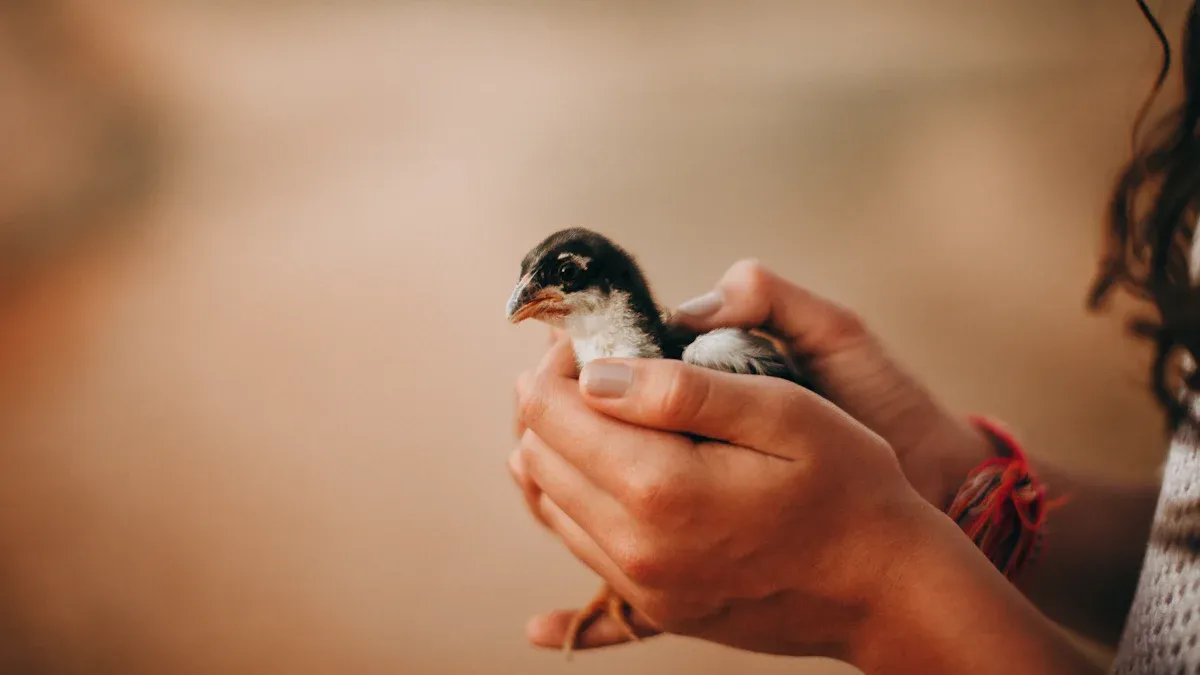
Broody Hen Method
Using a broody hen to hatch quail eggs gives me a chance to watch nature at work. I find this method rewarding, especially when I see the chicks break out of their shells. I always focus on three main steps: choosing the right hen, setting up the nest, and supporting the hen during the hatching process—core to the hatch quail eggs without incubator approach.
Choosing a Hen
Selecting the right hen is the first step in hatching eggs naturally. I look for breeds with strong maternal instincts. Silkie chickens stand out as my top choice. They have a calm temperament and a reputation for being excellent mothers. I also consider other breeds known for broodiness, but Silkies rarely let me down.
When I choose a hen, I check for these qualities:
|
Characteristic |
Description |
|---|---|
|
Spacious aviary housing |
A roomy space helps the hen feel safe and encourages nesting. |
|
Deep bedding or natural ground |
Soft bedding like straw or wood shavings lets the hen tuck away the eggs. |
|
Minimized disturbances |
A quiet area reduces stress and keeps the hen focused on hatching eggs. |
|
Reduced egg collection |
Leaving eggs in the nest helps the hen believe she has a full clutch, which promotes brooding. |
|
Preferred breed (Silkies) |
Silkies are gentle and have a strong instinct to hatch eggs, making them ideal for this method. |
I notice that quail hens sometimes go broody if they were hatched by a broody hen themselves. I try to provide a secure and hidden spot to encourage broodiness. The best time for hatching eggs is between April and July, with June being the most successful month in my experience.
Nest Setup
A good nest setup makes a big difference in hatching success. I always choose a quiet, dark corner for the nest. This helps the hen feel safe and less likely to abandon the eggs. I use a nesting box with a built-in box-in option to keep the eggs contained. I add deep straw or wood shavings for comfort and insulation.
Here is what I include in my nest setup:
-
Nesting box with sides high enough to keep eggs from rolling out
-
Dust bathing spot nearby so the hen can clean herself
-
Foraging and feeding area close to the nest
-
Optional legs made from 2x4s to raise the nest and save my back
I make sure the nest is protected from predators and drafts. I keep the area warm and humid, which helps the hatching process. I avoid moving the nest once the hen starts sitting on the eggs.
Tip: I always turn the eggs at least three times a day during the first 12 days. This step is vital for hatching success. If I skip turning, the hatch rate can drop by 25% to 50%. Turning keeps the temperature even and stops the eggs from sticking to the bedding—critical for natural quail egg hatching.
Supporting the Hen
Supporting the broody hen during hatching eggs is just as important as the setup. I give her clean water and fresh feed every day. I try not to disturb her, but I check on her quietly to make sure she stays healthy and committed to hatching.
Quail eggs are fragile. I handle them gently to avoid breaking any during the process. Sometimes, the hen may accidentally harm the chicks or not recognize them as her own. I watch closely as hatching time approaches. If I see any problems, I step in to help the chicks.
Here are my best practices for supporting the hen:
-
Provide constant access to clean water and quality feed
-
Limit disturbances to keep the hen calm and focused
-
Monitor the hen’s brooding consistency and health
-
Prepare to assist if the hen ignores or harms the chicks
I also watch for common challenges like temperature fluctuations, dehydration, overcrowding, and health issues in the chicks. I keep the brooder at 95°F at first and lower it gradually. I make sure each chick has enough space and access to food and water. If I see any signs of pasty butt or splayed leg, I act quickly to help the chick recover.
Hatching with a broody hen takes patience and care. I find it deeply satisfying to see the chicks hatch and thrive under natural conditions.
DIY Quail Eggs Incubator
Creating a DIY quail eggs incubator at home gives me a hands-on way to hatch eggs without expensive equipment. I have tried several homemade setups over the years. Each time, I learn more about what works best for hatching. I use simple household items and pay close attention to temperature and humidity. This method lets me control the environment and watch the process closely—ideal for anyone researching “DIY quail egg incubator”.
Warmth
Keeping the right warmth is the most important part of a homemade quail eggs incubator. I always aim for the correct temperature for hatching quail eggs, which is 99.5°F (37.5°C). I use a few different items to create and maintain this warmth:
-
Styrofoam cooler or carton box for insulation
-
15-watt incandescent bulb or a heating pad as the heat source
-
Digital thermometer for accurate temperature readings
-
Plexiglass or glass from a picture frame to make a viewing window
-
Hot glue gun or duct tape to seal gaps and hold parts together
I place the heat source inside the insulated box. I put the thermometer at egg level to check the temperature. I adjust the bulb or heating pad until the temperature stays steady. I always test the setup for 24 hours before adding eggs. This helps me find and fix any hot or cold spots. I keep the incubator in a room with stable air temperature. I avoid drafts and direct sunlight, which can cause temperature swings.
|
Incubator Type |
Recommended Temperature |
Humidity During Incubation |
Humidity During Hatching |
|---|---|---|---|
|
Forced-air incubator |
99.5°F (37.5°C) |
45–50% |
65–70% |
|
Still-air incubator |
101°F (38.3°C) |
45–50% |
65–70% |
I use this table as a guide for my quail eggs incubator. I check the temperature several times a day. I make small adjustments and wait for the temperature to stabilize. I avoid opening the incubator too often, since this lets heat escape and can harm the hatching process.
Tip: I always keep a backup heat source ready in case the bulb burns out or the heating pad fails. This helps me avoid sudden drops in temperature that could ruin the hatch.
Humidity
Humidity plays a big role in hatching success. I aim for 45–50% humidity during most of the incubation period. I raise it to 65–70% during the last three days, which is the correct humidity for hatching quail eggs. I use a digital hygrometer to track humidity levels inside my quail eggs incubator.
Here are some ways I manage humidity:
-
Place a shallow dish or small glass cup of water inside the incubator
-
Add damp sponges or towels to increase moisture
-
Adjust the water surface area to fine-tune humidity
-
Mist the inside lightly if humidity drops too low
-
Remove some water or use dry towels if humidity gets too high
I check the hygrometer at least twice a day. I make small changes and give the incubator time to adjust. I avoid making big changes quickly, since this can stress the eggs and lower the hatch rate.
Note: I always increase humidity during the last three days before hatching. This helps the chicks break through the shell more easily and improves your quail egg hatching success rate.
Sunlight (Optional)
Sometimes, I use sunlight as a natural heat source for my DIY quail eggs incubator. I place the incubator near a sunny window for a few hours each day. Sunlight can help warm the eggs, but I use it with caution.
-
I never leave the incubator in direct sunlight for long periods. This can cause overheating.
-
I monitor the temperature closely when using sunlight. I move the incubator if the temperature rises above 100°F.
-
I use curtains or blinds to control the amount of sunlight entering the room.
Sunlight works best as a supplement to my main heat source. I rely on the bulb or heating pad for steady warmth. I use sunlight only when I can watch the temperature and make quick adjustments.
Safety Precautions
Safety always comes first when I build and use a homemade quail eggs incubator. I follow these steps to protect the eggs, my home, and myself:
|
Safety Precaution |
Description |
|---|---|
|
Location of Incubator |
I keep the incubator away from gas heaters, drafts, and extreme temperatures. |
|
Stability |
I make sure the incubator sits on a stable surface. I use books or bolts if needed. |
|
Cord Management |
I secure all cords to prevent tripping or tangling. |
|
Fire Prevention |
I never leave heat sources unattended. I check for frayed wires or loose bulbs. |
|
Animal Protection |
I keep pets and small children away from the incubator. |
|
Backup Heating |
I keep a spare bulb or heating pad ready in case of failure. |
I always test my setup before adding eggs. I check for hot spots, loose parts, and electrical safety. I keep a fire extinguisher nearby, just in case. I never use the incubator near flammable materials.
Tip: I label the incubator and cords clearly. This helps everyone in my home know not to touch or move the setup.
Building a DIY quail eggs incubator takes patience and care. I find it rewarding to watch the eggs develop and hatch under my own setup. By keeping the correct temperature and humidity, I give the eggs the best chance to hatch. I always stay alert for safety issues and make improvements with each new batch.
How to Hatch Quail Eggs Step-by-Step
Egg Turning
I always turn my quail eggs by hand when I hatch quail eggs naturally. I mark each shell with a pencil, drawing an "X" on one side and an "O" on the other. This helps me track which eggs I have turned. I rotate the eggs 3–5 times daily, making sure each egg gets even warmth. I use clean hands and move gently to avoid damaging the shells. Turning prevents the embryo from sticking to the shell and helps it develop properly—key to any hatch quail eggs without incubator plan.
Tip: I set reminders on my phone to keep my turning schedule consistent. Missing turns can lower the hatch rate.
Monitoring
I monitor the eggs closely throughout the incubation period. I candle the eggs every 5–7 days using a small flashlight. Candling lets me check for signs of development, such as visible veins or movement inside the shell. I record the temperature and humidity in a notebook, aiming for 99.5°F and 50–70% humidity. I adjust my setup if I notice any changes. This routine supports better quail egg hatching success rate.
To improve my monitoring, I sometimes use advanced tools and techniques:
|
Tool/Technique |
Description |
|---|---|
|
Thermal Imaging |
I observe thermal behavior of eggs without opening the incubator. |
|
Deep Learning Algorithms |
I use real-time vision systems to classify thermal images and spot fertilized eggs. |
|
Isotherm Filtering |
I identify unfertilized eggs by clustering radiometric information. |
Note: If I see no signs of development during candling by Day 7, I remove those eggs to prevent contamination.
Troubleshooting
Problems can happen during natural hatching. I watch for common issues and act quickly to fix them. If I see rotten eggs, I remove them right away. Sometimes, chicks form but do not pip the shell. I check if the temperature or humidity is too high. Sticky chicks or dry shells often mean humidity needs adjusting. I keep a list of problems and solutions to help me respond fast—useful for anyone attempting natural quail egg hatching.
Here are some common problems I encounter:
-
Infertile eggs at lay
-
Rotten eggs or bad odors
-
Chicks fully formed but dead without pipping
-
Sticky chicks smeared with egg contents
-
Dry shell sticking to chicks
-
Chicks hatching too early with bloody navels
-
Weak or malformed chicks
|
Problem Type |
Description |
|---|---|
|
Trauma during shipping |
Eggs may be damaged during transport, affecting viability. |
|
Incubation/hatching temperature too high |
Excessive heat can lead to embryo death or malformation. |
|
Incubation/hatching humidity too high |
High humidity can cause sticky chicks or poor hatching rates. |
If I notice delayed hatching time, I check my temperature and humidity records. Small adjustments often solve the issue.
Learning how to hatch quail eggs naturally takes patience and attention. I find the process rewarding, especially when I see healthy chicks emerge.
Hatching Quail Eggs Tips & Challenges
Challenges
When I hatch quail eggs naturally, I face several challenges. I learned that managing temperature and humidity levels is crucial. Temperature affects moisture loss from the eggs more than humidity does. If the temperature fluctuates, I see higher mortality rates and sometimes malformed chicks. I check the temperature often and use a thermometer to keep it steady—especially important if you try to hatch quail eggs without an incubator.
Humidity also matters, but average humidity is more important than small spikes or dips. I monitor air cell growth to adjust humidity. I add water dishes or damp towels to my setup when needed. Ventilation becomes essential during the hatching stage. I open small vents to let fresh air in, which helps the chicks breathe.
Weak maternal instincts in quail hens make natural hatching harder. Most quail do not sit on their eggs long enough. I often use broody chickens instead. Environmental interference, such as drafts or predators, can disrupt the process. I protect the nest and keep it in a quiet, safe spot.
Here are some practical solutions I use:
-
I collect eggs several times a day to keep them clean.
-
I store eggs with the large end up in a cool, humid place.
-
I pre-warm eggs before starting incubation to prevent sweating.
-
I maintain ideal conditions: 99.5°F temperature and 60% humidity.
-
I turn eggs at least three times daily.
-
I candle eggs after a week to check for development.
Tip: Regular monitoring and quick adjustments help me overcome most problems when hatching quail eggs and improve overall quail egg care.
Pros & Cons
I compared natural hatching and incubator use based on my experience. Here is a summary:
|
Method |
Advantages |
Disadvantages |
|---|---|---|
|
Natural Brooding |
Low cost, uses natural instincts, less work |
Less control, variable results, not suitable for many eggs |
|
Artificial Incubation |
Precise control over conditions, can hatch many |
Higher cost, requires more management, electricity-dependent |
Natural hatching gives me a hands-on experience and saves money. I rely on nature and watch the process closely. Incubators offer better control and higher hatch rates, especially for large batches. I choose the method that fits my goals and resources.
I use two main natural methods to hatch quail eggs: the broody hen method and a DIY incubator setup. Success depends on careful control of temperature and humidity. I always turn eggs three times daily and monitor conditions closely.
-
Proper humidity and temperature help chicks develop and hatch well.
-
Small-scale hatching gives me a rewarding, hands-on experience.
|
When to Use an Incubator |
Why It Helps |
|---|---|
|
Large batches |
More reliable and higher hatch rates |
|
Poor brooding instincts |
Better control over conditions |
For advanced tips, I recommend guides on incubator setup and egg care.
FAQ
Can quail hatch their own eggs?
I have seen that most quail do not hatch their own eggs. Quail hens rarely go broody. I usually need to help by using a broody chicken or a homemade incubator. Natural hatching with quail hens happens, but it is very rare.
What’s the success rate without an incubator?
When I hatch quail eggs without an incubator, I usually see a 20–40% success rate. This is lower than with a commercial incubator. Careful temperature and humidity control can help improve the hatch rate.
How long does it take for quail eggs to hatch naturally?
Quail eggs usually hatch in 17 to 18 days when I use natural methods. This timing matches what I see with incubators. I always start counting from the day I set the eggs under the hen or in my DIY setup.
What should I do if my quail eggs are not hatching?
I check the temperature and humidity first. I candle the eggs to see if they developed. Sometimes, eggs are infertile or conditions were not right. I remove any eggs that smell bad or show no signs of life.
Can I use a chicken to hatch quail eggs?
Yes, I often use a broody chicken, like a Silkie, to hatch quail eggs. Chickens have strong maternal instincts. They keep the eggs warm and turn them. I find this method works better than relying on quail hens and is a proven way to hatch quail eggs without an incubator.


0 Comments