
You can expect hatching quail eggs to take about 17–18 days if you follow the right steps. Keep the temperature steady—99–100°F for forced-air incubators or 101–102°F for still-air models. During incubation, maintain humidity between 45–50%, then raise it to 65–70% at lockdown. Turn the eggs regularly for healthy development. Under optimal conditions, quail hatching eggs reach a hatch rate of 75–80%. If you use the wrong temperature or humidity, the hatch rate can drop to 10%. Use this hatching guide to learn how to hatch quail eggs with confidence.
Key Takeaways
- Maintain a steady temperature of 99–100°F for forced-air incubators and 101–102°F for still-air models to ensure healthy embryo development.
- Select clean, uncracked eggs with a smooth surface for better hatch rates. Avoid dirty eggs to reduce the risk of bacteria.
- Turn the eggs regularly, at least 3 to 5 times a day, to prevent the yolk from sticking to the shell and support healthy growth.
- Monitor humidity levels closely: keep it at 45–50% during incubation and raise it to 65–70% during the last three days for successful hatching.
- Set up a warm brooder around 95°F for newly hatched chicks, then reduce ~5°F each week, and provide high-protein starter feed to support their growth.
Selecting Quail Hatching Eggs
Egg Appearance and Cleanliness
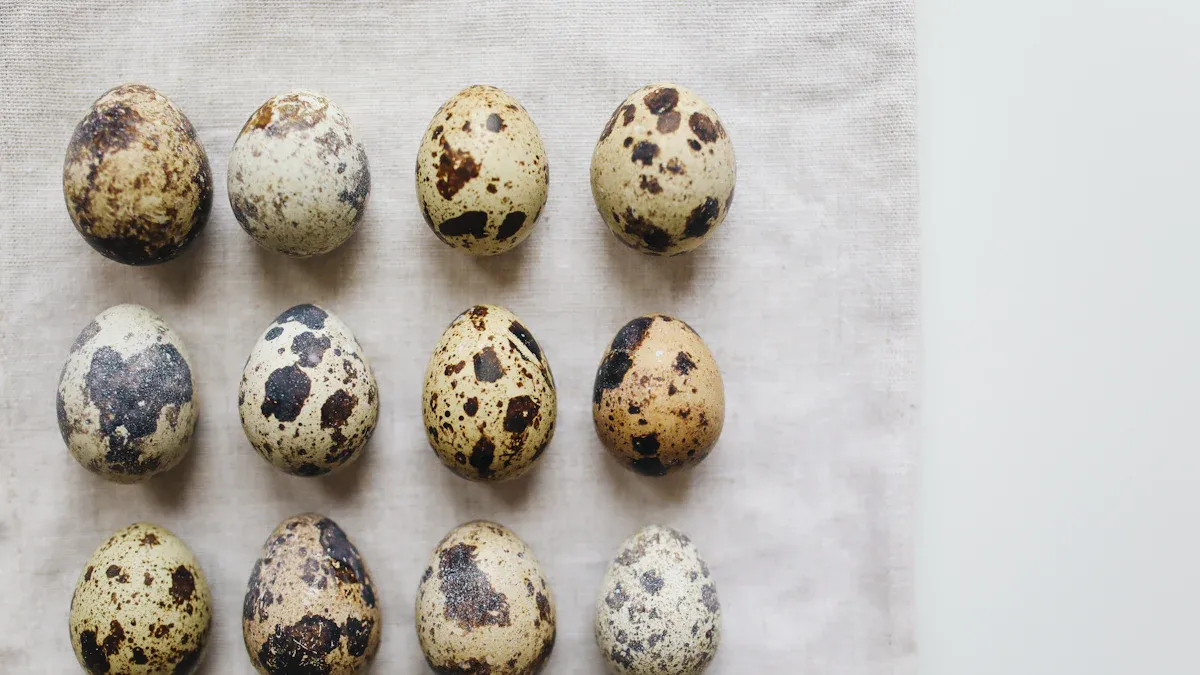
When you prepare the eggs for incubation, always check their appearance first. Choose eggs with smooth, uncracked shells and a natural, clean surface. Avoid eggs with heavy stains or visible dirt. Dirty eggs can carry bacteria that may harm the developing chicks. Studies show that some cleaning methods, like strong chemicals or ozone, can damage the embryo or lower hatch rates. For best results, select eggs that look clean from the start.
| Study | Findings |
|---|---|
| Shafey et al. | Ultrasonic wave sanitization led to abnormal embryo development. |
| Mousa-Balabel et al. | Hydrogen peroxide caused weak chicks and high omphalitis rates. |
| Wlazlo et al. | Ozone exposure increased embryo mortality. |
| Hasyim et al. | Cherry leaf extract affected shell pores and hatchability. |
| Chung et al. | Low chlorine dioxide was safe, but high levels were harmful. |
Weight and Shape Selection
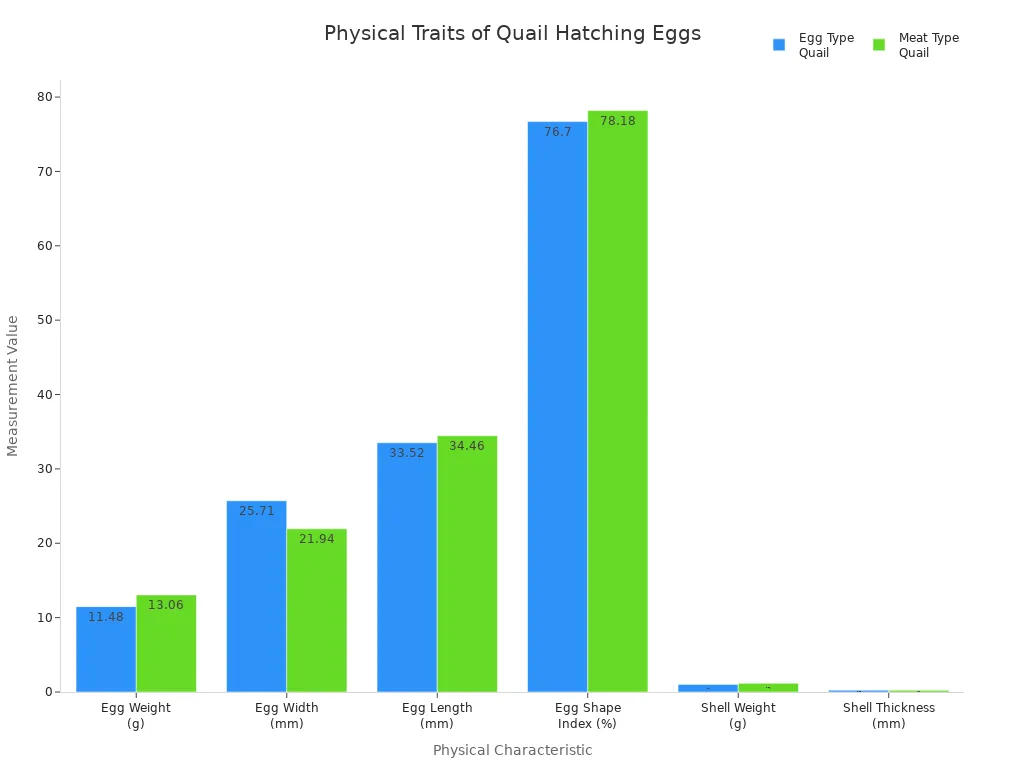
You should select medium or heavy-weight quail hatching eggs for better hatch rates. Lighter eggs often have lower hatchability. Eggs with a regular oval shape and even shell thickness support healthy embryo growth. The shell’s ability to let water and gases pass (called conductance) affects how much water the egg loses during incubation. Too much water loss can harm the chick inside. Use the table below to compare physical traits of different quail eggs.
| Characteristic | Egg Type Quail | Meat Type Quail |
|---|---|---|
| Egg Weight (g) | 11.48 | 13.06 |
| Egg Width (mm) | 25.71 | 21.94 |
| Egg Length (mm) | 33.52 | 34.46 |
| Egg Shape Index (%) | 76.70 | 78.18 |
| Shell Weight (g) | 1.02 | 1.16 |
| Shell Thickness (mm) | 0.25 | 0.23 |
Sourcing and Shipping Fertile Eggs
When collecting fertile hatching eggs or purchasing fertile hatching eggs, always check the source. Reliable farms or breeders help you get the best results. Sourcing quail eggs from trusted suppliers reduces the risk of poor hatch rates. Ask for eggs that are less than seven days old. Request expedited shipping so eggs arrive within one to three days. Avoid shipping methods that expose eggs to extreme temperatures or long trips. After arrival, let the eggs rest for 12–24 hours before incubation. Check for any signs of shipping trauma, such as moving air cells, and store eggs with the pointed end down at 12–16°C until you start incubation.
Storage Angle and Temperature for Hatching Quail Eggs
When you prepare the eggs for incubation, you need to pay close attention to how you store them. Proper storage helps keep the embryos healthy and ready for hatching. If you are collecting fertile hatching eggs from your own birds, gather them at least twice a day. This reduces the risk of damage or contamination. If you are purchasing fertile hatching eggs, check them as soon as they arrive and let them rest before incubation.
How to Store Quail Hatching Eggs:
- Place eggs with the pointed end facing down. This position keeps the air cell stable and helps the embryo develop in the right spot.
- Store eggs at a temperature between 12°C and 16°C (about 54°F to 61°F). This cool range slows embryo growth but does not harm the egg.
- Keep humidity around 70–80% to prevent the eggs from drying out.
- Tilt the eggs slightly, changing the angle once a day. This gentle movement stops the yolk from sticking to the shell and keeps the embryo healthy.
- Avoid storing eggs for more than 7 days. Fresh eggs give you the best chance for a strong hatch.
Tip: After sourcing quail eggs or receiving shipped eggs, let them rest for 12–24 hours at room temperature before you start incubation. This helps the air cell settle and improves hatchability.
You should always handle eggs gently. Sudden movements or temperature changes can harm the developing embryo. If you need to store eggs for a short time, keep them in a clean, well-ventilated area away from direct sunlight.
| Storage Step | Best Practice |
|---|---|
| Egg Position | Pointed end down |
| Temperature | 12–16°C (54–61°F) |
| Humidity | 70–80% |
| Angle Adjustment | Tilt daily |
| Storage Duration | ≤ 7 days |
By following these steps, you help ensure your quail hatching eggs stay healthy and ready for incubation.
Incubator Setup for How to Hatch Quail Eggs
Forced-Air vs Still-Air Incubators
When you prepare the incubator, you need to choose between forced-air and still-air models. Forced-air incubators use a fan to move air around the eggs. This keeps the temperature even in all parts of the incubator. You usually see better hatch rates with forced-air models. Still-air incubators do not have a fan. The temperature can change from one spot to another, which sometimes leads to lower hatch rates.
- Forced-air incubators keep the temperature steady and help more chicks hatch.
- Still-air incubators may have hot or cold spots, so you must watch the temperature closely.
- Set forced-air incubators to 99.5°F (37.5°C).
- Set still-air incubators to 101°F (38.3°C) at the top of the eggs.
If you want the best results with hatching quail eggs, many people recommend forced-air quail egg incubators.
Thermometer Placement at Egg Height
You should always measure the temperature at the same height as the eggs. Place the thermometer right next to the eggs, not near the heating element or the walls. This helps you see the real temperature that the eggs feel. If you use a still-air incubator, this step becomes even more important because the air does not move as much. A thermometer at egg height helps you avoid cold or hot spots that can harm the chicks.
Tip: Keep the incubator away from windows, direct sunlight, and drafts. A stable room helps keep the temperature steady.
Calibrating with Multiple Thermometers
You can check the accuracy of your thermometer by using two or more thermometers at the same time. Place them at egg height and compare the readings. If you see a difference, use the average or pick the thermometer you trust most. This step helps you catch mistakes before they affect your hatch. Always check your thermometers before you start a new batch of eggs.
| Step | What to Do |
|---|---|
| Place Thermometers | Put at least two at egg height |
| Compare Readings | Check for differences in temperature |
| Adjust if Needed | Use the average or the most trusted device |
By following these steps, you give your quail eggs the best chance to develop in a safe and steady environment.
Choosing the Right Incubator Location
When you prepare the incubator, you need to think carefully about where you place it. The right location helps keep the temperature and humidity steady. Quail eggs need a stable environment to develop well. If the room changes temperature often, the eggs may not hatch as expected.
Start by picking a room that stays between 65°F and 75°F. Avoid places that get too hot or too cold. Basements and laundry rooms often work well because they do not have big temperature swings. Stay away from windows, direct sunlight, and vents. Sunlight can heat the incubator too much. Drafts from doors or air conditioners can cool it down quickly.
Noise and vibration can also affect the eggs. Choose a spot where people and pets do not walk by all the time. A quiet shelf or table works better than the kitchen counter. Make sure the surface is flat and strong. The incubator should not wobble or tilt.
Humidity matters, too. Bathrooms and kitchens often have high humidity that changes fast. These rooms can make it hard to control the incubator’s settings. Pick a dry, clean room with good airflow. Do not put the incubator near walls or corners. Air needs to move around the machine for even heating.
Tip: Before you set the eggs, run the incubator for 12–24 hours in your chosen spot. Check the temperature and humidity several times. This step helps you find problems before you add the eggs.
Here is a quick checklist for choosing the best location:
- Room temperature stays steady (65–75°F)
- No direct sunlight or drafts
- Away from busy areas and noise
- Flat, stable surface
- Good airflow, not in a corner
By following these steps, you give your quail hatching eggs the best chance for a healthy start.
Incubation Settings for How to Incubate and Hatch Quail Eggs
Temperature Range and Monitoring Points
You need to keep the temperature steady when you incubate quail eggs. The right temperature helps the embryos grow at a healthy rate. For most incubators, aim for a target temperature of 100°F. Forced-air incubators work best at 99–100°F. Still-air incubators need a slightly higher setting, around 101–102°F, measured at the top of the eggs. Always place your thermometer at egg height and away from the heating element or walls. This gives you the most accurate reading.
| Temperature Range | Monitoring Frequency |
|---|---|
| 97°F to 102°F | Regularly |
| Target: 100°F |
Check the temperature several times a day. Even small changes can affect the chicks. If the temperature drops too low, the embryos develop slowly and may hatch late. If it gets too high, the chicks can grow too fast and may not be healthy. Look at the table below to see how temperature changes can impact quail embryos.
| Temperature | Effect on Metabolism | Result |
|---|---|---|
| Low | Decreased T3, increased glycogen | Heavier yolk-free body weight |
| High | Accelerated growth, glycogen depletion | Lower chick quality |
| Temperature Effect | Metabolic Rate | Development Impact |
|---|---|---|
| Low Temperature | Decreased | Prolonged hatching, heavier chicks |
| High Temperature | Increased | Lower protein retention, weaker chicks |
Tip: Use two thermometers at egg height to double-check your readings. If you see a difference, use the average or the one you trust most.
Humidity Range and Water Surface Adjustment
Humidity plays a big role in how to incubate and hatch quail eggs. You need to keep the right amount of moisture in the air so the eggs lose water at a healthy rate. For the first 14 days, keep the humidity between 45% and 50%. In the last three days, called lockdown, raise the humidity to 65–70%. This helps the chicks hatch without sticking to the shell.
- Keep humidity at 45–50% for days 1–14.
- Raise humidity to 65–70% for the last 3 days (lockdown).
- Add clean sponges or small containers of water to increase humidity.
- Mist the incubator walls lightly if you need a quick boost.
- To lower humidity, use less water and open the air vents.
If you let humidity get too high, the eggs can absorb too much moisture. This can make them swell or deform. High humidity also makes the air cell smaller, which limits oxygen for the embryo. Mold and bacteria can grow more easily, raising the risk of infection. If humidity stays too low, the chicks may stick to the shell or have trouble hatching.
Note: Quail eggs lose water faster than larger eggs. Check the air cell size or weigh the eggs to make small adjustments. Aim for about 10–13% weight loss by lockdown.
Ventilation and Airflow
Good airflow is just as important as temperature and humidity. Your incubator needs to bring in fresh air and remove carbon dioxide. As the embryos grow, they use more oxygen. Make sure the air vents stay open, especially during the last days before hatching. Follow the manufacturer's instructions for your incubator model.
Proper ventilation keeps the air fresh and helps the chicks breathe. If you close the vents too much, carbon dioxide can build up and harm the embryos. If you open them too wide, you might lose too much heat or humidity. Adjust the vents as needed to keep the balance right.
Tip: As hatching day gets closer, check the vents and make sure nothing blocks the airflow. You want plenty of oxygen for the chicks as they start to breathe on their own.
By paying close attention to temperature, humidity, and airflow, you give your quail eggs the best chance to develop into healthy chicks. These settings form the foundation for success in every step of how to incubate and hatch quail eggs.
Egg Turning Schedule and Angle
Turning quail eggs during incubation helps the embryos develop properly. You need to turn the eggs so the yolk does not stick to the shell. This movement also helps the air cell grow at the right pace. If you skip turning, the chicks may not hatch or could have deformities.
You can use either an automatic or manual method for turning. Automatic incubators make the process easier. These machines turn the eggs every 1 to 2 hours, shifting each egg about 45 degrees to each side. This means the eggs move through a total angle of about 90 degrees. Automatic turning keeps the process consistent, even if you are busy.
Manual turning works well if you do not have an automatic incubator. You should turn each egg at least 3 to 5 times a day. Try to space out the turns evenly during the day. Use clean hands or wear gloves to avoid spreading germs. Mark one side of each egg with a pencil so you can track which side faces up. Always turn the eggs gently to avoid damaging the embryo.
Tip: Place a small mark, like an "X" on one side and an "O" on the other. This helps you remember which side you turned last.
| Turning Method | Frequency | Angle per Turn | Total Angle | Notes |
|---|---|---|---|---|
| Automatic | Every 1–2 hours | ~45°/side | ~90° | Consistent, less labor |
| Manual | 3–5 times per day | ~45°/side | ~90° | Even spacing, gentle handling |
You should stop turning the eggs on day 14. This stage is called "lockdown." The chicks start to position themselves for hatching. If you keep turning after day 14, you might disturb the chicks and lower your hatch rate. At lockdown, raise the humidity and avoid opening the incubator unless necessary.
Turning eggs at the right schedule and angle is a key part of how to incubate and hatch quail eggs. Careful turning supports healthy development and improves your chances of a successful hatch.
📝 Note: Always record your turning schedule in your incubation log. Write down the date, time, and any changes you make. Good records help you learn and improve with each batch.
Candling & Monitoring Hatching Quail Eggs
Day 7 and Day 14 Candling Techniques
You can use candling to check the progress of your quail hatching eggs. On day 7, you may find it hard to see clear images of the embryo. The shell often blocks your view, but you can still spot a dark spot or some veins if the egg is fertile. By day 14, the embryo has grown much larger. You will notice more development and a bigger dark area inside the egg. Try to candle in a dark room and use a bright LED light. Hold the egg gently and avoid shaking it. Limit candling to these two key days to reduce the risk of harming the embryo.
| Day | Description of Development |
|---|---|
| 7 | More difficult to see clear images of embryo development. |
| 14 | Increased development visible compared to day 7. |
Tip: After day 14, avoid opening the incubator. Chicks need stable humidity and temperature for the final stage.
Adjusting Humidity by Air Cell Size or Weight Loss
You can use air cell growth or weight loss to fine-tune humidity during incubation. As the egg loses moisture, the air sac inside gets bigger. If humidity stays high, evaporation slows down and the air cell remains small. Low humidity speeds up evaporation and makes the air cell grow faster. You want the egg to lose about 10–13% of its weight by lockdown. Too little moisture loss can trap chicks inside the shell. Too much can lead to weak or mushy chicks.
- The size of the air sac increases as the egg loses weight during incubation, indicating moisture loss.
- High humidity slows down evaporation and weight loss, while low humidity accelerates it.
- Correct weight loss is crucial for successful hatching; too low humidity can prevent chicks from hatching, while too high humidity can cause issues like mushy chicks.
Note: Quail eggs evaporate faster than larger eggs. Adjust humidity based on air cell growth or weight loss, not just a fixed number.
Record-Keeping for Incubation Progress
You should keep detailed records for each batch of eggs. Good record-keeping helps you spot patterns and improve your results. Use a printable incubator card or a notebook. Write down the date, temperature, humidity, turning schedule, and any changes you make. Some tools offer automated date tracking and reminders for hatching and turner removal. You can also track each egg’s breed and origin, especially if you are sourcing quail eggs from different places. Weigh eggs before and during incubation to monitor moisture loss.
| Feature | Description |
|---|---|
| Automated Date Tracking | Generates dates for hatching and turner removal with one button! |
| Daily Tracking | Tracks each day's hatch, including survivors and non-survivors. |
| Printable Incubator Cards | Summarizes dates, temperatures, and humidity for easy reference. |
| Individual Egg Tracking | Records each egg's details, including breed and origin. |
| Automated Reminders | Sends reminders for hatching and turner removal dates. |
| Egg Weighing | Tracks egg weight and calculates humidity automatically. |
Tip: Review your records after each hatch. You will learn what works best for your setup.
Lockdown & Hatching Quail Hatching Eggs
Stopping Egg Turning at Lockdown
On day 14 of incubation, you need to stop turning your hatching quail eggs. The chicks begin to position themselves for hatching. If you keep turning the eggs, you might disturb this process. Automatic turners should be switched off or removed. For manual turning, simply leave the eggs in place. This step helps the chicks settle and get ready to break out of their shells.
Tip: Mark your calendar or incubation log for day 14. This reminder helps you avoid missing the lockdown stage.
Raising Humidity and Reducing Lid Openings
During lockdown, you must raise the humidity in your incubator. Aim for 65–70% relative humidity. This higher moisture level keeps the chicks from sticking to the shell as they hatch. Add extra water trays or sponges to boost humidity. Check the air cell size or egg weight loss to fine-tune the level. Try not to open the incubator lid during this time. Each time you open the lid, you lose heat and humidity. This can make hatching harder for the chicks.
- Keep humidity around 65–70% during lockdown.
- Avoid opening the lid unless you see a problem.
- Watch for condensation on the incubator window as a sign of high humidity.
🛑 Alert: Too many lid openings can cause sticky chicks or slow hatching.
Setting Up Non-Slip Liner
Before the hatch window begins, place a non-slip liner on the incubator floor. This liner gives the chicks a safe surface to walk on after they hatch. It helps prevent leg injuries and keeps the chicks from sliding. Use a clean, absorbent material like paper towel or a special hatching mat. Change the liner between batches to keep the area sanitary.
The hatch window for Coturnix quail eggs usually falls between 16 and 20 days. Most chicks hatch around day 18, but timing can change if your incubator runs a bit hot or cool, or if humidity shifts.
- Hatch window: 16–20 days
- Average hatch: 18 days
- Timing depends on incubator quality and settings
By following these steps, you help your quail hatching eggs hatch safely and smoothly.
Typical Hatch Window and Timing
When you reach the final days of incubation, you enter the hatch window. For most people hatching quail eggs, this window usually falls between day 16 and day 20. Most Coturnix quail chicks start to pip and hatch around day 17 or 18. Some may arrive a little earlier or later, depending on your incubator’s temperature and humidity.
You can use this simple timeline as a guide:
- Day 16: Some early chicks may start to pip. This means you might hear faint peeping or see tiny cracks in the shell.
- Day 17–18: Most chicks will hatch during this time. You will notice more activity and more eggs starting to crack open.
- Day 19–20: A few late hatchers may still emerge. If you see no progress by the end of day 20, check your records and review your incubation settings.
Tip: Do not rush to help chicks out of their shells. Hatching can take several hours. Chicks need time to absorb the yolk and gain strength before leaving the egg.
Several factors can affect the timing:
- Temperature: Higher temperatures may cause chicks to hatch early. Lower temperatures can delay hatching.
- Humidity: If humidity is too high or too low, chicks may struggle to hatch or become stuck.
- Egg size and freshness: Older or smaller eggs may hatch at different times.
Keep the incubator closed as much as possible during the hatch window. This helps maintain the right humidity and temperature. Only open the lid if you see a problem that needs attention.
By watching closely and keeping good records, you will learn what timing works best for your setup.
Troubleshooting How to Hatch Quail Eggs
Early or Late Hatching Issues
You may notice that your quail hatching eggs sometimes hatch too early or too late. This often points to problems with temperature or humidity during incubation. If the temperature drops or fluctuates, embryos may develop slowly and hatch later than expected. High temperatures can cause chicks to hatch early, but they may be weak. Humidity also plays a big role. You should keep humidity around 65–70% during the final days to support proper hatching.
- Temperature dips can delay hatching.
- High temperatures may cause early hatching.
- Humidity below target can make hatching difficult.
Check your thermometer at egg height and away from the heating source. Review your records for any changes in temperature or humidity. Stable settings help you avoid these timing issues.
Air Cell Size Problems
The air cell inside each egg tells you how much water the egg has lost. You can check air cell growth during candling, especially on day 7 and day 14. If you see a small air sac, your humidity is likely too high. The egg has not lost enough moisture. If the air sac looks too large, humidity is too low and the egg has lost too much water.
- Small air sac: Humidity too high, not enough moisture loss.
- Large air sac: Humidity too low, too much moisture loss.
- Air cell growth quail eggs should show steady increase by lockdown.
Adjust humidity based on air cell size, not just a fixed number. Quail eggs evaporate faster than chicken eggs, so small changes matter. Aim for about 10–13% weight loss by lockdown for best results.
Sticky Chicks and Embryo Deaths
Sticky chicks and embryo deaths can happen if humidity is not right during incubation or lockdown. High humidity can cause sticky embryos because the eggs do not lose enough water. Low humidity, especially during hatching, can make chicks stick to the shell and struggle to hatch.
- High average humidity leads to sticky embryos.
- Low humidity during hatching causes chicks to stick to the shell.
- Adjust humidity by watching air cell size.
Other factors also affect hatchability and chick health. The table below shows some key points:
| Factor | Impact on Hatching Outcomes |
|---|---|
| Egg storage time | Longer storage increases early embryo deaths and lowers hatch rate. |
| Breeder flock age | Older flocks may have more chick deaths and lower hatchability. |
| Hatcher and setter type | Different machines affect chick survival in the first week. |
You can improve your hatch by keeping good records, checking air cell growth, and adjusting humidity as needed. Careful monitoring helps you spot problems early and gives your quail chicks the best start.
Adjusting Temperature, Humidity, and Ventilation
You play a key role in keeping your quail hatching eggs safe and healthy. If you notice problems like early or late hatching, sticky chicks, or odd air cell growth, you should check your temperature, humidity, and ventilation settings right away.
Temperature Adjustments
- Always measure temperature at egg height, away from the heating element and walls.
- For forced-air incubators, set the temperature between 99–100°F.
- For still-air incubators, use 101–102°F.
- If chicks hatch early, your incubator may run too hot. Lower the setting by half a degree and monitor closely.
- If chicks hatch late, raise the temperature slightly, but never above the safe range.
Humidity Adjustments
- Keep humidity at 45–50% during most of the incubation period.
- Raise humidity to 65–70% during lockdown. This is called quail lockdown humidity.
- Watch air cell growth quail eggs by candling on day 7 and day 14. If the air cell is too small, lower humidity. If it is too large, add more water.
- Quail eggs lose water faster than chicken eggs. Aim for 10–13% weight loss by lockdown.
Ventilation Tips
- Open air vents more as you get closer to hatch day. Chicks need more oxygen in the final days.
- Avoid blocking vents with liners or extra trays.
- If you see condensation or smell musty air, increase airflow.
Tip: Use a simple table to track your adjustments. Write down the date, temperature, humidity, air cell size, and any changes you make. This helps you spot trends and improve your quail incubation day by day.
| Date | Temp (°F) | Humidity (%) | Air Cell Size | Vent Adjustments | Notes |
|---|---|---|---|---|---|
If you want more details on quail hatching eggs selection or how to set up your quail brooder, check out our incubation chart reference and brooder setup guide. Careful monitoring and small changes can make a big difference in your hatch results.
Brooder Setup & First 48h After Hatching Quail Eggs
Creating Warmth Zones and Choosing Bedding
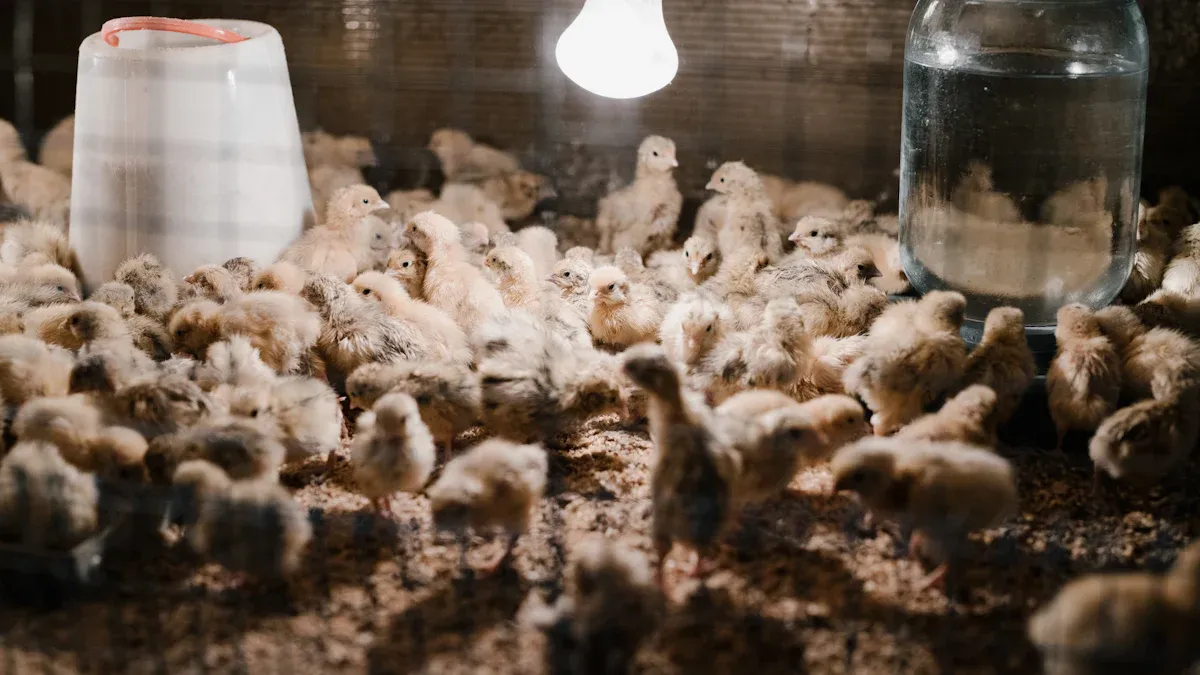
You need to set up a warm and safe space for your quail chicks as soon as they hatch. The brooder should have a warm zone around 95°F (about 35°C) in the first 48 hours. Place a heat lamp or brooder plate in one area so chicks can move closer or farther away as they need. This helps them find their comfort zone and avoid chilling or overheating.
Choosing the right bedding is important for quail brooder setup. Some materials work better than others for safety and cleanliness. Check the table below to compare common bedding options:
| Bedding Material | Safety Concerns | Effectiveness |
|---|---|---|
| Big Flake Shavings | Low risk of ingestion; safe for chicks. | Easy to clean and maintain; keeps the brooder clean. |
| Small Flake Shavings | Higher risk of ingestion; can cause choking or digestive obstructions. | Less effective due to potential health risks. |
| Sawdust | Similar risks as small flake shavings; can be ingested. | Not recommended due to health concerns. |
| Newspaper | Not very absorbent; potential ink toxicity. | Can be used in a pinch but not ideal for long-term use. |
| Paper Towels | Not very absorbent for odors; can smell quickly. | Better than newspaper but still not the best option. |
| Sand | Small particles can be ingested; potential for bacteria and chemicals. | Easy to clean but not effective for odor control. |
| Hay | Can contain bugs and seeds; less absorbent than straw. | Requires frequent cleaning; not ideal for odor control. |
| Straw | More absorbent than hay; less likely to contain harmful seeds. | Good substitute for shavings but still requires regular cleaning. |
Big flake shavings or straw work best for most quail chicks. Always keep the bedding dry and clean.
Starter Feed and Water for Chicks
You should give your chicks a high-protein starter feed right after they dry off. Avoid chicken starter feed because it does not have enough protein for quail chicks. Turkey starter feed usually works better since it contains 28–30% protein, which matches the needs of newly hatched quail. Chicks need this higher protein level from hatching up to 6 weeks old. After 6 weeks, you can switch to a feed with 20–25% protein.
| Age of Quail Chicks | Recommended Protein Level |
|---|---|
| Newly hatched to 6 weeks | 30% protein |
| After 6 weeks | 20–25% protein |
Always provide clean, fresh water. Use shallow dishes or special chick waterers to prevent drowning.
🐣 Tip: Place marbles or small stones in the water dish to keep chicks safe.
Monitoring for Crowding, Chilling, or Overheating
You need to watch your chicks closely during the first 48 hours. Chilling or overheating can cause poor growth and make chicks sick. Keep the brooder at 95°F for the first week, then lower the temperature by 5°F each week until you reach room temperature. If chicks huddle under the heat source, they feel cold. If they spread out far from the heat, they feel too hot.
- Chicks can get stressed with even a 1°F change in body temperature.
- Keep at least 1 square foot of space for every 10 chicks.
- Use more than one feeder and waterer so all chicks can eat and drink.
Watch for signs of stress. Adjust the heat source and space as needed to keep your chicks healthy and active.
Keep Learning About How to Incubate and Hatch Quail Eggs
Incubation Chart Reference
You can boost your success with quail hatching eggs by using a clear incubation chart. This chart helps you track each step, from egg selection to brooding. You see at a glance when to adjust temperature, humidity, and when to candle or stop turning. Many experienced breeders use a chart to spot trends and improve their hatch rates over time.
Here is a sample chart you can follow:
| Day | Temperature (°F) | Humidity (%) | Action |
|---|---|---|---|
| 1 | 99–100 | 45–50 | Start incubation |
| 7 | 99–100 | 45–50 | Candle eggs |
| 14 | 99–100 | 45–50 | Candle, stop turning |
| 15+ | 99–100 | 65–70 | Lockdown, no turning |
| 17–18 | 99–100 | 65–70 | Hatch window |
Tip: Always pre-warm eggs before incubation and handle them gently. This helps you avoid damage and supports healthy development.
Candling Fertile Eggs Guide
Candling lets you check the progress of your quail eggs without opening the incubator too often. On day 7, look for veins or a dark spot. By day 14, you should see a larger dark area and a growing air cell. Use a bright LED light in a dark room for best results. Try to candle only on these days to keep the environment stable.
- Day 7: Look for signs of life, like veins or movement.
- Day 14: Check air cell growth and embryo size.
- After day 14: Avoid opening the incubator to protect humidity and temperature.
You can learn more about quail egg candling day 7 and air cell growth quail in our candling guide.
Egg Incubator Product and Tutorial Page
You can improve your hatch rates by choosing the right incubator and learning how to use it well. Modern incubators offer features like automatic turning and precise humidity control. Some even use advanced technology, such as thermal cameras, to monitor eggs in real time. These tools help you spot problems early and adjust your process.
If you want step-by-step help, visit our egg incubator product and tutorial page. You will find setup tips, troubleshooting advice, and videos that show each stage of quail incubation day by day. With the right knowledge and tools, you can refine your technique and enjoy better results with every batch.
Keep learning and experimenting. Small changes in your process can make a big difference in hatch rates and chick health. 🐣
You can achieve healthy chicks by following each step, from selecting clean, well-shaped quail hatching eggs to setting up a warm brooder. Careful monitoring and good records help you spot changes early. Patience matters because small adjustments in temperature or humidity often make a big difference. Keep learning and try new methods as you gain experience. Every batch gives you a chance to improve your hatch rates and care for your birds.
FAQ
How long does it take for quail hatching eggs to hatch?
You can expect quail hatching eggs to hatch in about 17 to 18 days. The exact time depends on your incubator’s temperature and humidity settings. Always monitor your eggs daily for the best results.
When should you candle quail eggs during incubation?
You should candle your eggs on day 7 and again on day 14. Look for signs of development, such as veins or a growing air cell. Try not to open the incubator after day 14 to keep conditions stable.
What is the best humidity level during lockdown?
During lockdown, keep humidity around 65–70%. This higher humidity helps chicks hatch smoothly and prevents them from sticking to the shell. Use the air cell size or weight loss to fine-tune your settings.
How do you set up a brooder for new quail chicks?
Set up a warm zone around 95°F with a heat lamp or brooder plate. Use safe bedding like big flake shavings or straw. Make sure chicks have clean water and high-protein starter feed. Watch for signs of crowding or chilling.


0 Comments