
Wondering how long for chicken to hatch? You can expect chicken eggs to hatch in 21 days if you follow the right steps. Each stage brings its own signs and care routines, so you’ll need to watch for changes. Most chicken eggs hatch well with stable temperature, humidity, and regular turning. Check out these quick tips for hatching chicken eggs:
-
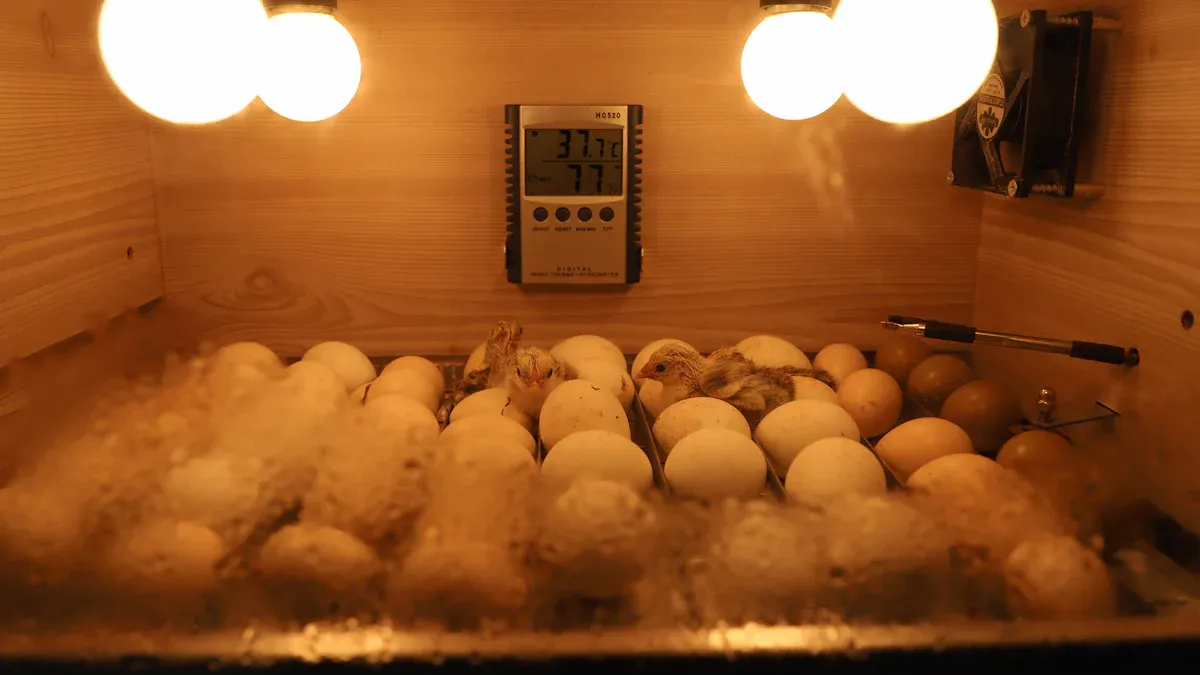
Set forced-air incubators to 99.5°F; still-air to 100–101°F (egg top)
-
Keep humidity at 45–55% RH during days 1–18 (target 11–13% total weight loss), then 65–75% RH at lockdown
-
Turn eggs 4–6 times/day at a ~45° angle; stop at day 18 (auto-turn every 60–90 minutes)
-
Candle eggs on day 7 and day 14
-
Most chicks finish within 24–48 hours after the first external pip; wait ~24 h before assisting
-
Move chicks to the brooder 4–8 hours after hatching
Typical home setups often reach 50–75% hatch with disciplined handling and verified settings. Many eggs don’t hatch because of temperature swings, humidity mismatch, or improper turning. You can avoid most mistakes by following these steps and using beginner guides from trusted poultry references.
Table: Common reasons eggs fail to hatch
|
Reason for Failure |
Description |
|---|---|
|
Infertility |
Major portion of hatch loss; influenced by feed, mating, flock age |
|
Embryonic Death |
Early loss from poor storage or temperature shocks |
|
Environmental Conditions |
Mid/late loss from wrong humidity, ventilation, or embryo malposition |
You can hatch chicken eggs successfully. Just stay patient, keep conditions steady, and trust the process.
Key Takeaways
In short: set 99.5°F (forced-air) or 100–101°F at egg-top (still-air), hold 45–55% RH to day 18 targeting 11–13% total weight loss, then 65–75% RH at lockdown; wait ~24–36 h after the first external pip and stop at any fresh blood or visible yolk.
-
Chicken eggs typically hatch in 21 days. Maintain stable temperature and humidity for best results.
-
Hold humidity at 45–55% RH during days 1–18 (aim for 11–13% total weight loss), then 65–75% RH at lockdown.
-
Turn eggs 4–6 times a day (or auto-turn every 60–90 min) until day 18. This helps embryos develop properly and prevents sticking.
-
Candle eggs on days 7 and 14 to check development. Remove non-developers safely after re-checking.
-
After hatching, let chicks stay in the incubator for 4–8 hours to dry before moving them to a brooder.


How Long for Chicken to Hatch
21-Day Guide Overview
If you’re asking how long for chicken to hatch, the answer is almost always 21 days. This is the gold standard for hatching chicken eggs, whether you use an incubator or a broody hen. Most eggs will hatch right on time, but you might see a few chicks arrive a day early or late. The 21-day guide is your best friend for a smooth hatch.
Here’s a quick look at what careful practice says about the hatching process:
|
Evidence |
Description |
|---|---|
|
Hatching Time |
Chicken eggs hatch after about 21 days of incubation, with a common window of 24–48 hours from first to last hatch. |
|
Factors Influencing Hatch |
Egg age, breed, size, and incubation practices can shift timing. |
|
Temperature Impact |
Steady targets are critical; even small swings can affect outcomes. |
You’ll find that the chicken embryo usually needs 21 days (504 hours) to finish developing. Sometimes, eggs from younger hens or those stored longer than five days might take a bit more time. If you keep your temperature and humidity steady, you’ll get the best results.
🐣 Beginner’s Rhyme:
Stable temp and humidity—turn till 18—lockdown, raise humidity—don’t open—don’t help if you see blood.
Key Stages by Week
Let’s break down the 21-day guide into weekly milestones so you know exactly what to expect. This egg hatching tutorial will help you spot the signs and avoid surprises.
Week 1 (Days 1–7):
You start by setting your eggs in the incubator. The embryo forms quickly. By day 3, the heart beats and blood vessels spread. By day 7, you’ll see the comb begin to grow and the egg tooth start to appear.
Week 2 (Days 8–14):
The chick looks more like a bird. Feathers and scales show up. By day 14, the embryo turns its head toward the large end of the egg. This is a key sign that things are on track.
Week 3 (Days 15–18):
The chick grows fast. Feathers cover the body. By day 18, the embryo’s head tucks under its right wing. The yolk sac is still outside the body, but almost ready to be absorbed. Now, you stop turning the eggs and raise the humidity. This is called “lockdown.”
Here’s a handy table for the main milestones:
|
Day |
What’s Happening? |
|---|---|
|
1 |
Embryonic tissue appears |
|
3 |
Heart beats, blood vessels visible |
|
7 |
Comb and egg tooth begin to form |
|
10 |
Egg tooth is prominent, toe nails visible |
|
14 |
Head turns toward large end |
|
16 |
Feathers cover the body |
|
18 |
Growth nearly complete, head under right wing |
|
19 |
Yolk sac draws into body |
|
20 |
Chick breathes air, internal and external pip |
|
21 |
Chick hatches |
Tip:
From day 18, don’t open the incubator. Chicks need steady humidity to hatch safely.
Signs of Hatching
You’ll notice several clear signs when your eggs are about to hatch. This part of the egg hatching tutorial is exciting, but patience is key.
-
Internal Pip (Day 20): The chick breaks into the air cell inside the egg. You might hear tiny peeps.
-
External Pip: The chick cracks the shell from the inside. This is the first hole you’ll see.
-
Zipping: The chick rotates inside the egg, making a line of cracks.
-
Hatching (Day 21): The chick pushes out of the shell. This can take 24–48 hours from the first external pip; wait ~24 h before considering assistance.
Here’s a table of the most reliable hatching signs:
|
Indicator |
Description |
|---|---|
|
Egg Tooth |
The chick uses this to break the shell. |
|
Yolk Absorption |
The yolk disappears into the chick’s body just before hatching. |
|
Embryo Position |
Head under right wing, ready to hatch. |
Don’t worry if some chicks take longer. How long for chicken to hatch can vary with temperature, egg age, and the health of the mother hen. Lower temperatures slow things down, while higher ones speed them up. Most chicks hatch within 24–48 hours of each other, but a few may need extra time.
Note:
If you see blood during hatching, don’t help the chick. It’s not ready yet.
You now have a clear, actionable 21-day guide for hatching chicken eggs. Stick to the basics: stable temperature, steady humidity, and careful turning until day 18. Lockdown, then wait. Trust the process, and you’ll see fluffy chicks in no time.
Chicken Hatching Timeline & Incubator Setup
Incubator Types
When you start your chicken hatching timeline, you need to pick the right incubator. You’ll find two main types: forced-air and still-air. Forced-air incubators use a fan to circulate air, which helps keep temperature and humidity even. This type usually gives you a higher hatch rate for fertilized eggs. Still-air incubators don’t have a fan. They rely on natural air movement, so you must measure the temperature at the top of the eggs. Forced-air models work best at 99.5°F (37.5°C), while still-air incubators need 100–101°F (37.8–38.3°C) at egg top height. Forced-air incubators make it easier to prepare for hatching because they keep conditions steady. Still-air incubators may need more careful monitoring to get the best results with your fertile hatching eggs.
Tip: Forced-air incubators usually give you more reliable hatching results than still-air models.
Temperature and Humidity
Keeping the right temperature and humidity is key for hatching healthy chicks. For the first 18 days, hold your incubator at 45–55% RH (use total weight loss to guide). On day 18, raise and maintain 65–75% RH to help chicks hatch. Use the table below to check the recommended ranges:
|
Parameter |
Recommended Range |
|---|---|
|
Incubation Temperature |
37.5–37.6°C |
|
Relative Humidity |
45–55% (days 1–18) |
|
Increased Humidity |
65–75% (last 3 days / lockdown) |
You want your fertilized eggs to lose about 11–13% of their weight by day 18. This helps the air cell grow so chicks can breathe before hatching. If humidity drops too low, eggs lose too much water and chicks may get stuck. If it’s too high, chicks can drown. Always check the air cell size and weigh your eggs if you want to fine-tune humidity. Increase vent opening gradually through lockdown (e.g., open ~30% → 60% in steps) while holding 65–75% RH; avoid sudden drafts that crash humidity.
Turning Eggs
Turning eggs is a big part of how to incubate eggs. You need to turn your eggs 4–6 times a day at a ~45° angle (or auto-turn every 60–90 minutes). This keeps the embryo from sticking to the shell and helps nutrients move around. If you don’t turn fertilized eggs enough, the embryo can stick to the membrane or not develop right. The chart below shows how turning frequency affects hatch rates:
You should stop turning eggs on day 18. This is when you prepare for hatching and let chicks get into position. Turning at a ~45° angle works best for the chicken hatching timeline. Lower angles can cause more chicks to be in the wrong position. If you skip turning, your eggs may not hatch at all.
Remember: Turn eggs until day 18, then stop and raise humidity for the final hatching stage.
Candling and Monitoring Progress
Candling Days 7 and 14
Candling your eggs is like shining a flashlight into a secret world. You should candle on day 7 and day 14. This helps you check if your eggs are developing as they should. Always wash your hands before handling eggs, and work quickly to keep temperature and humidity steady. Place the eggs large end up or slightly tilted.
Here’s what you’ll see when you candle:
|
Day |
Description of Viable Egg |
Description of Non-Viable Egg |
|---|---|---|
|
7 |
Embryo visible with spider-like veins. |
Clear egg with floating yolk. |
|
14 |
Embryo fills most of the shell. |
Hard to see inside; veins under chick. |
Look for these signs of healthy development:
-
The embryo appears as a large black dot.
-
Blood vessels spread out from the embryo.
-
The air cell at the bottom grows larger.
-
The top of the egg looks opaque, showing the chick.
Turning your eggs 4–6 times daily at about ~45° helps the embryo grow evenly. Stop turning on day 18.
Removing Non-Developers
Not every egg will make it to hatching. On candling days, remove any eggs that look clear or show no signs of growth. Always handle eggs gently and avoid shaking them. If you find non-developing eggs, take them out right away. This keeps your hatching rate high and prevents bad eggs from affecting the others. Before you remove any eggs, candle them one last time to be sure. At late stages, confirm no internal pip and no vessel activity before discarding.
Tip: Remove eggs that have not hatched by day 24. They are unlikely to develop further.
Air Cell and Weight Loss
The air cell inside each egg is your best clue about humidity. By day 14, the air cell should be growing. If it’s too small, your humidity may be too high. If it’s too big, humidity may be too low. Eggs lose moisture through their shells, which causes weight loss. For the best hatching results, your eggs should lose 11–13% of their weight by day 18. Weigh your eggs at the start and check again at candling. Adjust humidity if you see too much or too little weight loss.
-
Continuous weight loss helps the chick breathe during hatching.
-
If weight loss is less than 10%, hatchability drops.
-
Adjust humidity to keep air cell growth on track.
Candling and monitoring your eggs gives you the best chance for a successful hatching. Stay patient, keep your tools clean, and trust the process.
Hatching Window and Aftercare
Lockdown at Day 18
You’ve reached day 18—this is the critical step in hatching. Now, you need to start lockdown. Here’s what you do:
-
Candle your eggs one last time to check for late quitters.
-
Stop turning the eggs. Chicks need to settle into the right position for hatching.
-
Raise humidity to 65–75% RH. This keeps the membranes soft so chicks can break through.
-
Chick-proof any water sources inside the incubator.
-
Close the lid and don’t open it until hatching is done.
Keep the temperature steady at 99.5°F for forced-air incubators. Adjust ventilation so chicks get enough oxygen, but avoid cold drafts. Proper humidity prevents too much water loss and supports healthy hatchlings.
Tip: Once you start lockdown, patience is your best friend. Don’t peek!
Pipping and Zipping
The hatching window starts around day 20. First, you’ll hear peeping and see a small crack—this is pipping. Chicks can rest at external pip for up to ~24 hours, and most complete the hatch within 24–48 hours of the first external pip. Zipping comes next. The chick makes a line of cracks around the shell. This usually takes about an hour to start and can finish in ~20–60 minutes.
You might feel tempted to help, but opening the incubator can harm all your hatchlings. Only consider assistance after ~24 h with no progress at external pip and no active blood vessels. If you spot blood vessels or unabsorbed yolk, stop all help and keep the chick warm and humid.
Remember: “Don’t help if you see blood.” Let nature do its job.
After Hatching Care
Once your chicks hatch, leave them in the incubator until they dry and fluff up. This usually takes 4–8 hours. Move your baby chicks to a brooder with the right setup:
-
Keep the brooder at 95–98°F for the first week. Lower the temperature by 5°F each week.
-
Use safe flooring like wood chips or wire to protect their feet.
-
Give chicks water right away. Add a little sugar for energy if you want.
-
Feed a chick starter with about 20% protein for the first 6–8 weeks.
-
Clean the brooder daily and keep it dry.
-
Make sure there’s good ventilation but no drafts.
With these steps, you’ll give your hatchlings the best start. Hatchling care is simple if you stay patient and follow the basics. Soon, you’ll have healthy, happy baby chicks running around.
You’ve made it through the full 21-day journey! Chicken eggs need steady care, from turning and candling to the final hatching day. Keep temperature and humidity stable for the best hatch rates. Here’s a quick table of what to remember:
|
Key Takeaway |
Description |
|---|---|
|
Hatching Day |
Eggs usually hatch on day 21. |
|
Humidity Levels |
45–55% RH (days 1–18); 65–75% RH at lockdown. |
|
Leave in Incubator |
Let chicks stay in the incubator for 4–8 hours after hatch. |
|
Avoid Interference |
Don’t help chicks out of their eggs unless no progress for ~24 h and no active blood vessels. |
After chicks hatch, move them to a brooder at 95°F (35°C), lowering by 5°F each week. Give them warm water in shallow dishes and start feed soon after. For the best results, follow these quick tips:
-
Choose fresh eggs from a trusted source.
-
Use a reliable incubator for hatching.
-
Keep everything clean.
-
Turn eggs often.
-
Monitor progress and trust the process.
Stay patient and watch for signs at each stage. You’ll soon see healthy chicks hatch and thrive!
FAQ
How long does it take for chicken eggs to hatch?
You can expect most chicken eggs to hatch in 21 days. Some may hatch a day early or late. Keep your temperature and humidity steady for the best results.
What should I do if my chicks are not hatching on day 21?
Don’t panic! Many finish within 24–48 h after the first external pip. Re-candle to confirm progress and vessel status. Evaluate non-hatchers around day 24 only after checks.
Can I open the incubator during hatching?
No, you should not open the incubator after day 18. Opening it can lower humidity and harm the chicks. Wait until all chicks have hatched and dried.
How often should I turn the eggs?
Turn your eggs 4–6 times a day at a ~45° angle (or auto-turn every 60–90 minutes). Stop turning on day 18. This helps the embryos develop properly and prevents sticking.
What if I see blood during hatching?
If you see fresh blood or visible yolk, do not help the chick. Raise humidity and wait. The chick is not ready to hatch.


0 Comments