
Goal: Keep your parrot chick warm enough to digest and grow, but not so warm that it dehydrates or pants. Use a warm zone and a cool zone, place probes at chick height, and adjust based on behavior plus daily weight trend.
Last updated: December 29, 2025
Conclusion: Start warm, then step down slowly as feathers and weight gain improve.
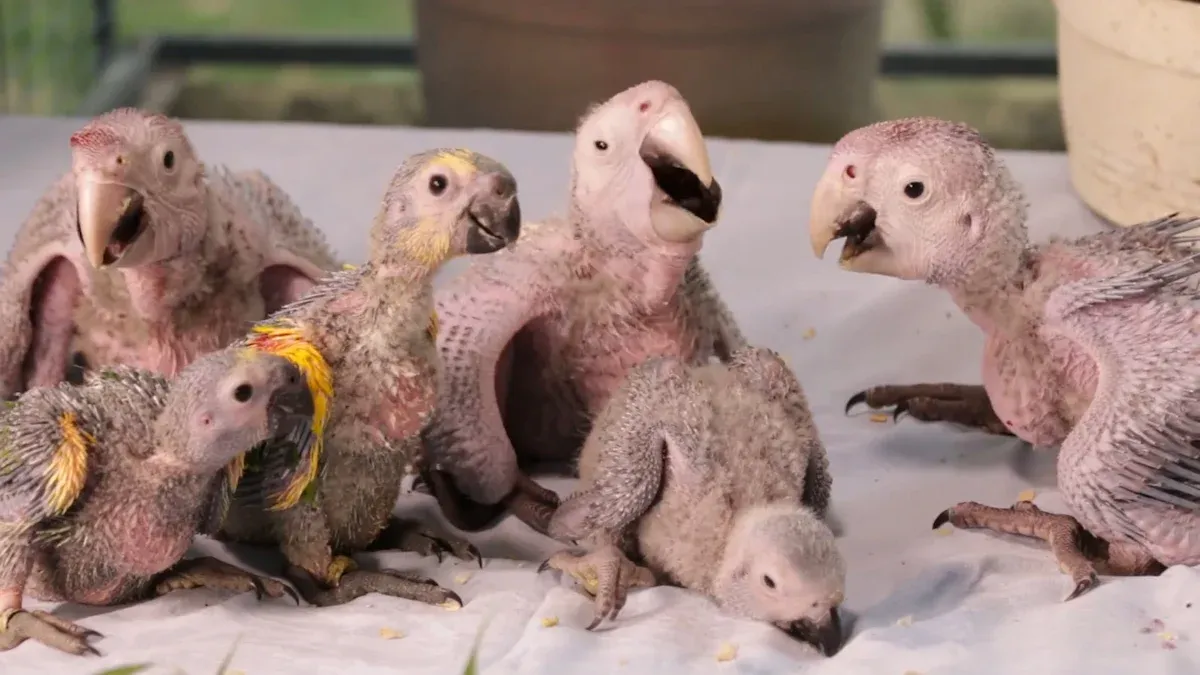
- Hatch to Day 2–3: usually 96–98°F with 55–65% RH for fully naked chicks.
- Week 1–4: reduce in small steps and keep a gradient so the chick can choose comfort.
- Feathered: move toward 80–82°F, then to room temperature once fully feathered and gaining steadily.
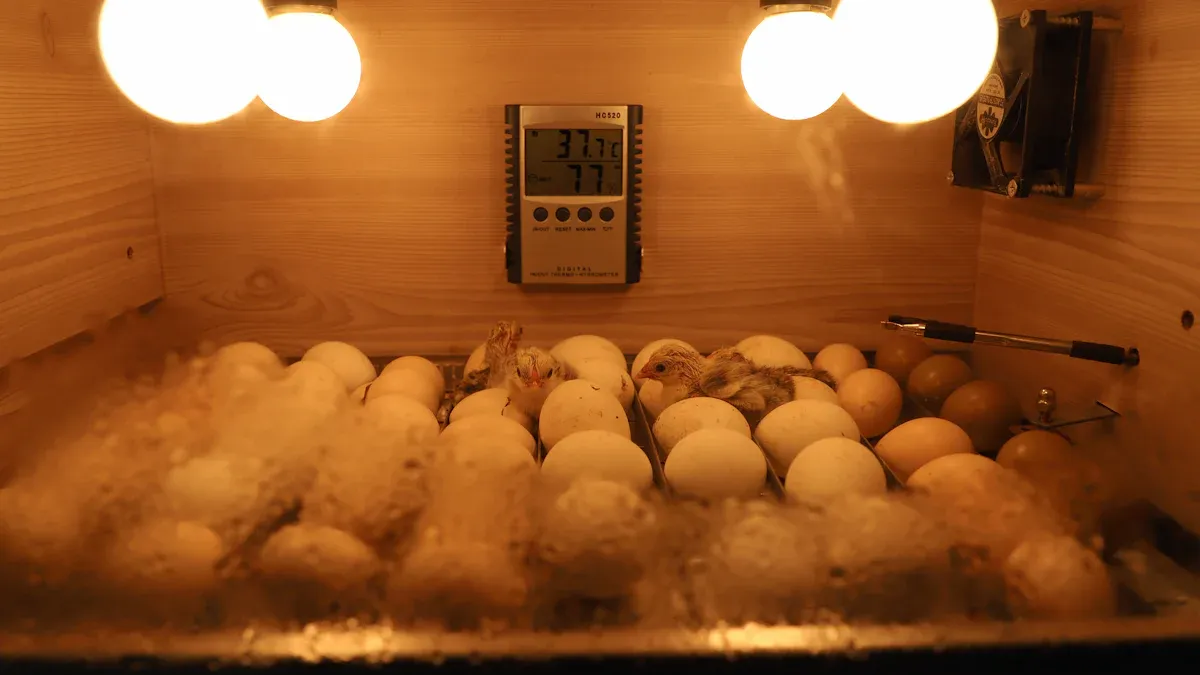
If you are incubating eggs before brooding, use a setup designed for delicate species. Compare the Parrot Egg Incubator options, then focus this page on safe brooder management.
Key Takeaways
- Use a gradient: one warm zone plus one cool zone beats one average number.
- Probe placement matters: measure at chick height, not near the lid.
- Humidity is a balance: higher for naked chicks, lower once pinfeathers appear.
- Behavior is your final check: huddling suggests cold, panting suggests heat stress.
- Log one line a day: temperature, humidity, weight, crop AM note, and behavior.
Quick Take – Brooder Temperature, Humidity, Draft Control, Probe Placement
If the video does not load, use the quick cards below.
60-second safety check: start here before you change settings.
- Too cold: tight huddle, loud cheeping, shivering, slow crop emptying.
- Too hot: panting, wings spread, lying flat, avoiding the warm zone.
- Too damp: wet bedding, condensation, musty odor. Dry and ventilate first.
Safe Brooder Temperature Range
Newly hatched parrot chicks lose heat fast. Most keepers begin with a warm brooder and reduce heat as feathers come in and weight gain becomes steady. Do not drop temperature on a calendar alone. Use your chick’s behavior and morning weight trend to guide the pace.
Conclusion: Make changes small so you can see what helped.
- Adjust in small steps: change by 2–3°F, then wait and observe before changing again.
- Keep a warm zone: place heat at one end so the chick can move away when comfortable.
- Confirm stability: a steady average is more important than chasing minute-to-minute numbers.
Tip: If chicks huddle and squeak, they feel cold. If they pant, spread wings, or avoid the warm zone, they are too hot. Adjust based on behavior.
Humidity Targets for Parrot Chicks
Humidity supports skin and hydration when chicks are naked. As pinfeathers appear, slightly lower humidity and keep airflow gentle to reduce damp bedding and mold risk.
Conclusion: Aim for moisture that supports the chick, not moisture that wets the brooder.
- Naked chicks: often 55–65% RH.
- Pinfeathers: commonly 45–55% RH.
- Accuracy: verify your hygrometer with the 75% salt test and 32°F ice bath calibration guide.
Draft Control in Brooder
Drafts chill chicks even when the thermometer looks fine. Block direct airflow, then use small vents for gentle air exchange.
Conclusion: Fresh air matters, but wind-chill is the enemy.
- Block drafts: use solid sides or baffles and keep fans away from the brooder.
- Vent high and low: small vent holes support exchange without blasting the chick.
- Use an odor cue: ammonia smell or heavy condensation means you need more ventilation and drier bedding.
Common mistakes to avoid:
- Setting up the brooder late and rushing adjustments.
- Using heat without a thermostat, then reacting to swings.
- Letting bedding stay damp or dirty, then blaming temperature.
Probe Placement at Chick Height
Measure where the chick lives. Place the main probe at chick height in the warm zone, then place a second probe at the same height on the cool side to confirm the gradient.
Conclusion: Probe height prevents false confidence.
- Main probe: chick height under the heat source, held off the bedding.
- Second probe: chick height on the cool side to confirm a safe escape zone.
- Check twice daily: morning and evening, then log the readings.
How to place your probes:
- Clip the main probe to a small stand so it sits at chick height without touching bedding.
- Place the second probe at the same height on the opposite side.
- Keep both probes away from water trays and direct radiant heat.
- Check both readings before feeding and again in the evening.
Safety Numbers at a Glance – Brooder Temperature Plan
Week-by-Week Temperature and Humidity
Use these numbers as a starting point. The safest approach is to keep a stable gradient, then step down only when the chick is active, feeding well, and gaining weight.
Conclusion: Follow the chick, then the calendar.
- Hatch to Day 2–3: 96–98°F, 55–65% RH, strong draft control.
- Week 1–2: often 92–96°F, 50–60% RH, confirm warm and cool probe readings.
- Week 2–4: step toward 85–90°F as pinfeathers and steady gains appear, then continue gradual step-down.
Tip: A second probe on the cool side prevents overheating. Chicks should be able to move away from the warm zone without getting chilled.
Brooder Setup Checklist
Enclosure Size and Type
Pick an enclosure that holds heat, stays easy to clean, and has enough room for a warm side and a cool side. Smooth walls and a secure lid reduce escapes and drafts.
Conclusion: Your enclosure should make stability easy.
- Safe footing: use a non-slip liner so tiny feet do not slide.
- Room for a gradient: heat at one end, rest area on the other.
- Vent without drafts: small vents high and low, no direct airflow over the chick.
Heat Source: Ceramic Emitter, Radiant Panel, Heat Lamp
Choose a heat source you can control with a thermostat. The goal is steady heat, not hot spots.
Conclusion: Steady control is safer than strong heat.
- Ceramic emitter: heat without light, supports a calm sleep cycle.
- Radiant panel: gentle warmth that helps a stable gradient.
- Heat lamp: use only with secure mounting, a guard, and thermostat control to reduce fire and burn risk.
Thermostat and Controls
A thermostat reduces swings. Place the heater at one end so the chick can self-regulate.
Conclusion: Fewer swings means less stress.
- Hands-off control: set the thermostat, then verify with probes at chick height.
- Warm zone placement: heat at one end, never centered with no escape.
- Behavior check: comfort looks like relaxed resting, not tight huddling or panting.
Thermometer and Hygrometer Placement
Keep sensors away from water trays and direct heat. Clip probes to a small stand so they stay at chick height without touching wet bedding.
Ventilation Baffles for Brooder
Use baffles to block direct drafts while still allowing gentle exchange. If a tissue flaps hard near a vent, that airflow is too strong.
Bedding and Cleaning Kit
Dry, grippy bedding is your first line of safety. Start with paper towels, puppy pads, or plain towels. Switch to soft, dust-free bedding as chicks grow. Avoid aromatic softwoods.
Conclusion: Clean and dry prevents most preventable setbacks.
- Spot clean: morning and evening, replace wet areas immediately.
- Full clean: every 24–48 hours or sooner when damp.
- Dry before reset: never place chicks onto damp bedding or damp walls.
Keep a simple kit ready:
- Gloves and paper towels
- Spare liners or bedding
- Bird-safe disinfectant
- Trash bags for quick removal
Backup Power for Brooder
Even short outages can chill a naked chick. Prepare a simple plan before you need it.
Conclusion: In an outage, insulate first and avoid extra handling.
- Hold warmth: move chicks to a smaller insulated container with air holes and wrapped warm bottles placed nearby.
- Target range: many keepers aim for a temporary holding range around 85–90°F while restoring normal brooder heat.
- Be ready: keep your outage steps printed or saved so you can act quickly.
Emergency steps during an outage:
- Reduce headspace with towels around the outside of the container.
- Use wrapped warm bottles nearby. Never place heat directly on the chick.
- Check temperature at chick height every 30 minutes.
- Keep airflow gentle. Never seal the container tight.
Week-by-Week Brooder Temperature Plan
Week 0–1: 96–98°F
In the first days, chicks rely on your brooder to stay warm enough to digest. Keep readings stable at chick height, and keep a cooler escape zone available.
Conclusion: Stability beats constant adjustments.
- Temperature: start near 96–98°F for fully naked chicks.
- Humidity: commonly 55–65% RH when skin is exposed.
- Watch: huddling means cold. Panting or wing spreading means heat stress.
Week 1–2: step toward 92–96°F
As chicks become more active and begin developing pinfeathers, you can begin stepping down. Keep changes small and track the trend.
Conclusion: Step down only when weight gain is steady.
- Temperature: many brooders land around 92–96°F.
- Humidity: often 50–60% RH, then lower as pinfeathers appear.
- Process: adjust 2–3°F, then observe before changing again.
Week 2–3: step toward 89–92°F
By week two to three, pinfeathers usually reduce heat loss. Keep the brooder dry and avoid damp bedding.
Conclusion: Avoid dampness while you lower heat.
- Temperature: many setups move toward 89–92°F.
- Humidity: often 45–55% RH.
- Signal: if the chick crowds the warm zone, slow your step-down.
Week 3–4: step toward 85–88°F
Feathering continues. Keep the gradient so the chick can choose where to rest.
Conclusion: A safe gradient prevents both chilling and overheating.
- Temperature: many keepers aim around 85–88°F in the warm zone.
- Humidity: keep within 45–55% RH with clean, dry bedding.
- Air: increase gentle ventilation if you smell ammonia or see condensation.
Week 4+: 80–84°F
When chicks look fluffier and are gaining steadily, you can continue stepping down toward the low 80s in the warm zone.
Conclusion: Step down faster only if the chick stays comfortable.
- Temperature: many brooders land around 80–84°F in the warm zone.
- Humidity: keep around 45–55% RH.
- Behavior: relaxed resting and normal feeding suggest you can continue the transition.
Transition to Room Temperature
Once fully feathered and gaining weight steadily, you can transition to room temperature. Move slowly and keep the room draft-free.
Conclusion: Slow transitions reduce stress.
- Drop gradually: reduce by 2–3°F every few days.
- Watch comfort: if the chick acts cold, pause and stabilize.
- Keep notes: track weight and behavior to confirm the change is safe.
Adjustments for Species and Body Condition
Species, body size, and feathering speed change the schedule. Use the same decision rules: stability first, small steps, and daily logging.
Conclusion: Let body condition guide the plan.
- Slow feathering or underweight: slow the step-down and confirm warmth.
- Fast feathering and strong gains: you can step down sooner, but still in small moves.
- Red flags: steady weight loss, dehydration signs, or crop not emptying by morning call for an avian vet.
Humidity: Prevent Dehydration Without Mold in Brooder
Humidity Targets by Chick Stage
Start higher when the chick is naked, then lower as feathers come in and the brooder stays drier.
Conclusion: The best humidity is the one that supports the chick and keeps bedding dry.
- Naked: often 55–65% RH.
- Pinfeathers and beyond: commonly 45–55% RH.
- Measure first: confirm device accuracy before big changes.
Raising Humidity Safely in Brooder
Conclusion: Raise humidity without soaking the brooder.
- Add water surface area: warm water tray or damp sponge away from direct heat.
- Keep bedding dry: replace damp spots immediately.
- Re-check in 30 minutes: confirm the new RH after the brooder stabilizes.
Lowering Humidity Safely in Brooder
Conclusion: Lower humidity by drying and exchanging air gently.
- Increase ventilation: open vents slightly, but avoid direct drafts.
- Remove wet material: change wet bedding and wipe condensation.
- Reduce water area: smaller tray or less exposed sponge surface.
Warning Signs of Too Much or Too Little Humidity
Conclusion: Use symptoms to decide which lever to pull first.
- Too dry: tacky saliva, dry nares, wrinkled skin. Raise humidity slightly and confirm warmth.
- Too damp: wet bedding, condensation, musty smell. Increase gentle ventilation and dry the brooder.
- Both: slow weight gain can happen in either direction, so check warmth and hygiene together.
Draft Control & Ventilation in Brooder
Gentle Airflow vs Drafts
Gentle airflow keeps air fresh. Drafts chill chicks. If a tissue flaps hard at a vent, that is a draft.
Baffling Lids and Side Vents
Use baffles to block direct airflow and keep vents small and positioned to avoid blowing over the chick.
Fresh Air, CO₂, and Odor Cues
If you smell ammonia, see heavy condensation, or notice damp bedding, increase gentle ventilation and replace wet bedding.
Monitoring & Logging Brooder Temperature
Daily AM/PM Readings and Crop Check
Check brooder temperature and humidity twice daily at chick height. Weigh in the morning before feeding. Note whether the crop is empty in the morning.
Copy/paste daily log template:
- Date:
- AM temp / RH:
- PM temp / RH:
- Morning weight:
- Crop AM empty? Yes / No
- Notes: behavior, droppings, any change you made
Weight Log for Parrot Chicks
Healthy chicks gain steadily. Sudden drops, repeated stalls, or a crop that does not empty by morning are red flags.
Thermometer and Hygrometer Calibration
Calibrate before a new brooder setup and whenever readings look suspicious. Keep the method simple so you will do it.
Conclusion: Calibration prevents chasing a bad number.
- Thermometer: ice bath should read 32°F.
- Hygrometer: salt test should read 75% RH.
- Frequency: check monthly or after any drop, bump, or battery swap.
Thermometer ice bath steps:
- Fill a glass with crushed ice, then add cold water and stir.
- Place the probe in the ice water for two minutes.
- It should read 32°F. If not, note the offset.
Hygrometer salt test steps:
- Mix salt with a few drops of water to form a paste.
- Seal the salt dish and hygrometer in an airtight container.
- After 8–12 hours, the hygrometer should read 75% RH. Note any offset.
Too Cold vs Too Hot: Signs & Fixes in Brooder
Use behavior as your fastest signal, then confirm with your probes.
Conclusion: Fix temperature first before changing multiple things.
- Too cold: huddling, loud cheeping, shivering, slow crop emptying.
- Too hot: panting, wings spread, lying flat, avoiding the warm zone.
- First move: adjust 2–3°F, then re-check after the brooder stabilizes.
Immediate actions:
- If too cold: verify probe height, block drafts, raise the warm zone by 2–3°F, then wait for stability.
- If too hot: lower the warm zone by 2–3°F, increase gentle ventilation, and confirm a cooler escape area.
Power-Outage SOP for Brooder (0–2 h / 2–6 h)
Plan for short outages so you are not improvising with a fragile chick.
Conclusion: Insulate, provide safe nearby warmth, and keep airflow.
- 0–2 hours: reduce headspace, insulate, and use wrapped warm bottles nearby.
- 2–6 hours: check temperature at chick height every 30 minutes and keep bedding dry.
- Do not guess: follow the power-outage SOP and log what you did.
Cleaning & Biosecurity in Brooder
Chicks are vulnerable to contamination. Clean routines reduce preventable setbacks.
Conclusion: Clean hands, clean tools, and dry bedding protect growth.
- Hands first: wash before and after handling chicks and feeding tools.
- Separate tools: do not share syringes or cloths between groups.
- Dry reset: fully dry surfaces after cleaning before chicks return.
If you are incubating eggs at home, stable incubation helps you start with stronger hatchlings and a calmer first week in the brooder. For parrot-focused incubation setup, read the Parrot Egg Incubator guide. If you are also hatching poultry eggs and want consistent turning while you focus on brooder care, consider this auto-turn dual-motor chicken and duck egg incubator.
FAQ
What temperature should you set for newly hatched parrot chicks?
Many keepers start fully naked chicks around 96–98°F in the warm zone, with a cooler escape zone available. Step down in small moves as feathers and steady weight gain appear.
How do you control humidity in the brooder?
Raise humidity with safe water surface area away from direct heat and keep bedding dry. Lower humidity by increasing gentle ventilation and replacing wet bedding. Calibrate your hygrometer before making big changes.
Where should you place the thermometer probe?
Place the main probe at chick height in the warm zone, held off the bedding. Place a second probe at the same height on the cool side to confirm a safe gradient.
What signs show your chicks need a temperature adjustment?
Huddling and loud cheeping suggest cold. Panting, wing spreading, or avoiding the warm zone suggests overheating. Adjust by 2–3°F and re-check after the brooder stabilizes.
How do you keep chicks safe during a power outage?
Move chicks to a smaller insulated container with air holes, use wrapped warm bottles nearby, and check temperature at chick height frequently. Keep bedding dry and restore normal brooder heat gradually.
Data authenticity note: This guide reflects practical at-home brooder management for parrot chicks. Outcomes vary with species, chick age, feathering pace, brooder design, sensor placement, room temperature swings, hygiene, and how often the brooder is opened. Use calibrated tools, change one variable at a time, and keep a simple daily log. It is not a substitute for care from an avian veterinarian.


0 Comments