
If you want healthy chicks, you must set up your automatic egg incubator correctly. First, preheat and level the machine. Calibrate temperature and humidity with two thermometers and hygrometers. Use the same settings for each batch. Turn eggs on time. Check air cell size and weight loss to change humidity if needed. Keep the lid closed during lockdown. These easy steps help you avoid mistakes. Mistakes like bad humidity or not turning eggs can lower hatch rates.
|
Mistake |
Effect on Hatch Success Rates |
|---|---|
|
Incorrect temperature |
Chicks may hatch too late or too early |
|
Poor humidity control |
Chicks may be weak or not hatch at all |
|
Improper egg handling |
Eggs can get germs and embryos may die |
|
Lack of egg turning |
Chicks can stick to the shell |
Tip: Write down your settings. Check your results. Change things during incubation to get better chicks.
Key Takeaways
-
Get your incubator ready by heating it first and making sure it is flat. This helps keep the temperature and humidity the same for all eggs, which leads to more chicks hatching.
-
Check the temperature and humidity every day. Use two thermometers and two hygrometers to get correct numbers. Change the settings if you need to.
-
Turn the eggs automatically every 1–2 hours (12–24 times/day). This helps the embryos grow well. Stop turning the eggs on Day 18 so they can get ready to hatch.
-
Write down your settings and what you see in a neat logbook. This helps you remember changes and make your hatching better next time.
-
Keep the room steady with good airflow. A stable place helps chicks grow strong and makes hatching work well.
Automatic Egg Incubator Features
Fan and Heating System
A good fan and heating system is important in your automatic egg incubator. The fan moves warm air around, so all eggs get the same heat. The a well-insulated model. Its heater lets you pick a temperature starting at 99.5°F (37.5°C). The fan helps keep the temperature steady, even if your room changes. This helps embryos grow at the right speed.
Tip: Put your incubator in a room that does not change temperature much. Leave space around it for air to move. Write down your temperature settings and check them every day. If you notice changes, look at your notes and fix them.
Humidity Control
Humidity control is very important for healthy chicks. Your automatic egg incubator uses different ways to control humidity. You can check humidity with a hygrometer. You can make humidity higher by adding water or making the water area bigger. Some incubators have pumps that add water for you. You can also open or close vents to change humidity. If you want to watch humidity closely, weigh your eggs to see how much water they lose.
|
Method |
Description |
|---|---|
|
Hygrometers |
Check humidity; make sure they are correct. |
|
Water Surface Area |
Add water or use a sponge to make humidity higher. |
|
Automatic Humidity Pump |
Adds water by itself to keep humidity the same. |
|
Weighing Eggs |
Weigh eggs to see how much water they lose. |
|
Ventilation |
Open or close vents to change humidity. |
|
Ambient Humidity |
Room humidity can change how the incubator works. |
Notice: Write down your humidity numbers and any changes. Check them every day. Change water or vents if you need to.
Sensors and Turning Motor
Sensors and turning motors help your automatic egg incubator work well. Sensors watch temperature and humidity inside and outside the incubator. They help keep things steady for your eggs. The turning motor gently moves eggs so embryos do not stick to the shell. Most incubators turn eggs every few hours. This helps heat and nutrients spread evenly. You should check that sensors and motors work before you start.
-
Sensors check both inside and outside the incubator.
-
Automatic egg turning keeps eggs at the right angle and helps embryos grow.
-
Incubators keep temperature at 99.5°F (37.5°C) and humidity at 55% for most eggs.
Tip: Write down sensor numbers and turning times. Look at your notes and change settings if you see problems.
Room Conditions for Incubation
Temperature and Humidity Stability
You need a room that stays the same temperature. If the temperature changes, chicks may not grow right. This can make fewer eggs hatch. Keep the room steady at 70–75°F (21–24°C) and away from direct sunlight or drafts.. Humidity should be 50–55% most of the time. Make it about 65% for the last three days. This helps the air cell form and keeps chicks healthy.
|
Parameter |
Recommended Range |
|---|---|
|
Temperature |
98.6–102.2°F (37–39°C) |
|
Humidity |
50–55% (65% last 3 days) |
Tip: Write down your room’s temperature and humidity every day. Look at your notes. Change your incubator settings if you see something different.
A steady room helps your incubator keep the right temperature. This makes embryos less stressed and helps more chicks hatch. If your room is too hot or cold, the incubator works harder to fix it.
Ventilation and Space
Ventilation is very important for incubation. Fresh air brings in oxygen and takes away carbon dioxide. Good ventilation helps chicks grow and hatch. Put your incubator where there is space around it. Leave at least 4 inches (10 cm) on every side for air to move.
-
Check that vents are open and not blocked.
-
Do not put your incubator near walls or in corners.
-
Keep the room clean and dry to stop mold and bacteria.
-
Write down your ventilation checks and look at them often.
|
Factor |
Importance |
|---|---|
|
Temperature Control |
Helps embryos grow and get nutrients. |
|
Relative Humidity (RH) |
Helps eggs lose water and form the air cell. |
|
Oxygen/CO2 Balance |
Needs good air flow for healthy chicks. |
Notice: Sometimes, less air early in incubation can help more chicks hatch. But always check air quality and change ventilation if needed.
A room with good air and space helps your incubator keep the right temperature and humidity. This helps embryos grow strong and gives better hatching results. Always write down, check, and change your settings for each group of eggs.
Egg Storage and Placement
Pre-Incubation Storage
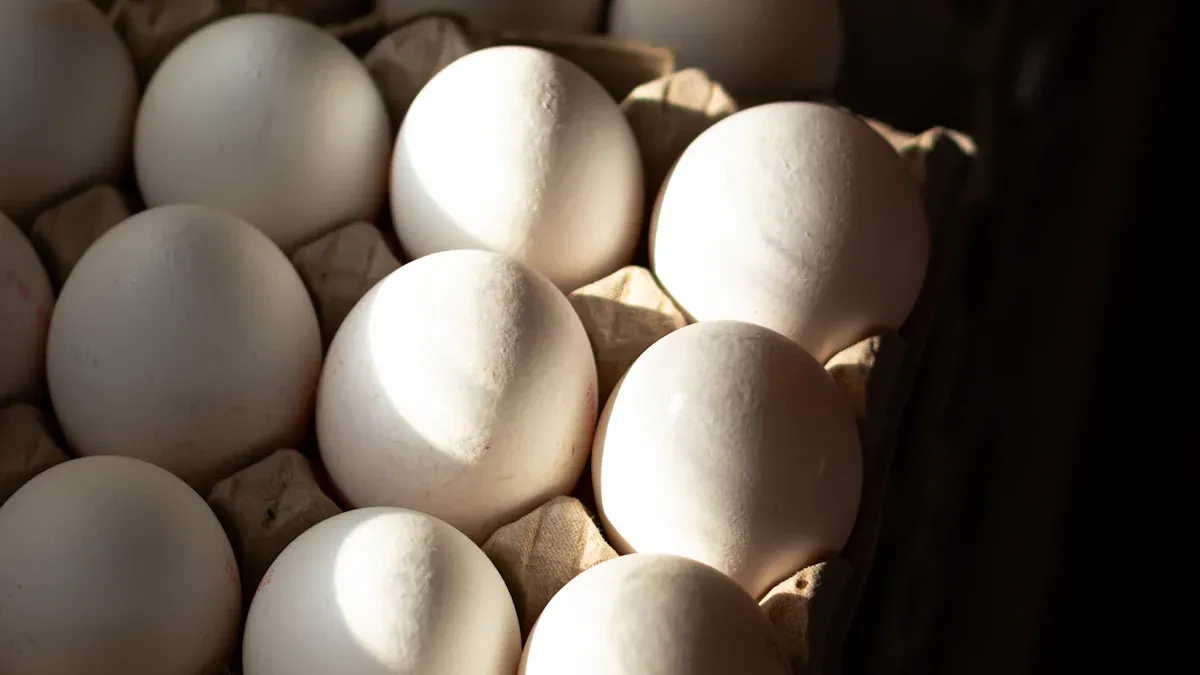
You need to store eggs correctly before incubation to keep egg quality and viability high. Eggs do best in a cool, humid place. Keep the temperature between 55°F and 60°F (13°C to 15°C). Humidity should stay around 75% to 80%. Collect eggs at least twice a day, especially when it is hot. Choose eggs that weigh at least 1.75 ounces and come from healthy hens over 22 weeks old. Only use clean eggs. If you see dirt, wipe it gently with a damp cloth. Avoid storing cracked or odd-shaped eggs.
-
Store eggs with the big end up or on their side. Do not put the pointy end up.
-
Turn eggs 45 degrees each day if you wait more than four days before incubation. This helps keep egg quality and viability strong.
-
Let eggs warm up slowly to room temperature before you start incubation.
-
Try to incubate eggs within seven days of collection for the best results.
Tip: Write down your storage temperature and humidity. Review your notes before each batch. Adjust your storage if you see changes in hatch rates.
Egg Positioning in Incubator
How you place eggs in the incubator affects embryo growth and hatch success. Put eggs in the incubator with the big end up. Make sure all eggs are at the same height. Leave space between eggs for air to flow. Avoid placing eggs near heating elements or vents. Good positioning helps keep temperature and humidity even, which supports egg quality and viability.
"Egg turning helps embryos grow by letting them absorb nutrients from the yolk. The way you position eggs during incubation can change how fast embryos develop and how many chicks hatch."
|
Factor |
Impact on Development and Hatch Success |
|---|---|
|
Lack of Turning (Days 3-7) |
More embryos in the wrong position, higher death rate, lower hatchability. |
|
Lack of Turning (Days 12-19) |
Less oxygen use, slower growth. |
Notice: Record how you place eggs and how often you turn them. Review your notes after each hatch. Adjust your method to improve results.
Setup and Calibration
Setting up your incubator the right way helps eggs start well. Make sure the incubator is flat and steady. Preheat it before you use it. Check all sensors before you begin. Careful setup keeps temperature and humidity right for eggs.
Leveling and Preheating
Put your incubator on a flat table. This keeps heat and humidity even. If it tilts, eggs may not grow right. Use a bubble level to check. Adjust the feet or add shims if needed.
-
Unplug the incubator before you move or level it.
-
Set it on a strong table away from windows and vents.
-
Check if it is level from side to side and front to back.
-
Plug in the incubator and turn it on.
-
Fill one water channel with warm water (about 100°F or 38°C).
-
Let it run for 2–4 hours to preheat and get stable.
-
Check temperature and humidity before you add eggs.
Tip: Always preheat your incubator before adding eggs. This helps you reach the right temperature and humidity faster.
Temperature and Humidity Calibration
Set the right temperature and humidity before you start. Most eggs hatch best at 99.5°F (37.5°C). Keep humidity between 45% and 55% for 18 days. Raise it to 70–75% for the last three days.
-
Use two thermometers and two hygrometers to check accuracy. Put one set near the eggs and one at the other end.
-
Compare both sets. If they match, sensors work well. If not, use the average or change settings.
-
Check the display on your incubator. Many show temperature and humidity on an LCD screen.
-
If temperature is low, adjust the heating element. If it is high, lower the setting or open a vent a little.
-
To raise humidity, add water or put in a damp sponge. To lower it, take out water or open vents more.
-
Write down your settings and readings every day. Look at your notes and change things if needed.
|
Component |
Function |
|---|---|
|
DS18B20 |
Gives you very accurate temperature readings. |
|
DHT11 |
Checks both temperature and humidity. |
|
Heating Element |
Keeps temperature between 97°F and 104°F (36°C–40°C). |
|
Relay-Controlled Elements |
Turns on humidifiers or water trays if humidity drops below 60%. |
|
LCD Display |
Shows temperature and humidity, updates every few seconds. |
|
Alert System |
Sounds an alarm if temperature or humidity goes outside safe levels (95°F–106°F / 35°C–41°C and 45–70%). |
|
Manual Control |
Lets you set and switch to hatch mode. |
Notice: Measuring temperature and humidity at egg level gives the best results. Always use two devices to double-check your readings.
Sensor Validation
Check your sensors before every incubation. Good sensors help keep the right conditions for eggs.
-
Use digital thermometers and hygrometers so you do not disturb eggs.
-
Put sensors in different spots to check for hot or cold areas.
-
Try advanced tools like computer vision if you want to watch sensors in real time. Some systems use deep learning to find problems fast.
-
Check the alert system. Make sure alarms work if temperature or humidity goes out of range.
-
Write down sensor readings and compare them to backup devices.
Tip: Always record your sensor checks. Look at your notes after each batch. Change your process if you find problems.
Safety and Practical Tips:
-
Keep the incubator away from water and sunlight.
-
Check power cords for damage before plugging in.
-
Do not open the lid during preheating or calibration.
-
Wash your hands before touching eggs or sensors.
-
Label your thermometers and hygrometers so you know which reading is which.
You can get better hatch rates by following these steps. Always use the record, review, and adjust method. This helps you find problems early and make changes for better results.
What Temperature and Humidity to Hatch Eggs
Baseline Settings
You need the right temperature and humidity for eggs to hatch well. Most automatic egg incubators work best at 99.5°F (37.5°C). This temperature helps embryos grow at the right speed. For chicken eggs, keep humidity between 50% and 55% for the first 17 days. This range helps the air cell form and stops too much water from leaving the egg.
-
Set temperature to 99.5°F (37.5°C) for chicken eggs.
-
Keep humidity at 50–55% for days 1–17.
-
Forced air incubators can use 45–50% humidity.
-
Write down your temperature and humidity every day.
Tip: Use two thermometers and two hygrometers to check your settings. Put them at egg level for the best readings.
Here is a quick chart for baseline settings:
|
Parameter |
Optimal Setting |
|---|---|
|
Temperature |
99.5°F (37.5°C) |
|
Humidity (Days 1-17) |
50–55% Relative Humidity |
Always write down your temperature and humidity. Look at your notes often. Change your settings if you see the air cell or weight is not right.
Adjusting for Incubator Model
Different incubators may need small changes in temperature and humidity. Cabinet, tabletop, and forced air incubators all move air and heat in their own way. You should check your incubator’s manual for special steps.
-
For chicken eggs, keep temperature at 99–101°F (37.2–38.3°C) from day 1 to day 18. Raise humidity to 65–70% for the last three days.
-
Quail eggs need 99°F (37.2°C) in summer and 98°F (36.7°C) in winter. Use 50–60% RH during incubation, then 65–75% for hatching.
-
Duck eggs incubate at 99.5°F (37.5°C) in forced-air models; use 50–60% RH during incubation, then 70–75% RH for lockdown.
-
Always write down your temperature and humidity for each batch. Check and change them if needed.
|
Stage of Incubation |
Temperature (°F) |
Humidity (%) |
|---|---|---|
|
Days 1 to 18 |
99–101 |
55–60 |
|
Days 18 to 21 |
99–101 |
65–70 |
Notice: Humidity can change with the room and egg type. Always use the record → review → adjust method to keep your settings right.
You can get better hatch rates by checking your temperature and humidity every day. Change your incubator if you see the air cell or weight is not right. Watching your settings closely helps you know what temperature and humidity to hatch eggs for your setup.
Automatic Egg Turning Schedules
Initial Manual Turning
You need to start incubation with careful manual turning. During the first days, you should turn the eggs by hand about 3–4 times each day. This helps position the eggs correctly and supports healthy embryo growth. Even if your incubator has an automatic turning system, you should still turn the eggs manually at the beginning. Manual turning lets you check each egg and make sure they are not stuck or crowded. When you open the incubator lid for turning, you also allow fresh air to enter, which helps the embryos develop.
-
Turn eggs gently by hand 3–4 times daily during the first week.
-
Check that each egg sits with the large end slightly higher than the small end.
-
Use clean hands to avoid spreading germs.
-
Record your turning times and any changes you notice.
📝 Tip: Write down your manual turning schedule. Review your notes after each batch. Adjust your process if you see problems with hatch rates.
Auto Turning Frequency
Your incubator uses an automatic turning motor to keep eggs moving. Turning eggs during incubation is very important for embryo health. Research shows that turning eggs 24 times every day gives the best hatch results. Most automatic incubators turn eggs every 1–2 hours, moving them roughly 80 degrees each time. This mimics how a hen moves eggs in nature. Regular turning spreads heat and nutrients evenly, prevents embryos from sticking to the shell, and helps air cells form correctly.
You should check your incubator’s settings before each batch. Make sure the turning motor works smoothly and does not skip cycles. If your incubator allows you to set the turning frequency, choose 24 turns per day (once every hour). Set the turning angle to about 80 degrees for each movement.
-
Set automatic turning to every 1–2 hours (12–24 times/day).
-
Set the turning angle to 40–45° each side (~80–90° total) for each cycle.
-
Check the turning motor and sensors before starting incubation.
-
Record your turning schedule and any changes in embryo development.
⚡ Notice: Always use the record → review → adjust method. If you see uneven development or stuck embryos, check your turning frequency and angle.
Stopping Before Lockdown
You must stop turning the eggs before hatching begins. This step is called "lockdown." On Day 18 of incubation, you should stop turning the eggs to let chicks position themselves for hatching. Remove the automatic egg turner from the incubator at this time. Place the eggs on a non-slip surface with the large end up or on their sides. Do not turn the eggs again after this point. Keeping the eggs still helps the chicks break through the shell and hatch safely.
-
Stop turning the eggs at Day 18 of incubation.
-
Remove the automatic egg turner from the incubator.
-
Place eggs on a non-slip surface with the large end up or on their sides.
-
Do not turn the eggs again after Day 18.
🚨 Tip: Write down the date you stop turning. Review your hatch results and adjust your lockdown timing if needed.
You can improve hatch rates by following these turning schedules. Always record your turning times, review your results, and adjust your process for each batch. Careful turning supports healthy embryo development and successful hatching.
Daily Incubation Operation
Routine Checks
Check your incubator every day. This keeps the eggs safe. Watch the temperature and humidity closely. Use a digital thermometer and hygrometer for best results. Write down the numbers in your logbook. Turn the eggs 180 degrees at least three times each day. This stops embryos from sticking to the shell. It helps them grow strong. Keep the incubator clean. Wipe away dust or spills inside. This stops germs from spreading.
|
Daily Check |
Description |
|---|---|
|
Temperature |
Watch and change it to keep things steady. |
|
Humidity |
Track the average humidity during incubation. |
|
Egg Turning |
Turn eggs 180 degrees three times every day. |
|
Cleanliness |
Clean the incubator to stop germs. |
📝 Tip: Write down your daily checks. Look at your notes often. Change your process if hatch rates drop.
Water and Ventilation
Water and air flow are very important. Make sure the water tray is always full. This keeps humidity at the right level. Check the tray every morning. Add warm water if needed. Good ventilation brings fresh air to the eggs. Open or close the vents based on humidity readings. If the room is dry, close the vents a little. If humidity is too high, open them more. Leave space around your incubator for air to move.
-
Keep the water tray full all the time.
-
Check and change ventilation every day.
-
Watch humidity and temperature closely.
⚠️ Notice: Stable water and air flow help you control humidity and temperature. Use your notes to help you make changes.
Alarms and Records
Many incubators have alarms and self-check features. These help you find problems early. If temperature or humidity goes outside the safe range, the alarm will sound. Check the display panel for alerts every day. Write down any alarms in your logbook. Keep records of all readings, turning times, and changes you make. Looking at your notes helps you see patterns and improve results. Always use the record, review, and adjust method when you run your incubator.
-
Listen for alarms and check the display panel every day.
-
Write down all readings and changes in your logbook.
-
Look at your records after each batch and change your process.
💡 Tip: Careful checking and record keeping help you find problems early and make smart changes.
Candling and Humidity Adjustment
Candling Schedule
Candling lets you see inside each egg during incubation. You use a bright light to check embryo growth and air cell size. Follow a simple schedule to get the best results:
-
On Day 7, candle your eggs. Look for blood vessels and embryo movement. Remove any eggs that show no signs of development.
-
On Day 14, candle again. Check for a larger embryo and a growing air cell. Mark any eggs that look abnormal.
-
On Day 18, do a final candling before lockdown. Make sure the embryo fills most of the shell and the air cell is the right size.
🕯️ Tip: Always record what you see during candling. Write down the date, air cell size, and any changes. This helps you adjust humidity levels and improve hatch rates.
Weight Loss and Air Cell Monitoring
You can track egg weight and air cell size to control humidity during incubation. Eggs lose water as they develop. You want about 0.6–0.7% weight loss per day. By Day 18, aim for a total weight loss of 12%. Use a kitchen scale to weigh all your eggs before incubation starts. Write the starting weight and number of eggs in your notebook or spreadsheet.
-
Weigh eggs every one to two days. Record each new weight.
-
Candle eggs on Days 7 and 14. Compare air cell size to standard charts.
-
If the air cell looks too large, humidity is too low. If it is too small, humidity is too high.
📒 Notice: Use both weight loss and air cell size to guide your humidity adjustments. Always follow the record → review → adjust method for best results.
Humidity Tweaks
You need to keep humidity levels between 45% and 55% for most of the incubation period. This range helps eggs lose water at the right rate and supports healthy chick development. Automatic humidity control systems make this easier, but you should still check readings with a hygrometer. If you use a manual system, monitor humidity often and adjust as needed.
-
Increase humidity by adding water or using a sponge in the tray.
-
Decrease humidity by reducing water surface area or opening vents.
-
Check humidity levels daily and write down any changes.
-
Use a hygrometer to understand the incubator environment.
💧 Tip: Adjust humidity based on air cell growth and weight loss. Keeping correct humidity levels helps you get better hatch rates.
Eggs lose water through evaporation. You control this by adjusting humidity in your incubator. When you track weight loss and air cell size, you can make smart changes to humidity levels. This supports healthy chick development and improves your chances for a successful hatch.
Lockdown and Hatching
Stopping Turning
You need to stop turning the hatching eggs at the start of the lockdown phase. On Day 18 of incubation, remove the automatic turner from the incubator. Place the eggs on a non-slip mat with the large end up or on their sides. This helps chicks move into the right position for hatching. Do not turn the eggs again during the lock-down period. Write down the date you stop turning. Review your hatch results after each batch and adjust your timing if needed. This step supports healthy chick development and gives you a better chance for a successful hatch.
Raising Humidity
During lockdown, you must raise humidity to help chicks hatch. Start increasing humidity to about 70% three days before the expected hatch date. This higher humidity keeps the membranes inside the hatching eggs soft, making it easier for chicks to break out. If your eggs have lost the right amount of weight, keep humidity at 70% as you wait for chicks to pip the shell. If eggs have not lost enough moisture, do not raise humidity yet. Always check your incubator’s humidity readings and write them down. Use the record → review → adjust method to keep conditions right for incubation and hatching.
-
Increase humidity to 70% about three days before hatch.
-
Keep humidity steady if eggs have lost enough weight.
-
Wait to raise humidity if eggs still need to lose moisture.
💡 Tip: Use a hygrometer to monitor humidity. Adjust water trays or add a damp sponge if needed.
Minimal Lid Opening
You should keep the incubator lid closed as much as possible during lockdown and hatching. Opening the lid lets out warm, moist air and can lower humidity quickly. This can cause chicks to get stuck in their shells. Only open the lid once every six to eight hours if you must remove dry chicks or fix a problem. If a newly hatched chick rolls another egg, check that the pipping hole stays clear. Try to keep humidity high even when you open the lid.
-
Open the incubator lid only when necessary, about every 6–8 hours.
-
Watch for chicks rolling eggs and blocking pipping holes.
-
Keep humidity and temperature steady for the best hatch rates.
⚠️ Notice:
Do not disturb the eggs after lockdown and avoid opening the incubator at all costs.
You must keep that lid closed! No matter how much you want to check on those hatching eggs, don’t open the incubator. The incubator must maintain a stable humidity and temperature during these last few days before and during the hatch. Opening and closing the incubator lid will let in cool air and let out humidity.
Always record your actions and results. Review your notes after each incubation. Adjust your process to improve your hatch rates next time.
Troubleshooting Temperature and Humidity
Fluctuations and Recovery
Temperature and humidity can change during incubation. These changes happen for many reasons. The incubator might be in a bad spot. The thermometer may not be correct. The fan could break or get dirty. Opening the lid too much can cause problems. Too many eggs can block air flow. Humidity issues often come from water trays or changes in the room.
-
Put your incubator in a room with steady temperature. Keep it away from drafts and sunlight.
-
Check your thermometer often to make sure it is right.
-
Look at the fan and clean it so it works well.
-
Do not put too many eggs inside. Leave space for air to move.
-
Only open the lid when you need to. This keeps temperature and humidity steady.
Humidity control helps chicks stay healthy. Keep humidity between 40–50% for the first 18 days. Raise it to 65–70% for the last three days. If humidity is wrong, fix the water trays or add a sponge. Always write down your readings. Look at them and change your process if needed.
💡 Tip: If temperature or humidity changes fast, check your logbook. Find patterns and fix the problem. Use the record → review → adjust method for every batch.
Top-Bottom Differences
Sometimes, the top and bottom of your incubator have different temperatures. This can make fewer eggs hatch. The way your incubator is built changes how heat spreads. A small temperature range helps embryos grow better. If you see a difference, move eggs or use a fan to mix the air.
Embryos are sensitive to temperature changes, especially in the first week. Lower temperatures (97–98°F or 36–36.6°C) slow growth and lower hatch rates. Higher temperatures can hurt embryos. Always measure temperature at egg level. Use two thermometers to check. Write down your readings and move eggs if needed.
⚠️ Notice: Keep eggs at the same height. Do not put eggs near heating elements. Check your notes after each hatch and change your setup for better results.
Power Outage Solutions
Power outages can stop incubation. If the power goes out, act fast to protect your eggs. Keep the incubator closed to hold heat and humidity. Wrap towels around the incubator for extra warmth. If the outage lasts more than an hour, move eggs to a warm place (99–100°F or 37–38°C) if you can.
-
Check temperature and humidity when power comes back.
-
Write down any changes in your logbook.
-
Look at your notes and change your process for next time.
🛠️ Tip: Always have a backup plan for power loss. Use the record → review → adjust method to get better results.
Cleaning and Storage
Post-Hatch Cleaning
You must clean your incubator after each hatch. This keeps it safe for new eggs. First, unplug the incubator and let it cool down. Take out trays, mats, and any parts you can remove. Use warm soapy water and a soft cloth to wipe inside. Rinse with clean water and let everything dry all the way. If you see spills, use 70% rubbing alcohol to clean those spots. Clean the water tray every week with 70% alcohol. Fill it with distilled water after cleaning. This stops mold and bacteria from growing during incubation.
🧼 Tip: Write down your cleaning steps in your logbook. Check your notes before starting a new batch. Change your cleaning routine if you see problems with hatch rates.
Here is an easy cleaning schedule to follow:
|
Frequency |
Procedure |
|---|---|
|
Daily |
Wipe surfaces and clean spills with 70% ethanol or isopropanol. |
|
Weekly |
Empty and wash the water tray with 70% alcohol, then fill with clean distilled water. |
|
Monthly |
Wash the inside with soapy water and a soft cloth, then rinse with clean water. |
Maintenance and Storage
Doing regular maintenance helps your incubator work well every time. Check the fan, sensors, and turning motor before you use it. Make sure the power cord is not broken. Clean off dust or dirt as soon as you see it. Store your incubator in a dry, cool spot when you are not using it. Keep it away from sunlight and water. Cover it with a clean cloth to keep dust out.
-
Check all parts before you start each batch.
-
Store the incubator in a dry place at 55–80°F (13–27°C).
-
Keep it covered when you are not using it.
-
Write down any repairs or changes in your logbook.
⚠️ Notice: Always use the record → review → adjust method for cleaning and storage. Good records help you find problems early and keep your incubator ready for next time.
More Incubation Resources
You can find more ways to use your incubator. These resources give you easy tips and guides. They help you get better hatch results.
egg incubator
You can use a basic egg incubator at home or school. It works well for small batches. Set the temperature to 99.5°F (37.5°C). Keep humidity between 50% and 55%. Most incubators have a clear lid so you can see the eggs. Always write down your settings. Check your results and change your process for each batch. This helps you get more chicks over time.
Tip: Use two thermometers and two hygrometers. Check your incubator readings every day. Write down your numbers.
-
Pick an incubator with simple controls.
-
Clean the incubator after every hatch.
-
Store your incubator in a dry spot when not using it.
cabinet incubator
A cabinet incubator is good for lots of eggs. You can put eggs on different shelves. You control temperature and humidity for each shelf. This helps you hatch big batches and gives you more control. Leave space around the incubator for air to move. Always write down, check, and change your settings.
Notice: Do not crowd eggs in your cabinet incubator. Spread eggs out so air can move between them.
-
Check each shelf for the same temperature.
-
Use a fan to mix the air inside.
-
Raise humidity for the last three days.
incubation guides
Incubation guides show you how to set up your incubator step by step. You can find charts for air cell growth and candling. These guides help you know what happens at each stage. Follow the guide, write down what you do, check your notes, and change your process to get better results.
📝 Tip: Print a candling chart and keep it near your incubator. Mark each egg when you check it.
poultry incubator
A poultry incubator hatches chicken, duck, or quail eggs. You can use it for different birds by changing temperature and humidity. Always look at your incubator’s manual for the best settings. Write down your results for each batch and change your process if needed.
-
Set the incubator to 99.5°F (37.5°C) for chicken eggs.
-
Change humidity for duck or quail eggs when needed.
-
Check your hatch results and change your settings.
Notice: Every incubator is a little different. Always write down, check, and change your settings to get the best hatch rates.
-
First, make sure your incubator is flat and steady. Warm it up before you use it. Set the temperature and humidity to the right numbers.
-
Turn the eggs at the right times. Change the humidity if the air cell or weight is not right.
-
Check the numbers every day. Write down what you do to help more chicks hatch.
📝 Tip: Always write down, check, and change your steps for each group of eggs. This helps you get better at hatching. Have fun watching your chicks grow and be proud of your work!
FAQ
How often should you check temperature and humidity in your incubator?
You should check temperature and humidity at least twice a day. Write down each reading. If you see changes, review your notes and adjust your settings. This helps you keep conditions steady for your eggs.
📝 Tip: Use two thermometers and two hygrometers for more accurate results.
What is the best way to turn eggs in an automatic incubator?
Set your incubator to turn eggs every 1–2 hours (12–24 times a day). Make sure the turning angle is close to 80 degrees. Record your turning schedule and review it after each batch. Adjust if you notice uneven development.
Why do you need to candle eggs during incubation?
Candling lets you see embryo growth and air cell size. You can spot eggs that stopped developing. Candle on Day 7, Day 14, and Day 18. Record what you see. Adjust humidity if air cells look too big or too small.
💡 Notice: Always use the record → review → adjust method for candling.
What should you do if humidity is too high or too low?
If humidity is too high, open vents or reduce water surface area. If it is too low, add water or use a sponge. Check readings daily. Write down changes and review your notes. Adjust your process for better results.
-
High humidity: open vents, less water.
-
Low humidity: add water, use sponge.
How do you handle a power outage during incubation?
Keep the incubator closed to hold heat and humidity. Wrap towels around it for extra warmth. When power returns, check temperature and humidity. Record any changes. Review your notes and adjust your process for future batches.
⚠️ Tip: Always have a backup plan for power loss.


0 Comments