
Quick Take:
Pick a quiet room with steady temperature and humidity. Set your small egg incubator to the right settings. Turn eggs often and check humidity by watching weight loss or air cell size. Try not to open the lid much during lockdown for better results.
You can use an incubator at home, in class, or in an apartment. Many people say they hatch 50% to 80% of their eggs with careful setup. You can hatch chickens, special breeds, or learn how long eggs need to incubate. You can get better results by writing down, checking, and changing your hatching steps.
Key Takeaways
-
Pick a quiet room for your incubator. The room should not change much. This helps keep the temperature and humidity right for hatching.
-
Turn your eggs often and check humidity levels. Watching these things helps more eggs hatch.
-
Use a clear window to see the eggs grow. You do not need to open the incubator. This keeps the inside the same.
-
Write down your settings and what you see every day. Doing this helps you learn and get better results next time.
-
Clean your incubator well after each use. A clean space stops germs and helps eggs hatch healthy.
Small Egg Incubator Uses
Home and Classroom
You can use a small incubator at home or in class. It helps you learn about animal life cycles and how to care for animals. Families and teachers like these incubators because they fit on desks or tables. You can watch eggs grow and hatch in a small space. The clear window lets you see inside easily. This makes it simple to watch changes and share what you see with others.
Tip: Put your incubator on a strong table. Keep it away from sunlight and drafts. This helps keep the temperature and humidity steady.
Here is a table that shows why people choose small incubators for homes, classrooms, and apartments:
|
Feature |
Description |
|---|---|
|
Egg Type and Capacity |
Holds fewer eggs, good for small groups or lessons. |
|
Turning |
Turns eggs by itself, so you save time and work. |
|
Airflow |
Good airflow helps eggs grow well. |
|
Temperature Control |
Exact settings help you get more eggs to hatch. |
|
Humidity Control |
Built-in parts make it easy to keep humidity right. |
|
Ability to Observe |
Clear design lets you watch and learn. |
|
Cleaning Ease |
Easy cleaning keeps things safe and healthy. |
|
Cost |
Not expensive for families and schools. |
Beginners and Small Batches
If you are new to hatching, a small incubator is easy to use. You can start with a few eggs and learn each step. Many people hatch chicken, duck, quail, turkey, goose, and reptile eggs like snakes or turtles. You can write down your results, check what worked, and change your steps for next time.
-
Chicken eggs
-
Duck eggs
-
Quail eggs
-
Turkey eggs
-
Goose eggs
-
Reptile eggs (snakes, turtles)
Notice: Write down your settings and changes every day. This helps you learn and get better with each batch.
Viewing Window
A viewing window is very helpful in a small incubator. You can see eggs growing without opening the lid. This keeps the temperature and humidity the same inside. Families and classrooms like this because it is fun and helps you learn. You can watch the eggs change and talk about it with others.
|
Evidence Description |
Impact on User Experience and Hatch Monitoring |
|---|---|
|
Transparent window lets you watch eggs easily. |
Fun for kids and helps families learn, making it more interesting. |
|
You can check eggs without opening the incubator. |
This keeps the inside just right, so more eggs hatch. |
Temperature Stability
Eggs need the same temperature to hatch well. Most small incubators keep eggs between 99.5°F and 100.5°F. Try to keep the temperature the same for 21 days. If the temperature changes fast, fewer eggs will hatch. Automatic temperature control helps you not make mistakes. It also makes things easier for people who are new.
Air Circulation Type
Incubators use forced air or still air systems. Forced air incubators have a fan that spreads heat everywhere. This makes the inside the same temperature and helps more eggs hatch. Still air incubators do not have a fan. Warm air goes up, so some spots are cooler. You need to check and fix things more with still air. Forced air is easier for beginners, but some people like still air for special breeds.
Humidity Control
Humidity is important for healthy chicks. You can change humidity by adding water or using sponges. Some incubators change humidity by themselves. Others need you to add water or pads. You can use silica gel packs to soak up extra water. Always check humidity and write down your results. Look at your notes and change your steps for each group of eggs.
Egg Turning Method
Eggs must be turned many times each day. Some incubators turn eggs for you, which saves time. Turning eggs by hand lets you check them and add air. Both ways work, so pick what fits your day best. Write down when you turn eggs and see which way works better for you.
Cleaning and Noise
Clean your incubator before and after every hatch. Use a weak bleach mix or hydrogen peroxide. Take out all shells and trash right away. Let the incubator dry before you put it away. Check the fan and alarm to see if they are loud or safe, especially in classrooms or apartments. A clean incubator is quiet and keeps eggs safe.
Practical Tips for Small/Desktop Incubators:
Put your incubator on a flat table, away from drafts and sunlight.
Change humidity by adding water or using sponges.
Check the fan and alarm for noise and safety, especially in classrooms.
If the power goes out, cover the incubator and bring back humidity slowly.
Small incubators are good for small breeds, city homes, and showing how hatching works. You can write down, check, and change your steps to get more eggs to hatch.
Room Setup
Location Choice
Pick a good spot for your incubator. The right place helps keep temperature and humidity steady. This is important for healthy chicks. Choose a room that stays between 64°F and 68°F. Do not put the incubator near windows, air conditioners, or heaters. These things can change the temperature and humidity fast. Use a strong table that does not shake. Make sure the table can hold the incubator.
Tip Box: Room Setup Tips
Keep the incubator away from drafts and sunlight.
Use a flat, steady table.
Leave space around the incubator for air to move.
Leave space around the incubator so air can move. This helps heat spread out. If you use a small incubator in a classroom or apartment, check the room temperature every day. Write down any changes you see. Change your settings if you need to. This helps you learn what works best.
Here is a table with the best room conditions for your incubator:
|
Condition |
Optimal Level |
|---|---|
|
Room Temperature |
64°F to 68°F (18°C to 20°C) |
|
Incubator Temperature |
99.5°F to 99.7°F (37.5°C to 37.6°C) |
|
Humidity (Days 1-18) |
About 45% |
|
Humidity (Days 19+) |
Increase for hatching |
Power Backup
Sometimes the power goes out. You need a plan to keep your incubator working. Use a battery backup or a small generator. Some incubators can use a 12V battery for up to 72 hours. Equipment cabinets with vents help batteries stay cool. Battery-only cabinets keep backup power safe. Backup generators can switch on by themselves when needed.
Here is a table with common backup solutions:
|
Backup Solution Type |
Description |
|---|---|
|
Battery-exclusive cabinets |
Safe backup power for incubators |
|
Active equipment cabinets |
Vents for batteries, keeps air moving |
|
Backup generators with auto switches |
Switch to backup power during outages |
|
Dual power system |
Use a 12V battery for up to 72 hours |
Check your backup system often. Write down when you test it. If the power goes out, cover the incubator with a towel to keep it warm. Bring humidity back slowly when the power comes back. This careful way helps protect your eggs and get better results.
Egg Storage and Preparation
Pre-Incubation Storage
Proper storage of eggs before incubation helps you achieve better hatch rates. You should store eggs for no more than 7 days at 53–59°F (12–15°C) with 75–85% humidity. Always place eggs with the pointy end down. This position keeps the yolk centered and helps the embryo develop well. Turn the eggs once a day to prevent the yolk from sticking to the shell. Avoid washing eggs unless absolutely necessary. If you must clean them, use warm water and handle them gently. Discard any eggs that are cracked, misshapen, or heavily soiled.
Tip:
Keep eggs in a clean, cool area away from direct sunlight. Write down the date you collect each egg and check them daily for cracks or dirt.
-
Store eggs pointy-end down
-
Keep temperature at 53–59°F (12–15°C)
-
Maintain humidity at 75–85%
-
Turn eggs daily
-
Do not store for more than 7 days
Warming Eggs
Before you place eggs in the incubator, let them warm up slowly to room temperature. This step prevents temperature shock and helps all embryos start developing at the same time. Gradual warming also reduces early embryo loss. If you stored eggs for several days, warming them for 6–8 hours at 68–72°F (20–22°C) works well. Avoid placing cold eggs directly into a warm incubator.
Notice:
Gradual warming prevents condensation on the eggs and supports even development. Record the warming time and temperature for each batch.
Marking Eggs
Marking eggs helps you track turning and identify each egg during incubation. Use a soft lead pencil to write a number or letter on each egg. Never use markers, ink pens, or paint, as these can harm the shell and the embryo inside. For manual turning, mark an "X" on one side and an "O" on the other. This simple system lets you see at a glance if you have turned all the eggs.
-
Use a pencil for marking
-
Write a number or code for each egg
-
Mark "X" and "O" on opposite sides for turning
Tip:
Keep a notebook to record each egg’s number, collection date, and any notes about its condition. This habit helps you review and adjust your process for better results next time.
Setting Up Your Incubator
Cleaning and Sterilizing
Always clean your incubator before you use it. This stops bacteria and mold from hurting your eggs. First, take out all trays and loose parts. Wash them with warm, soapy water. Rinse everything well and let it dry.
Pick a disinfectant that is safe for your incubator. Here is a table with common disinfectants:
|
Disinfectant Type |
Effectiveness in Organic Matter |
Toxicity Level |
Residual Activity |
|---|---|---|---|
|
Quaternary Ammonia Compounds |
Good |
Low |
Moderate |
|
Multiple Phenolics |
Good |
Moderate |
Good |
|
Iodophors |
Good |
Moderate |
Low |
Quaternary ammonia compounds are safe and work well. Use them on plastic and metal parts. Always read the label and follow the directions. Let the incubator air dry after cleaning. Do not use strong bleach or harsh chemicals. These can hurt your incubator and chicks.
Tip:
Clean your incubator after every hatch. This keeps your setup safe for new eggs.
Level Placement
Put your incubator on a flat, strong table. A level spot helps eggs grow the same way. Use a table or shelf that does not shake. Do not put the incubator near windows or heaters. These places can change temperature and humidity fast.
-
Check if your incubator is flat with a bubble level or ball.
-
Leave space around it so air can move.
-
Keep it away from sunlight and drafts.
A steady setup keeps the inside conditions right. This helps embryos grow healthy and makes checking eggs easier.
Notice:
Write down where you put your incubator in your notebook. If you move it, check if it is still level.
Preheating and Calibration
Turn on your incubator before adding eggs. Let it run empty for 2–4 hours. This gets the temperature and humidity ready. Preheating helps you find problems before you add eggs.
Check if the temperature and humidity sensors work well. Follow these steps to set up your incubator:
-
Fill one water channel and run the incubator for a few hours. Wait for the temperature and humidity to stay the same.
-
Take a humidity reading. If it is too low, fill another channel and check again.
-
Use another hygrometer inside the incubator to check the controller’s reading.
-
If humidity is too high, take out water from some channels.
For best results, use a second thermometer you trust. Put it at egg level. This shows the real temperature where eggs sit.
Always check your readings before you start. Write down the temperature and humidity in your notebook. If your incubator’s display is different from your second thermometer or hygrometer, change the settings.
Tip:
Record and check your setup for each batch. This helps you get better results next time.
Incubator Setup Steps
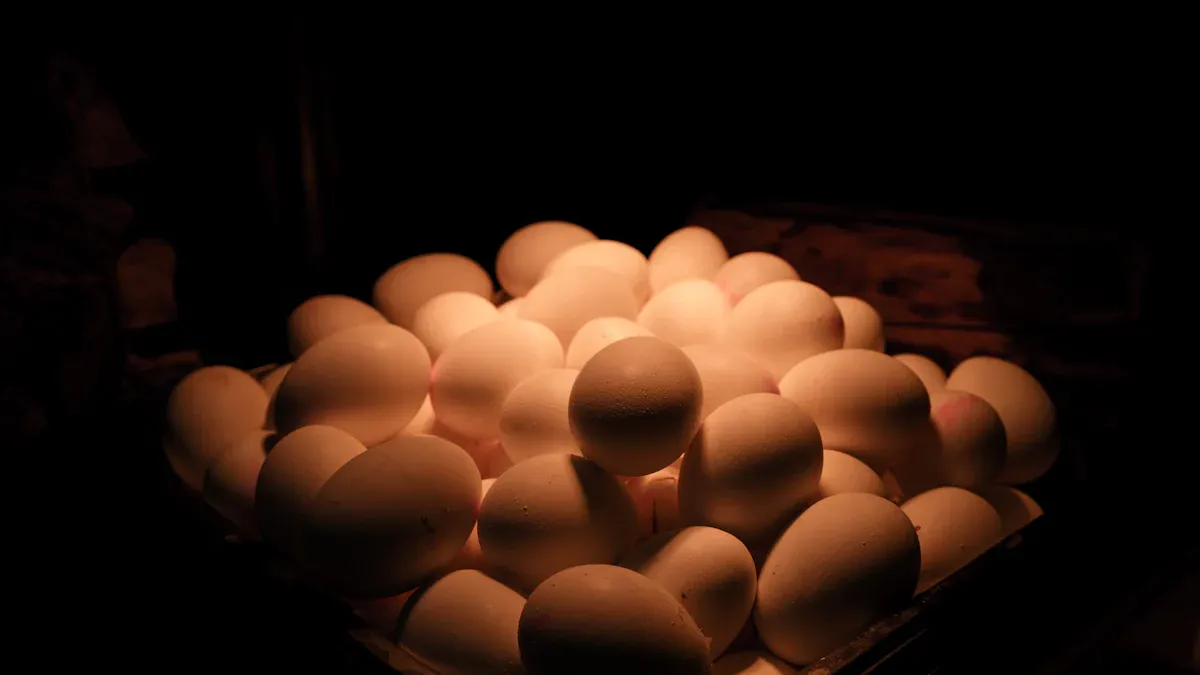
Loading Eggs
You must be careful when putting eggs in your incubator. This helps eggs hatch well. Here are the steps you should follow:
-
Turn on your incubator a day before adding eggs. This keeps the temperature and humidity steady.
-
Let your eggs warm up to room temperature first. Cold eggs can get wet inside and hurt the embryo.
-
Put each egg in with the pointed end facing down. This helps the embryo grow the right way.
-
Spread out the eggs so air can move around them. Good air flow keeps heat and humidity even.
-
Use a pencil to mark eggs if you turn them by hand. This helps you remember which eggs need turning.
-
Check your thermometer and hygrometer to make sure they are right. Good readings help you keep the best environment.
Tip:
Always write down the date and time when you set your eggs. Record the temperature and humidity too. This helps you look back and make changes for better hatching.
Egg Placement
Where you put eggs in the incubator matters for air flow and chick health. You want every egg to have a good chance to hatch. Look at this table to see how egg position can change hatching:
|
Egg Position |
Hatching Time |
Chick Quality |
|---|---|---|
|
Air Cell Up |
1–2 hours later |
Slightly lower, navel issues |
|
Air Cell Down |
Not specified |
More poor-quality chicks |
|
Horizontal |
1–2 hours earlier |
Not specified |
Put eggs with the pointed end down or lay them sideways. Both ways work, but sideways eggs may hatch a little sooner. Do not put big eggs far from the middle. This can make hatching worse and chicks weaker.
-
Keep eggs that are the same size together for even heating.
-
Do not pack eggs too close. Leave space for air to move.
-
Make sure no egg touches the heater part.
Notice:
Write down where you put each egg in your notebook. If you have problems, you can check your notes and try a new way next time.
Ventilation Settings
Letting in fresh air is important for hatching eggs. Your incubator needs to bring in oxygen and let out carbon dioxide. As eggs grow, they need more oxygen. You should open the vents more as time goes on.
Start with small vent openings in the first week. This keeps humidity steady. Open the vents a bit more each week as the eggs grow. In the last three days, open all the vents. This gives enough air for hatching and lets out extra moisture.
Tip:
Check the vents every day. If you see water drops or smell something strong, open the vents more. Always keep a balance between air and humidity, especially at the end.
Good ventilation helps chicks grow strong. It also helps you control heat and humidity in the incubator. Write down your vent settings for each group of eggs. After each hatch, look at your notes and change your steps if needed.
Baseline Settings
Temperature Range
You need to set the right incubation temperature for each type of egg. Small incubators work best when you keep a constant temperature. Most chicken eggs hatch well at 99°F (37.2°C) in forced air incubators or 101°F (38.3°C) in still air models. Quail eggs do best at 99.5–100°F (37.5–37.8°C). Duck eggs need 99.5°F (37.5°C). Always use a reliable thermometer at egg level to check the temperature. Write down your readings every day. If you see changes, adjust the incubator to keep a steady temperature.
Tip:
Keep the temperature steady for the whole incubation period. Sudden changes can lower hatch rates.
Here is a quick guide for incubation temperature:
|
Egg Type |
Incubation Temperature (°F) |
Incubation Temperature (°C) |
|---|---|---|
|
Chicken |
99 (forced air) / 101 (still air) |
37.2 / 38.3 |
|
Quail |
99.5–100 |
37.5–37.8 |
|
Duck |
99.5 |
37.5 |
Humidity Range
You must control incubation humidity for healthy chicks. The correct incubation humidity helps eggs lose the right amount of water. For chicken and quail eggs, keep humidity at 45–50% relative humidity during the first 18 days. Duck eggs need 50–60%. In the last three days, raise humidity to 65–75% for all types. This higher level helps chicks hatch without sticking to the shell. Always use a hygrometer to check the humidity. Write down your daily readings and look for patterns.
-
Chicken and quail: 45–50% humidity (first 18 days)
-
Duck: 50–60% humidity (first 25 days)
-
Lockdown (last 3 days): 65–75% humidity for all eggs
Notice:
The ideal humidity level may change with your room’s air. If you see too much or too little weight loss, adjust the humidity. The correct incubation humidity helps prevent sticky chicks and weak hatches.
Adjusting for Model
Each incubator model may need small changes to the setting. Some models hold heat better or lose water faster. You should check the manual for your incubator and compare your results. For example, in winter, quail eggs may need a lower temperature of 98°F (36.7°C). Some incubators need more water to keep the correct incubation humidity. Others need less. Always record your settings and results. Review your notes after each hatch and adjust for next time.
Tip:
If you want the best results, focus on record, review, and adjust. This method helps you find the right temperature and humidity for your incubator and your eggs.
Egg Turning
Manual vs. Automatic
You can choose between manual and automatic methods for turning the eggs in your incubator. If you turn eggs by hand, you need to flip each one several times a day. This lets you check the eggs and make sure they are clean and safe. Automatic turning uses a built-in tray or motor. The incubator moves the eggs for you, keeping the process steady and saving you time. Both methods help keep the embryo from sticking to the shell and support healthy chick growth.
Tip:
If you use manual turning, mark each egg with an "X" and "O" using a pencil. This helps you remember which eggs you have turned.
Turning Schedule
Turning eggs during incubation is very important for chick development. You should turn your eggs at least three times a day. Five times is even better, and some people turn them every hour. Always turn the eggs an odd number of times each day. This keeps the eggs from resting on the same side overnight. The first week is the most important for turning, especially the first three days. Good turning helps the embryo grow strong and keeps the yolk from sticking.
Here is a simple schedule for turning eggs:
-
Turn your eggs three to five times daily.
-
Use an odd number of turns each day.
-
Record each turning in your notebook.
Keeping a record helps you review and adjust your process for better results. Watch the temperature inside your incubator each time you open it. Quick turning keeps the temperature steady and protects the eggs.
Stopping Before Hatch
You need to stop turning the eggs before they hatch. For chicken eggs, stop on Day 19 of incubation, which is about two days before hatching. If you keep turning eggs during incubation after this point, chicks may get hurt or end up in the wrong position. Stopping turning lets the chicks settle and get ready to hatch. The last three days are called "lockdown." During lockdown, keep the temperature and humidity steady and avoid opening the incubator lid.
-
Stop turning eggs two days before hatch.
-
For chicken eggs, stop on Day 19.
-
Do not turn eggs during hatching to prevent injuries.
Notice:
Always write down when you stop turning the eggs. Review your notes after each hatch and adjust your schedule if needed.
Incubation Monitoring
Daily Checks
You need to check your incubator every day to keep your eggs safe and healthy. Start by looking at the temperature. Use a reliable thermometer at egg level. Make sure the reading stays steady, usually around 99.5°F (37.5°C) for most eggs. If you see changes, adjust the settings right away. Check the seals and make sure the lid fits tight. This keeps the air inside just right for incubation.
-
Look at the [temperature and humidity readings](https://www.eggbloom.com/How-to-Manage-Incubator-Temperature-and-Humidity-for-Successful-Hatching) each morning and evening.
-
Check the eggs for any signs of cracks or leaks.
-
Watch for any odd smells, which can mean a bad egg.
-
Make sure the incubator fan works and air moves well.
Tip:
Write down your daily checks in a notebook. This helps you spot patterns and make better choices for your next batch.
Water and Ventilation
Water and air control play a big part in hatching success. Eggs lose water through their shells during incubation. You need to keep the humidity between 35–45% for the first 18 days. Add water to the trays if the air feels dry. If you see too much moisture, use less water and open the vents a bit more. In the last three days, raise the humidity to 65–70% to help chicks hatch.
-
High humidity can cause chicks to drown or have small air cells.
-
Low humidity can make chicks shrink-wrapped and unable to hatch.
-
Open vents slowly to let in fresh air and keep oxygen levels up.
-
Adjust water levels to match the needs of your eggs and room.
Notice:
Always check both water and air flow. Good balance helps your eggs develop strong and healthy chicks.
Record Keeping
Keeping good records helps you improve your results with each incubation. Start by writing down the date you set your eggs, the type of eggs, and the settings you use. Each day, note the temperature, humidity, and any changes you make. When chicks hatch, record the date and number of eggs that hatched.
-
Create a chart or use a notebook for each batch.
-
Track the species, breed, and start date of incubation.
-
Mark down daily checks, water changes, and vent settings.
-
After hatching, count the chicks and note any problems.
Tip:
Review your notes after each hatch. Adjust your process based on what you learn. This helps you get better results with your incubator over time.
Candling and Adjustment

Candling Schedule
You need to candle your eggs during incubation to check their progress. Candling means shining a bright light through each egg to see what is happening inside. You should do this at least three times: once around Day 7, again at Day 14, and a final time at Day 18. These days work well for chicken eggs. For other types, check the recommended days in your guide. Candling helps you spot healthy embryos and see if the air cell is growing as it should.
Tip:
Candle in a dark room. Hold the egg gently and use a small flashlight or a special candling lamp. Write down what you see each time.
Air Cell and Weight Loss
During incubation, eggs lose water. The air cell inside each egg gets bigger as water leaves through the shell. You can check the size of the air cell when you candle. If the air cell looks too small, the humidity in your incubator may be too high. If it looks too large, the humidity may be too low. You want the air cell to grow slowly and match the right curve for your egg type. Some people weigh their eggs every week. A good target is about 13% weight loss by the end of incubation for chicken eggs.
-
[Check air cell size](https://www.eggbloom.com/How-to-Candle-Chicken-Eggs-During-Incubation-A-Complete-Guide-for-Better-Hatch-Rates) at each candling.
-
Adjust humidity in your incubator if needed.
-
Record air cell growth and weight loss in your notebook.
Removing Non-viable Eggs
Not all eggs will develop during incubation. Some may stop growing or show no signs of life. When you candle, look for clear eggs, blood rings, or no movement. These eggs will not hatch. Remove non-viable eggs right away to keep your incubator clean and safe for the healthy ones. This step helps prevent bad smells and stops bacteria from spreading.
Notice:
Always wash your hands before and after handling eggs. Write down which eggs you remove and why. This record helps you review and adjust your process for better results next time.
Lockdown and Hatch
Final Three Days
You have reached the last three days of incubation. This stage is called "lockdown." You should stop turning the eggs now. Chicks need time to settle and get ready to hatch. Place the eggs flat or with the pointed end down. Make sure the incubator stays at 99.5°F (37.5°C). Check the temperature at egg level. Write down your readings each day. Avoid moving the eggs during these days. Chicks start to position themselves for hatching.
Tip:
Record the date you begin lockdown. Review your notes after each batch. Adjust your process for better results next time.
Humidity Increase
During lockdown, you must raise the humidity in your incubator. Higher humidity helps chicks break out of their shells. Fill the water trays or add a damp sponge. Aim for 65–75% humidity. Use a hygrometer to check the level each day. If you see the humidity drop, add more water. If it gets too high, open the vents a little. Write down the humidity readings every day. This helps you learn what works best for your eggs.
-
Fill water trays to increase humidity.
-
Check humidity with a hygrometer.
-
Adjust water or vents as needed.
-
Record humidity levels each day.
Lid Opening Minimization
You should keep the incubator closed during the last three days. Opening the lid can lower humidity and temperature. Chicks need steady conditions to hatch well. Only open the lid if you must remove broken eggs or fix a problem. Each time you open the incubator, write down the reason and the time. Review these notes after hatching eggs. Adjust your steps for future batches.
Notice:
Less lid opening means better humidity control. Strong humidity helps chicks hatch without sticking to the shell.
Lockdown is a key part of incubation. You can improve your hatch rates by recording, reviewing, and adjusting your process for each batch of eggs.
Troubleshooting
Temperature Fluctuations
You may notice the temperature in your incubator changes more than it should. This can happen if the room gets too hot or cold. Place your incubator away from windows, heaters, or air conditioners. Always check the temperature at egg level with a reliable thermometer. If you see a drop or spike, adjust the settings right away. Write down every change in your notebook. This habit helps you spot patterns and improve your process. For more tips, check an incubation troubleshooting guide.
Tip:
Keep the room between 64°F and 68°F (18°C to 20°C) for best results.
Humidity Issues
Humidity plays a big role in hatching. If the humidity is too low, chicks may get stuck in the shell. If it is too high, chicks may drown before hatching. Use a hygrometer to check humidity every day. Add water to the tray or use a damp sponge to raise humidity. Open vents or remove water to lower it. During the last three days, aim for 65–75% humidity. Always record your readings and any changes. Review your notes after each batch. This step is key in any incubation troubleshooting guide.
-
Check humidity twice a day.
-
Adjust water and vents as needed.
-
Record all changes in your notebook.
Noise and Overheating
Sometimes you may hear strange noises from your incubator. A loud fan or alarm can mean a problem. Check for dust or loose parts. Clean the fan and make sure nothing blocks the air flow. Overheating can harm your eggs. If the incubator feels hot, check the temperature setting and move it to a cooler spot. Always write down what you find and how you fix it.
Notice:
Regular cleaning and checks help prevent noise and overheating.
Sticky Chicks
Sticky chicks happen when humidity is too low or too high during hatching. Chicks may stick to the shell or have trouble getting out. To help, keep humidity at 65–75% in the last three days. Avoid opening the lid unless needed. If you see sticky chicks, review your records and adjust humidity next time. Each batch teaches you something new.
Incubator Cleaning
Post-Hatch Cleaning
After your chicks hatch, you need to clean your incubator before you use it again. Take out all the eggshells and any leftover eggs. Remove the trays and soak them in warm, soapy water. Scrub gently to get rid of any dirt or dried material. Rinse each part well and let everything air dry. Use a safe disinfectant, such as a quaternary ammonia solution, to wipe down the inside of the incubator. Make sure you reach all corners and the fan area. Let the incubator dry with the lid open for several hours.
Tip:
Always wear gloves when cleaning. This keeps your hands safe and stops germs from spreading to new eggs.
Write down your cleaning steps in your notebook. If you see any mold or bad smells, clean those spots again. A clean incubator helps protect your next batch of eggs.
Storage Tips
When you finish cleaning, store your incubator in a dry, cool place. Keep it away from direct sunlight and damp areas. Place all small parts, like trays and water channels, inside the incubator so you do not lose them. Wrap the power cord neatly and check for any damage before you put it away.
-
Store the incubator at 55–77°F (13–25°C).
-
Keep eggs and incubator parts separate to avoid contamination.
-
Check your incubator before each use for dust or insects.
Notice:
Record the date you store your incubator and any repairs you make. Review your notes before you set new eggs. Adjust your cleaning routine if you find any problems.
A good storage plan keeps your incubator ready for the next group of eggs. This habit helps you get better results each time you hatch.
Incubation Guides and Links
Egg Incubator Options
You have many choices when picking an incubator for your eggs. Some models work best for small batches, while others fit larger groups. Look for features like a clear viewing window, steady temperature control, and easy cleaning. If you want to hatch eggs in a city apartment or classroom, choose a compact model that fits your space. Always check if the incubator matches the type of eggs you plan to hatch.
Tip:
Write down what you need before you shop. Compare different models and record your results after each hatch.
Desktop Egg Incubator
A desktop incubator fits well on a table or shelf. You can use it at home, in a classroom, or even in a small office. Most desktop models hold 7 to 24 eggs. They often have automatic turning and digital displays. You can watch the eggs through a clear window. This makes it easy to learn and share the hatching process with others.
-
Fits small spaces
-
Easy to move and clean
-
Good for beginners and small batches
Incubation Guides
You can find many guides to help you with each step of incubation. These guides show you how to set up your incubator, check egg development, and adjust settings. Look for guides with clear pictures and step-by-step tips. Use a notebook to record your settings and changes. Review your notes after each hatch to see what works best.
Notice:
No guide can promise perfect results. Always record, review, and adjust your process for better hatching.
Poultry Incubator
A poultry incubator works well for chicken, duck, quail, and other bird eggs. You can choose from manual or automatic turning. Some models let you control humidity with water trays or pads. Make sure you set the temperature to 99.5°F (37.5°C) for most poultry eggs. Always check the manual for your model.
Cabinet Incubator
If you want to hatch many eggs at once, a cabinet incubator gives you more space. These models often have several trays and strong air flow. You can use them for larger batches or for special breeds. Cabinet incubators work well in farm settings or for science projects. Always keep records of your settings and results to improve your hatch rates.
You can get good hatching results at home if you set up your incubator the right way. Check your incubator every day and make changes when needed. Always write down your temperature and humidity settings in °F and %RH. After each batch, look at your notes to see what worked. Change your steps as you learn more.
-
Learn more about egg incubator, desktop egg incubator, incubation guides, poultry incubator, and cabinet incubator to understand better.
Tip:
Every batch helps you learn something new. Keep practicing and get better at using your incubator.
FAQ
Why should you measure temperature at the top of eggs in still-air incubators?
You need to check temperature at the top of the eggs because warm air rises in still-air incubators. This spot shows the true heat the embryos feel. Use a thermometer at egg level for best results.
Tip:
Always record your readings and adjust settings if you see changes.
How can you stabilize humidity in a small incubator?
You can add water trays or damp sponges to keep humidity steady. Place the incubator away from drafts and sunlight. Check humidity twice daily with a hygrometer. Write down your results and adjust water as needed.
-
Keep water trays filled
-
Monitor humidity levels
How do you match automatic and manual egg turning frequency?
You should turn eggs three to five times daily. If you use an automatic turner, set it to match this schedule. For manual turning, mark eggs and flip them at regular times. Record each turn in your notebook.
Notice:
Odd numbers of turns help embryos develop evenly.
How do you handle noise or heat safely in desktop incubators?
You need to clean the fan and vents often. Place the incubator on a stable surface away from heat sources. If you hear loud noises, check for loose parts. If the incubator feels hot, lower the room temperature.
-
Clean fan and vents
-
Check for loose parts
When should you upgrade to a cabinet incubator?
You should consider a cabinet incubator if you want to hatch more than 24 eggs at once or need stronger airflow. Cabinet models work well for larger batches and specialty breeds. Record your results and review your needs before upgrading.
Tip:
Review your notes after each hatch to decide if you need more space.


0 Comments