
You want an egg incubator that is safe and clean for your family. The best kind has a clear lid, automatic turning, and digital controls. A compact desktop egg incubator with these features helps keep your kids safe and your home tidy. Hatching becomes a fun, hands-on way to learn instead of a messy chore. With the right setup, you also lower the chance of germs and clutter in your home. This guide uses chicken eggs as the default; timing and humidity targets for quail, duck, or other poultry may differ and should be adjusted per your equipment manual.
Key Takeaways
-
Pick an egg incubator with a clear lid and automatic turning so you can watch eggs hatch while the inside stays stable and protected.
-
Use an egg incubator as a learning tool for kids. Show them biology, life cycles, and observation skills in a simple, hands-on way.
-
Keep safety first by supervising children and keeping everything clean. Always wash hands after touching eggs or chicks to help stop illness from spreading.
-
Choose a separate spot for your incubator, away from food and meal areas, and keep the room between 68 and 75°F.
-
Clean and disinfect the incubator before and after each hatch to reduce germs and protect your family’s health.
-
Calibrate your thermometer and hygrometer before the first run, then watch settings often. Aim for about 99.5–100°F in forced-air units with 45–55% RH during days 1–18, then 65–70% RH for the last three days (“lockdown”).
-
Use drawings, charts, and simple notes to track what happens each day so kids stay engaged and remember what they learn.
-
Look for budget-friendly incubators that still offer key features, are easy to clean, save energy, and are safe for family use.
Why Egg Incubator Projects for Families
Learning Value for Kids
An egg incubator project can bring science to life for your family. When you use one at home, your kids see real changes each day as chicks grow and hatch. This kind of hands-on project teaches biology and life cycles in a way textbooks cannot match.
Here is a table that lists the main learning benefits of using an egg incubator for family projects:
|
Benefit |
Description |
|---|---|
|
Experiential Learning |
Lets your child take part in real science activities, not just read about them. |
|
Understanding Life Cycles |
Makes animal growth and development easy to see and remember. |
|
Cross-curricular Opportunities |
Connects science, math, and art through measuring, charting, and drawing embryos. |
You can ask your child to keep a daily journal or sketch what they see. This builds observation skills, writing practice, and memory. Many families find these projects teach more than science: kids use math to count days and track temperatures, and art to show different stages of hatching.
Tip: Have your child guess what will happen each day. This keeps them interested and helps them think like a scientist.
Decision Table: Is an Egg Incubator Project Right for Your Family?
|
Question |
Yes |
No |
|---|---|---|
|
Do you have a safe, clean space away from food? |
||
|
Can you supervise children during the project? |
||
|
Are all family members healthy (not high-risk)? |
||
|
Can you follow cleaning and handwashing steps? |
If you say "Yes" to most questions, an egg incubator project can be safe, fun, and educational.
Safety vs. Traditional Chick Raising
Using an egg incubator lets you control the hatching space more than a broody hen can. This can be safer than using a mother hen, but you still need to be careful. In the traditional way, a mother hen warms, turns, and protects her eggs. Without her, chicks depend on you and your equipment for all of that support.
Here are some key safety points to remember:
-
Kids can get sick from Salmonella when touching eggs or chicks and then touching their mouth or food.
-
Chicks without a mother hen may die more often or get sick if temperatures are wrong.
-
Many chicks hatched at home or school do not live long if they do not receive good daily care.
-
Young children have a higher risk of getting sick, so adults must supervise and keep things very clean.
Always wash hands after touching the incubator, eggs, or chicks. Keep the incubator and any tools away from food, dishes, and cooking areas. Do not keep chicks indoors longer than needed. Move them to a brooder or outside space as soon as it is safe.
Note: Kids under five, pregnant women, older adults, and people with weak immune systems should not handle eggs or chicks directly.
If you follow these tips, your egg incubator project can be both safe and rewarding for your family.
Health and Safety Risks at Home
Who Should Avoid Indoor Hatching
Some people should not take part in indoor egg hatching. Health experts say certain groups can get sick more easily from germs like Salmonella. These people are:
-
Children younger than 5 years old
-
Adults older than 65 years old
-
Pregnant women
-
People with weak immune systems
If your family includes anyone in these groups, you should avoid indoor hatching or use extra care. Eggs and chicks can carry germs even when they look clean. Keep high-risk family members away from the incubator and chicks.
Tip: Always supervise kids when they are near the incubator or chicks. Never let young children touch eggs, chicks, or incubator parts without an adult present.
Family Hygiene and Allergy Concerns
Clean hands and tools are essential for a safe project. Wash hands with soap and water for at least 20 seconds after touching eggs, chicks, or the incubator. Do not eat, drink, or prepare food near the incubator or brooder. Keep all tools out of the kitchen and dining room.
Sanitation matters. Clean the incubator before and after each hatch. A common example is a weak bleach mix (about 1 teaspoon bleach per gallon of water) to wipe trays, racks, and surfaces—always follow the product label for exact dilution and contact time, and never mix different cleaning chemicals. Unplug the incubator before cleaning, and let all parts dry completely before plugging it in again.
Some kids may have allergies to egg protein or chick dander. You can lower allergy risks by doing these things:
|
Allergy Risk |
Mitigation Strategy |
|---|---|
|
Egg protein on incubator equipment |
Wash hands after touching the incubator, trays, or tools. |
|
Handling newly hatched chicks |
Watch allergic kids and allow them to handle only fully dry chicks. |
|
Skin reactions from touching chicks |
Have kids wear gloves and wash hands right after touching chicks. |
|
Egg dander in the air |
Talk to parents or a doctor about allergies before starting the project. |
|
Handling chicks may expose to egg protein |
Use disposable gloves for kids with known egg allergies. |
Note: If your child has an egg allergy, talk to a doctor before you start an egg incubator project.
Limiting Chick Time Indoors
Chicks should not stay inside your house for long. They can spread germs and make cleaning harder. Move chicks to an outdoor brooder or a separate, easy-to-clean indoor area within one day after hatching. Place waterproof mats or trays under the incubator to catch spills and shell pieces.
Do these things to keep your home cleaner and safer:
-
Put the incubator in a room with steady temperature (68–75°F) and good air, away from direct sun and drafts.
-
Keep the incubator on a small table or shelf with a waterproof mat underneath.
-
Never place the incubator in the kitchen, dining room, or near food storage.
-
Clean and disinfect all parts outside or in a separate cleaning area.
-
Watch kids and make sure they wash their hands after every contact.
Decision Table: Is Your Home Ready for Indoor Egg Incubation?
|
Step |
Yes |
No |
|---|---|---|
|
Is there a separate room (not kitchen/dining) for the incubator? |
||
|
Can you keep the room at 68–75°F with good airflow? |
||
|
Are all family members free from high-risk health conditions? |
||
|
Can you clean and disinfect equipment outdoors or in a separate area? |
||
|
Will you supervise children and enforce handwashing? |
||
|
Can you move chicks to an outdoor brooder within 24 hours? |
If you say "Yes" to most, your home is ready for a safe and clean egg incubator project.
🐣 Remember: Good hygiene and careful supervision keep your family safe and make your project fun.
Best Egg Incubator Features for Families
Transparent Lid and Auto Turning
A transparent lid lets your family watch eggs without opening the incubator. You and your kids can see every step as chicks grow and hatch, while temperature and humidity stay more stable. Many modern units, such as a compact digital automatic egg incubator, combine a clear viewing lid with safe, enclosed heating and turning.
Automatic turning is essential for good hatch rates. Eggs must turn several times each day so the embryo does not stick to the shell. An auto-turner handles this job for you, which means fewer chances to introduce germs with your hands and fewer sudden temperature changes. This helps keep kids safe, improves hatch results, and makes the project easier to manage.
|
Feature |
Benefit |
|---|---|
|
Transparent Lid |
Lets you observe eggs without opening the incubator, helping keep temperature steady. |
|
Auto-Turning |
Ensures eggs turn regularly, supports even development, and reduces handling. |
|
Educational Value |
Allows hands-on learning, observation, and science journaling for kids. |
Tip: Pick an egg incubator with a transparent lid and automatic turning. These features help you hatch more eggs while keeping the project safe and simple.
Step 1: Check for Observation and Safety Features
-
Make sure the lid is clear and easy to see through.
-
Check that the incubator turns eggs automatically.
-
Confirm that it can keep temperature and humidity steady.
Decision Table: Does Your Incubator Meet Observation and Safety Needs?
|
Feature |
Yes |
No |
|---|---|---|
|
Transparent lid |
||
|
Automatic turning |
||
|
Stable temperature |
||
|
Reliable humidity |
||
|
Easy for kids to observe |
If you say "Yes" to most, your incubator is safe and well-suited for family learning.
Digital Controls and Alarms
Digital controls make it easy to set and read temperature and humidity. You simply use buttons or a small screen to adjust settings. Alarms can beep if something goes wrong, like if temperature or humidity falls outside the right range. These features help you keep eggs safe and support steady chick growth.
Some incubators include LED candlers so you can check development without fully opening the lid. Others even connect to your phone, so you can monitor and adjust settings from another room. These options are especially helpful for busy families who still want reliable results.
|
Feature |
Benefit |
|---|---|
|
Digital Thermometer |
Supports accurate temperature control and easy monitoring. |
|
Humidity Reader |
Provides reliable humidity readings for consistent hatching conditions. |
|
Touchscreen Controls |
Simple to adjust, user-friendly for adults and supervised kids. |
|
Built-in LED Candler |
Lets you check embryos without opening the incubator fully. |
|
Smartphone Connectivity |
Allows monitoring and control from anywhere in the house. |
|
Alarms |
Warn you about sudden changes so you can fix problems quickly. |
Note: Digital controls and alarms help you keep settings on track and make hatching easier and more reliable.
Step 2: Evaluate Digital and Remote Features
-
Look for a clear digital thermometer and humidity reader.
-
Check for alarms and, if helpful, remote monitoring options.
-
Make sure the controls are simple to use and support humidity adjustment.
Decision Table: Does Your Incubator Offer Reliable Digital Controls?
|
Feature |
Yes |
No |
|---|---|---|
|
Digital temperature control |
||
|
Automatic humidity control |
||
|
Alarms for safety |
||
|
Remote monitoring |
||
|
LED candler |
If you say "Yes" to most, your incubator is easy to use and works well for families.
Easy Cleaning and Leak-Proof Design
You need an incubator that is simple to clean and does not leak. Removable trays and racks make cleaning faster and safer. You can take them out and wash them outside or in a separate area. Use a mild detergent followed by a bleach mix to clean everything. This helps control germs and odors.
A leak-proof incubator keeps water and egg mess inside the unit. This helps prevent spills on floors and furniture and keeps your home cleaner. Energy-saving models use less power and save money. Many small incubators use about 40–100 watts, which is reasonable for families and first-time projects.
|
Specification |
Description |
|---|---|
|
Removable Trays |
Easy to clean, support reliable hygiene and simple maintenance. |
|
Leak-Proof Design |
Prevents spills and protects surrounding surfaces. |
|
Power Consumption |
Compact starter models often use around 0.3 kWh/day, or about $1 for a 21-day hatch. |
|
Cleaning Protocol |
Clean before and after each incubation, then disinfect all parts. |
|
Outdoor Cleaning |
Wash trays and racks outside or in a separate cleaning area. |
Tip: Choose an incubator with removable trays and a leak-proof design. This makes cleaning easier and helps keep your home safe and tidy.
Step 3: Assess Cleaning and Energy Features
-
Check if trays and racks can be removed easily.
-
Make sure the incubator is designed not to leak.
-
Look at how much power it uses.
-
Follow cleaning steps for good hygiene after every hatch.
Decision Table: Is Your Incubator Easy to Clean and Maintain?
|
Feature |
Yes |
No |
|---|---|---|
|
Removable trays/racks |
||
|
Leak-proof design |
||
|
Energy-efficient |
||
|
Supports outdoor cleaning |
||
|
Reliable cleaning protocol |
If you say "Yes" to most, your incubator is easy to clean, saves energy, and works well for family use.
Summary Table: Essential Features for Family Egg Incubators
|
Feature |
Why It Matters |
|---|---|
|
Transparent lid |
Supports observation, temperature stability, and education. |
|
Automatic turning mechanisms |
Helps maintain consistent development and reliable hatching. |
|
Digital controls and alarms |
Maintain steady incubation settings and alert you to problems. |
|
Removable trays |
Make cleaning simple and support better hygiene. |
|
Leak-proof design |
Prevents mess and helps protect floors and furniture. |
|
Energy-efficient designs |
Save power and support budget-friendly family projects. |
|
High-capacity options |
Support larger hatches when your family is ready to expand. |
You can use this table to compare incubators and pick the best one for your family. Look for models that are easy to use, keep eggs safe, and are simple to clean. These features help you hatch more chicks while keeping your home clean and safe.
Compact, Low-Noise Models
You may want an egg incubator that fits easily in your home and does not disturb your family’s daily life. Compact models work well for family projects. They use less space and less energy. Many small incubators use about 40–100 watts, which keeps your electric bill low. You can place a compact incubator on a small table or shelf without needing a special room.
Low-noise incubators help your family stay comfortable. The fan in a forced-air incubator usually makes a soft, steady sound. Most models run at about 45–60 decibels, similar to a quiet conversation. You can keep the incubator in a living room or study without worrying about loud noises waking kids or interrupting schoolwork.
Tip: Place your incubator away from bedrooms and quiet study areas when possible. This helps everyone sleep and focus more easily.
Why Compact, Low-Noise Models Are Best for Families
-
Save space in your home.
-
Use less electricity (often around $1 in power for a 21-day hatch).
-
Keep noise levels low for comfort.
-
Are easy to move, store, and clean.
-
Offer safe viewing for kids with adult supervision.
|
Feature |
Benefit |
Technical Value |
|---|---|---|
|
Small Size |
Fits on tables and shelves |
Usually under 1 sq. ft. |
|
Low Power |
Saves energy and money |
40–100 watts |
|
Quiet Operation |
Does not disturb family activities |
45–60 dB |
|
Portable Design |
Easy to move and set up |
Lightweight |
Step: Assess Your Space and Noise Needs
-
Measure the space where you want to put the incubator.
-
Check the location of the power outlet.
-
Listen to the normal noise level in the room.
-
Make sure the incubator will not disturb sleep or study time.
Decision Table: Is a Compact, Low-Noise Model Right for You?
|
Question |
Yes |
No |
|---|---|---|
|
Do you have limited space for the incubator? |
||
|
Do you want to keep electricity costs low? |
||
|
Is a quiet environment important for your family? |
||
|
Will you need to move the incubator easily? |
||
|
Do you want a model that is easy for kids to watch? |
If you answer "Yes" to most questions, a compact, low-noise incubator is a strong choice for your family project.
🏡 Choose a small, quiet incubator to make your egg hatching project safe, clean, and comfortable for everyone.
Setting Up Your Egg Incubator
Room Conditions and Placement
You want your egg incubator to work well and keep your family safe. Start by choosing the right room. Pick a space with a steady temperature between 68–75°F. Good airflow helps, but avoid drafts from windows or air conditioners. Direct sunlight can change the temperature quickly, so place the incubator in a shaded spot. Basements or utility rooms can work well if they stay dry and ventilated. If you are completely new to hatching, a short beginner incubator tips guide can make the first setup even smoother.
Keep the incubator away from kitchens, dining rooms, and food storage areas. These places can spread germs and make cleaning harder. A separate room helps you control the environment and keeps food safe.
Tip: Check the room temperature with a thermometer before you set up. Make sure the area stays within the recommended range throughout the day.
Step 1: Evaluate Your Room
-
Measure the temperature at different times of day.
-
Look for drafts or direct sunlight.
-
Check for good airflow without strong breezes.
-
Confirm that the room is not used for food preparation or eating.
Decision Table: Is Your Room Suitable?
|
Condition |
Yes |
No |
|---|---|---|
|
Temperature 68–75°F |
||
|
No direct sunlight |
||
|
Good airflow, no strong drafts |
||
|
Not a kitchen or dining area |
||
|
Separate from food storage |
If you answer "Yes" to most, your room is ready for safe incubation.
Safe Setup on Tables or Trays
Place your incubator on a flat, sturdy table or shelf. Use a waterproof mat or tray underneath to catch any spills. Stability matters: make sure the table does not wobble or tip. Keep the incubator away from edges where it could fall.
Pets and small children can bump into the incubator. Position it where they cannot reach or knock it over. Avoid placing it near busy walkways, doors that swing open, or other high-traffic spots.
|
Safety Measure |
Description |
|---|---|
|
Stability |
Secure the incubator to prevent tipping or sliding. |
|
Location |
Keep away from drafts and direct sunlight. |
|
Surface |
Use a flat, sturdy surface. |
|
Avoid Bumping |
Place out of reach of pets and small children. |
|
Waterproof Mat |
Use a mat or tray to catch spills and shell pieces. |
Note: Always check the surface before starting. A stable setup keeps eggs safe and prevents accidents.
Step 2: Set Up Your Table or Tray
-
Place a waterproof mat on the table.
-
Set the incubator in the center, away from edges.
-
Test for stability by gently nudging the table.
-
Make sure pets and children cannot reach the incubator.
Decision Table: Is Your Setup Safe?
|
Safety Check |
Yes |
No |
|---|---|---|
|
Waterproof mat/tray used |
||
|
Stable, flat surface |
||
|
Away from edges |
||
|
Out of reach of children |
||
|
Not in a busy walkway |
If you answer "Yes" to most, your setup is safe for family use.
Cord Safety and Child Access
Electric cords can be a hazard. Keep all cords out of reach of children and pets. Use electrical tape or cord clips to secure cords to the table or wall. Do not let cords hang loose or dangle where someone could trip or pull them.
Check that the power outlet is close to the incubator. Avoid using extension cords if possible. If you must use one, choose a heavy-duty type and keep it tucked away where it cannot be stepped on.
⚡ Alert: Always unplug the incubator before cleaning or moving it. Supervise children around the incubator and cords at all times.
Step 3: Manage Cord Safety
-
Tape cords securely to the table or wall.
-
Keep cords short and out of sight.
-
Check outlets to make sure they are in good condition.
-
Supervise children anytime they are near the incubator.
Decision Table: Are Your Cords Safe?
|
Cord Safety Check |
Yes |
No |
|---|---|---|
|
Cords taped or secured |
||
|
No loose or dangling cords |
||
|
Outlet close to incubator |
||
|
No extension cords if possible |
||
|
Children supervised |
If you answer "Yes" to most, your cords are safer and your project is ready.
🏠 Careful setup helps your egg incubator work well and keeps your family safe. Follow each step and use the decision tables to check your progress.
Step-by-Step Clean Hatching Process
Egg Selection and Storage
Begin your hatching project by picking eggs that are clean and not broken. Choose eggs with smooth shells and no cracks. Handle each egg gently so you do not shake it or change its temperature quickly. Store eggs with the larger end facing up.
Keep your eggs in a cool place before you start incubating. Aim for a storage temperature between 55 and 69°F and humidity between 75 and 80 percent. Use the eggs within 7 to 10 days for the best results. Longer storage lowers hatch rates and increases the chance that embryos will not develop. Do not store eggs in the refrigerator or near heat sources.
🥚 Tip: Turn the eggs once each day during storage so the embryo does not stick to the shell.
Decision Table: Is Your Egg Storage Ready?
|
Checkpoint |
Yes |
No |
|---|---|---|
|
Eggs are clean and uncracked |
||
|
Storage temperature is 55–69°F |
||
|
Humidity is 75–80% |
||
|
Eggs stored less than 10 days |
||
|
Eggs turned daily during storage |
If you say "Yes" to most, your eggs are ready to set in the incubator.
Incubation Settings and Monitoring
Put your egg incubator in a room with a steady temperature and no drafts. Keep it away from sunlight and vents. For forced-air incubators, set the temperature to about 99.5–100°F. Maintain 45–55% relative humidity for the first 18 days, then raise humidity to 65–70% for the last three days (the “lockdown” period). For still-air models, measure temperature at the top of the eggs (about 101–102°F). Use automatic turning to rotate eggs several times each day. Stop turning eggs for the last three days so chicks can position themselves for hatching.
Check the temperature and humidity at least twice a day and verify your instruments before the first batch. Calibrate the thermometer (for example, with an ice-water check) and verify the hygrometer with a simple salt test or a known-good meter. Only open the lid when you truly need to. Every time the incubator is opened, heat and humidity can drop and stress the chicks.
Quick Reference for Hatching Chicken Eggs:
-
Incubation period: about 21 days
-
Temperature: 99.5–100°F (forced-air); 101–102°F at egg top (still-air)
-
Humidity: 45–55% RH (days 1–18), 65–70% RH (last 3 days)
-
Turning: 3–6 times per day or use an automatic turner (stop for last 3 days)
Decision Table: Are Your Incubation Settings and Monitoring On Track?
|
Setting/Action |
Yes |
No |
|---|---|---|
|
Temperature steady (see model guidance) |
||
|
Humidity at 45–55% (days 1–18) |
||
|
Humidity at 65–70% (last 3 days) |
||
|
Eggs turned 3–6 times daily or auto-turned |
||
|
Monitoring twice daily |
||
|
Lid opened only when needed |
If you say "Yes" to most, your hatching process is on a good path.
Visual Logs for Kids
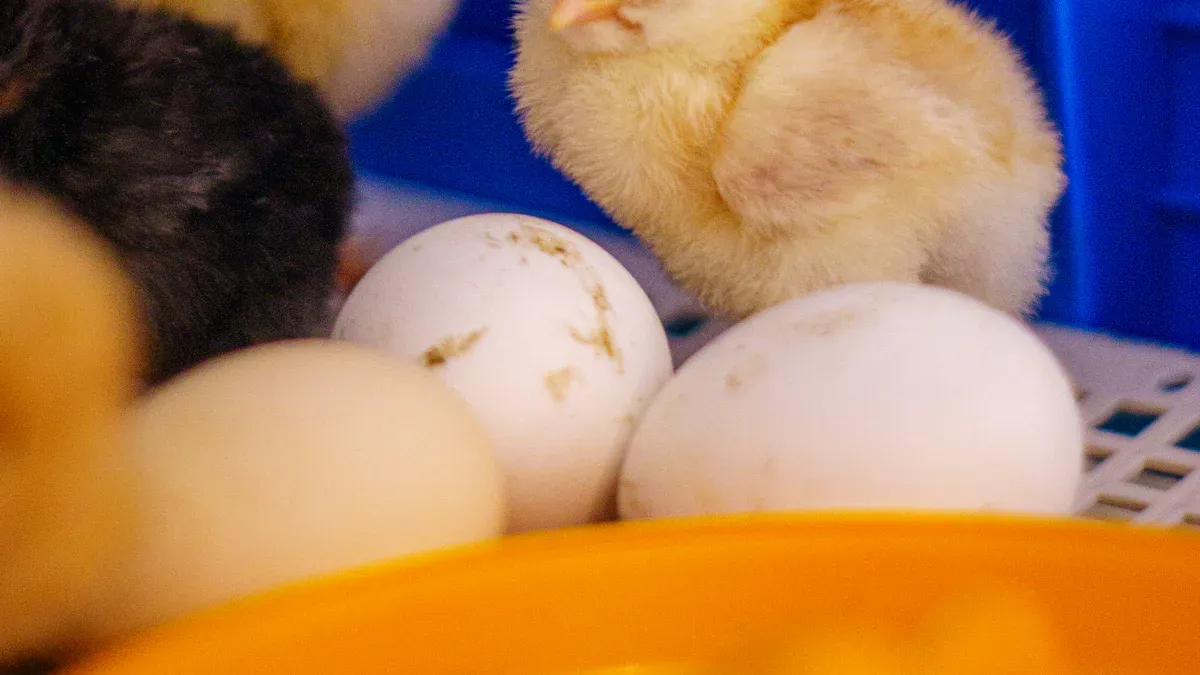
Visual logs help kids stay interested and learn during hatching. Use sticker charts or simple journals to track daily tasks. Kids can mark when eggs are turned, when temperature and humidity are checked, or when water is added. Celebrate key milestones like the first crack in a shell or the first chick peep.
|
Activity |
Tracking Method |
Engagement Level |
|---|---|---|
|
Turning the eggs |
Sticker chart |
|
|
Checking temperature |
Sticker chart |
|
|
Adding water for humidity |
Sticker chart |
|
|
Celebrating milestones |
Sticker chart |
Ask kids to draw what they see through the incubator lid and write short notes about changes each day. This helps them notice details, build science vocabulary, and remember the experience. Visual logs also help you keep track so important steps are not missed.
📒 Note: Using visual logs makes the project more fun and can help you spot problems early.
Post-Hatch Care and Cleaning
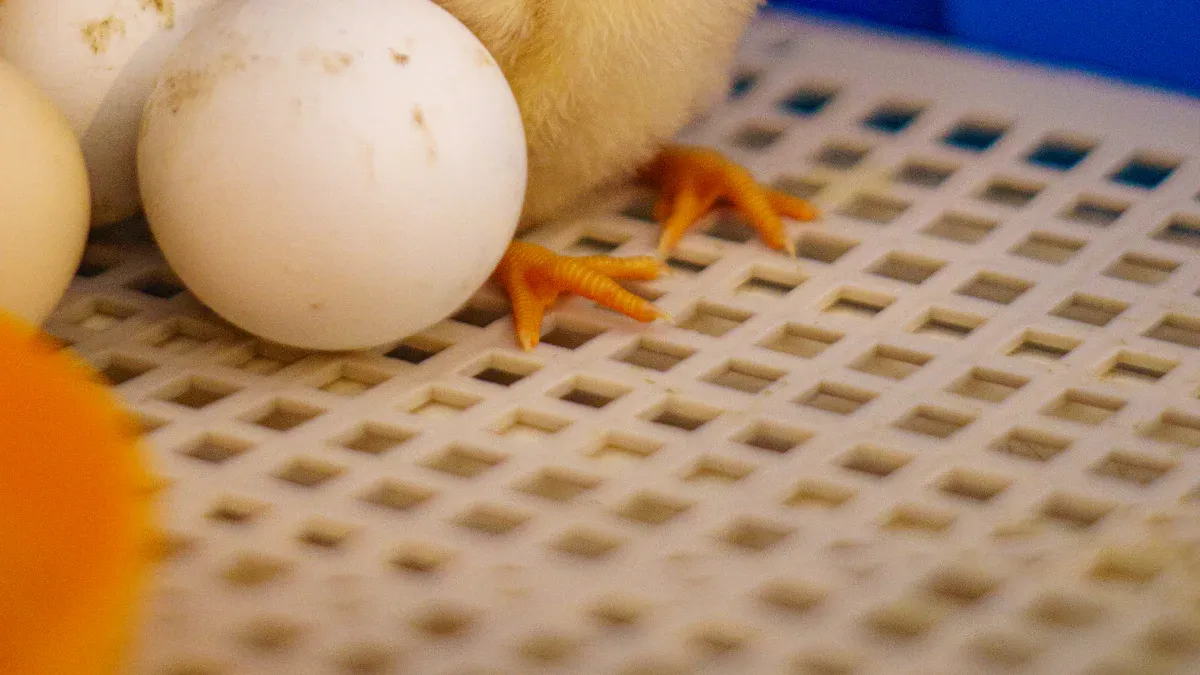
Moving Chicks to Brooder
After chicks hatch, move them to a brooder within one day. This helps keep your house clean and supports chick health. Follow these steps for a safe transfer:
-
Choose a secure brooder that keeps pets and wild animals out.
-
Add bedding such as pine shavings to keep chicks warm and give them good footing.
-
Set up a heat source like a heat lamp or brooder heater and keep the temperature steady.
-
Place chick-sized feeders and waterers inside so they always have access to feed and clean water.
-
Locate the brooder in a spot that is easy to clean and away from food areas.
-
Add simple enrichment like low perches or small toys, and clean the brooder daily.
-
Change shoes and wash hands before and after touching chicks.
-
Avoid overcrowding so chicks do not get chilled or stressed.
🐥 Tip: Move chicks slowly and calmly, and supervise children during the transfer.
Decision Table: Is Your Chick Transfer Safe?
|
Step |
Yes |
No |
|---|---|---|
|
Brooder is secure |
||
|
Bedding is clean and dry |
||
|
Heat source is set |
||
|
Feeders and waterers ready |
||
|
Brooder away from food areas |
||
|
Children supervised |
If you say "Yes" to most, your chicks are ready for their new home.
Cleaning and Disinfecting Equipment
Clean your incubator soon after chicks hatch. This helps stop germs from spreading. Always clean outside or in a different room, not in the kitchen. Follow these steps:
-
Remove all loose dirt and eggshells from the incubator and trays.
-
Wash every part with warm water and gentle soap.
-
Rinse all parts with clean water.
-
Use a bleach mix (for example, about one teaspoon bleach per gallon of water) to disinfect—follow the product label for exact dilution and contact time.
-
Let all parts air dry completely before reassembling.
-
Store the incubator in a cool, dry place until the next use.
Cleaning removes dirt so that disinfecting can work better. Disinfecting then kills germs and mold. Always clean first, then disinfect.
Decision Table: Are Your Cleaning Steps Complete?
|
Step |
Yes |
No |
|---|---|---|
|
Debris removed |
||
|
Washed with detergent |
||
|
Rinsed thoroughly |
||
|
Disinfected with bleach mix |
||
|
Air dried completely |
||
|
Stored safely |
If you say "Yes" to most, your equipment is ready for the next hatch.
Teaching Kids Hygiene
Teaching kids good hygiene keeps everyone safer during hatching projects. Try these ideas:
|
Hygiene Strategy |
Description |
|---|---|
|
Hand Sanitizer |
Use hand sanitizer when soap and water are not available. |
|
Health Checks |
Let kids count chicks and check water, then remind them to wash hands. |
|
Safety Reminders |
Teach kids to wash hands before and after touching eggs or chicks and never to eat near chicks. |
🧼 Always supervise kids and remind them to wash hands for 20 seconds after touching chicks or equipment.
Decision Table: Are Kids Practicing Good Hygiene?
|
Hygiene Practice |
Yes |
No |
|---|---|---|
|
Washed hands before/after touch |
||
|
Used sanitizer if needed |
||
|
No eating near chicks |
||
|
Adult supervision provided |
If you say "Yes" to most, your family is using safe hygiene habits.
Best Egg Incubator Project Ideas
Weekend Mini-Project
You can start a simple weekend mini-project with your family using an egg incubator. This project helps you learn about hatching and lets you see science in action. For most families—especially with young children—use a certified table-top incubator; the DIY concept below is for demonstration only and requires experienced adults, close supervision, and adherence to local electrical and fire-safety rules.
Steps for a Weekend Mini-Project:
-
Gather scrap wood and build a small frame.
-
Wrap the frame with a screen to hold the eggs.
-
Place a light bulb for heat, making sure it sits safely and cannot touch flammable material.
-
Cut ventilation holes in a styrofoam box.
-
Put a water cup and the frame inside the box.
-
Set the temperature around 99.5–100°F and humidity at 45–55% for the first 18 days. Raise humidity to 65–70% for the last 3 days.
-
Cut a small window in the lid so you can watch the eggs.
-
Monitor the incubator for a few hours before adding eggs.
🛠️ Tip: Always verify temperature and humidity with calibrated instruments before you start hatching.
Decision Table: Is Your Mini-Project Ready?
|
Step |
Yes |
No |
|---|---|---|
|
Frame and screen assembled |
||
|
Light bulb placed safely |
||
|
Ventilation holes made |
||
|
Water cup inside |
||
|
Temperature set (≈99.5–100°F) |
||
|
Humidity set (45–55%, then 65–70%) |
||
|
Window for observation |
||
|
Incubator monitored before eggs |
If you answer "Yes" to most, your project is ready for a safe start.
Science Diary and Embryo Charts
You can turn your egg incubator project into a science diary. This helps your family track progress and learn about each stage of hatching. Kids can draw embryo charts and write daily notes. You build observation skills and make science fun.
Ideas for Your Science Diary:
-
Draw the eggs and chicks each day.
-
Record temperature and humidity readings.
-
Note when you turn the eggs.
-
Mark special events, like the first crack or chick sounds.
📒 Note: Use stickers or colored pens to make your diary bright and easy to read.
Decision Table: Is Your Science Diary Complete?
|
Activity |
Yes |
No |
|---|---|---|
|
Daily drawings made |
||
|
Temperature recorded |
||
|
Humidity tracked |
||
|
Egg turning noted |
||
|
Milestones marked |
If you answer "Yes" to most, your diary will help you learn and remember each step.
Backyard or Farm Connections
You can connect your egg incubator project to your backyard or a local farm. This gives your family more chances to learn and grow. You see how hatching fits into real-life poultry raising and how chicks become part of a flock. You also get more value from your project as it supports long-term goals like backyard eggs or a small homestead. As your flock grows, higher-capacity cabinet incubators can support larger hatches and more advanced projects.
|
Connection Idea |
Benefit |
Next Step |
|---|---|---|
|
Backyard coop |
Kids see how chicks grow into laying hens. |
Plan coop space and basic chores. |
|
Local farm visit |
Connect classroom-style learning with real barns and flocks. |
Schedule a visit after your first hatch. |
|
Community project |
Share eggs or chicks with neighbors or school programs. |
Discuss care plans before sharing animals. |
Decision Table: Can Your Project Grow?
|
Step |
Yes |
No |
|---|---|---|
|
Space available for brooder |
||
|
Plan for chick care outdoors |
||
|
Hygiene steps in place |
||
|
Family ready for more chicks |
||
|
Connection to local farm |
If you answer "Yes" to most, your project can grow and give your family more learning opportunities.
Best Budget Option for Families
You may want to hatch eggs with your family without spending a lot. The best budget choice keeps things safe, easy to clean, and reliable. You do not need a big or costly incubator. A compact, fully automatic model such as an automatic egg incubator with 3 trays can give you room to grow while still fitting comfortably in a family home.
Step 1: Find the Most Important Features
When picking a budget incubator, look for these things:
-
Transparent lid so you can watch the eggs
-
Automatic egg turning (3–6 times each day)
-
Digital controls for temperature and humidity
-
Removable trays for fast cleaning
-
Leak-proof design to stop spills
-
Power use between 40–100 watts (cost varies by local power rates and room conditions)
-
Quiet running (around 45–60 dB)
These features help you get the most for your money. You can see the eggs clearly, keep conditions steady, and clean up quickly.
💡 Tip: Verify temperature around 99.5–100°F and humidity at 45–55% during days 1–18, then 65–70% for the last 3 days.
Step 2: Get Ready for Safe and Clean Hatching
Follow these steps to set up your budget incubator:
-
Put the incubator on a strong table with a waterproof mat.
-
Check that the room temperature is steady.
-
Run the incubator empty to test temperature and humidity.
-
Read the user manual and follow all safety notes.
-
Teach kids to look but not touch unless an adult is present.
If you answer "Yes" to most of the decision checks throughout this guide, you are ready for a safe, clean, and educational egg incubator project with your family.
Data authenticity note: Settings and examples here reflect typical ranges from hatchery practice, equipment manuals, and family/school incubation logs. Values are working targets—not guarantees—and may vary by species, altitude, room conditions, and model. Disinfectant ratios shown are examples only; always use the concentration and contact time on the product label. DIY concepts require adult supervision and local electrical/fire-safety compliance.
References :
1. Poultry incubation handbooks and extension-style teaching materials (temperature, humidity, turning, storage).
2. Manufacturer instructions for tabletop and cabinet incubators, including instrument calibration notes.
3. Hatchery standard operating procedures (SOPs) for sanitation, egg handling, and lockdown practices.
4. Public health recommendations on animal-contact hygiene in family and classroom settings.
5. Aggregated field logs from home and school hatching projects (energy use, troubleshooting, outcomes).


0 Comments