
Using an incubation chart is the simplest, lowest-cost way to improve hatch rates. A clear daily log helps you hold temperature steady, keep humidity in range, turn on schedule, and hit key checkpoints. New keepers, classrooms, and small farms see the fastest gains because the chart makes issues visible early and prevents “guesswork.” Pairing a stable incubator with a disciplined chart habit removes most preventable losses.
Key Takeaways
-
Track temperature, humidity, turning, and candling in one place. Consistency—not fancy gear—drives better hatch rates.
-
Sanitize and calibrate before every set. A clean, accurate incubator prevents bacteria and drift.
-
Day 7–10 candling removes clears early and confirms air-cell growth, protecting the rest.
-
Turn 3–5× daily (auto turner preferred). Stop turning for the last 2–3 days (“lockdown”).
-
Write brief notes daily. Your log becomes a troubleshooting map for the next batch.
Incubation Chart Basics
What Is an Incubation Chart?
An incubation chart is a daily log for your hatch. It captures set date, species, temperature, humidity, turning schedule, candling notes, and hatch results. With a glance, you can verify whether settings are stable and whether checkpoints were completed on time. That clarity is what improves outcomes for beginners and pros alike.
A practical chart usually includes:
-
Incubator model / location (to control room drafts and swings)
-
Temperature target and readings (forced-air ~99.5°F / 37.5°C; still-air ~101°F / 38.3°C)
-
Humidity target and readings (mid-stage 45–55%; lockdown 65–75%)
-
Turning method and frequency (auto/manual)
-
Candling checkpoints (Day 7, Day 14, lockdown)
-
Air-cell / weight-loss notes and final hatch count
Why Use an Egg Hatching Chart?
Because it creates a repeatable process. A simple, readable chart prevents skipped turns, catches humidity drift, and documents what you changed. Over time, your notes show patterns—letting you tweak humidity for your climate, room, and incubator model.
|
Feature/Benefit |
Description |
|---|---|
|
Customizable Fields |
Log species-specific targets and room conditions. |
|
Easy-to-Read Format |
Clear headings reduce errors when multiple people help. |
|
Multi-Species Tracking |
Run mixed sets without losing each line’s requirements. |
|
Essential Data Fields |
Temp, RH, turns, candling, air cell, hatch results in one view. |
|
User-Friendly |
Works with paper or a simple spreadsheet near the unit. |
Tip: If it’s not written down, it’s easy to forget. A 10-second entry beats a lost batch.
Species Differences
Incubation length and humidity targets vary by species. Use the chart to keep each line’s goals obvious during daily checks.
|
SPECIES |
INCUBATION PERIOD (Days) |
|---|---|
|
Chicken |
21 |
|
Duck (except Muscovy) |
28 |
|
Muscovy Duck |
35 |
|
Turkey |
28 |
|
Quail — Bobwhite |
23–24 |
|
Quail — Japanese |
16–18 |

Geese typically run longer than chickens and may need brief daily cooling/misting late in the set. Always check species targets on your chart before changing RH.
Getting Started
Preparing the Incubator
Start clean, accurate, and stable. Wash removable parts with warm soapy water, rinse, and dry fully. Disinfect per the manufacturer’s guidance. Place the unit in a draft-free room away from windows. Pre-run for 8–12 hours to confirm stable temp/RH with a verified thermometer/hygrometer. Calibrate if needed. This single prep step prevents most failures.
Tip: Room swings cause incubator swings. If the room is steady, the incubator is steady.
Steps for preparing your incubator:
-
Clean and dry trays, lids, and water channels.
-
Position the unit on a level surface in a low-traffic area.
-
Pre-heat to target temperature; verify with an independent probe.
-
Set RH to mid-stage range (45–55%) and check again after 1–2 hours.
-
Confirm the turner cycles correctly before setting eggs.
Choosing and Storing Eggs
Select clean, intact, fresh eggs of normal shape. Store pointed end down at 55–65°F (13–18°C) with ~70–80% RH for up to 7–10 days, tilting 2–4× daily if held more than 2 days. Extended storage reduces hatchability; use the freshest eggs first.
-
Avoid washing with cold water or scrubbing off the bloom; spot clean gently if needed.
-
Rotate stored eggs to keep the yolk centered.
-
Label dates/batches so clears and late deaths can be traced later in the chart.
Setting Up for Quail and Other Species
Dial targets by species and incubator type. The table below provides practical starting points you can refine with your own chart data and local climate.
|
Species |
Incub. Period |
Temp (F°/C°) |
Humidity |
Humidity (Last 3 days) |
Stop Turning |
|---|---|---|---|---|---|
|
Japanese Quail |
16–18 days |
99.5° / 37.5° |
45–55% |
65–75% |
Day 14–15 |
|
Turkey |
28 days |
99.5° / 37.5° |
45–55% |
65–75% |
Day 25–26 |
|
Ducks (not Muscovy) |
28 days |
99.5° / 37.5° |
45–55% |
65–75% |
Day 25–26 |
|
Geese |
28–35 days |
99.5° / 37.5° |
45–55% (cool/mist late) |
65–75% |
Last 3 days |
|
Muscovy Duck |
35 days |
99.5° / 37.5° |
45–55% (cool/mist late) |
70–80% |
Day 32 |

Prioritize an auto-turner and an audible alarm for temp/RH drift. These two features protect beginners from the most common mistakes.
Using an Egg Incubation Chart
How to Fill Out the Chart
Print the chart and place it beside the incubator. Label eggs lightly (e.g., X/O) so you can confirm turns at a glance. Before setting, soak-test the incubator for 8–12 hours to confirm stability.
Daily routine:
-
Record date/time, temperature, and humidity.
-
Tick each turn (or verify the auto-turner cycle).
-
Note candling results and air-cell growth on Day 7 and Day 14.
-
Flag any adjustments you make (water added, vent opened, room door closed).
-
Log hatch count and pulls at the end.
Tip: Short notes beat long essays. “RH 42% → add water, vent ½ closed” is perfect.
Tracking Temperature and Humidity
Stable temp and appropriate RH prevent most early deaths. For forced-air units, aim near 99.5°F (37.5°C). Mid-stage RH 45–55% works for most species/climates; raise to 65–75% for lockdown. In very humid regions, start lower (35–45%) to ensure proper air-cell growth.
Use your chart to spot drift and correct quickly:
|
Observation |
What it Means |
Action |
|---|---|---|
|
Temp drifting ±0.5°F |
Room or sensor instability |
Stabilize room; verify with a second thermometer |
|
RH low & air cell large |
Excess water loss |
Add water/close vent slightly |
|
RH high & air cell small |
Poor water loss |
Reduce water/open vent slightly |
|
Late shrink-wraps |
Low lockdown humidity |
Increase RH to target range |
If temperature or humidity falls out of range, correct within minutes—don’t wait for the next check.
Monitoring Air Cell and Weight Loss
Air-cell growth is the best “truth meter” for humidity. Candle at Day 7 and Day 14; compare to a reference sketch on your chart. For precision, weigh eggs on set day and again at Day 7/14. A total weight loss of ~11–14% by hatch is a good target for chickens and quail.
-
Candle in a dim room; note live movement and vessel quality.
-
Weigh with a kitchen scale (±1 g) and log % change.
-
Note shell porosity if you see unusual losses across a line.
-
Record any cooling/misting you do for waterfowl.
-
Lockdown: stop turning; raise RH; open vents for ample oxygen.
Note: Your air-cell notes tell you whether to nudge RH up or down next time.
Turning Eggs
Turning prevents embryo adhesion and malposition. Most sets do well with 3–5 turns/day to ~45°. Auto turners reduce human error; still verify function daily and continue marking turns on the chart. Stop turning the final 2–3 days so chicks can position to pip.
|
Turning Angle |
Turning Frequency |
Effect on Hatchability |
|---|---|---|
|
~45° |
3–5× daily |
Good embryo orientation; fewer malpositions |
|
Too infrequent |
<2× daily |
Higher risk of adhesion and late deaths |
|
Excessive |
>8× daily manual |
No added benefit; more disturbance |
Auto-turners save time and improve consistency, but the chart is still your proof that turns occurred as expected.
Tip: A simple X/O on shells confirms you didn’t miss a turn when you’re busy.
Standard vs. Dry Incubation
Use standard RH (45–55%) in arid/normal rooms or when shells are very porous. Try a lower “dry” RH (35–45%) in humid climates or with thick shells where air-cell growth lags. Note your choice on the chart so results are comparable between batches.
Daily Checks and Key Milestones
Daily Monitoring Tasks
Keep the routine short and repeatable. The chart below summarizes a solid daily habit that fits busy schedules.
|
Task |
Description |
|---|---|
|
Temperature Checks |
Verify target; note any drift and likely cause (room door, window, vent). |
|
Humidity Monitoring |
Match air-cell growth; adjust water or vents. |
|
Egg Turning |
3–5× daily or confirm auto-turner cycles. |
|
Air Cell Monitoring |
Day 7/14 sketch or note % weight loss to guide RH. |
Tip: Write it while you’re at the incubator. Don’t wait until evening to “remember.”
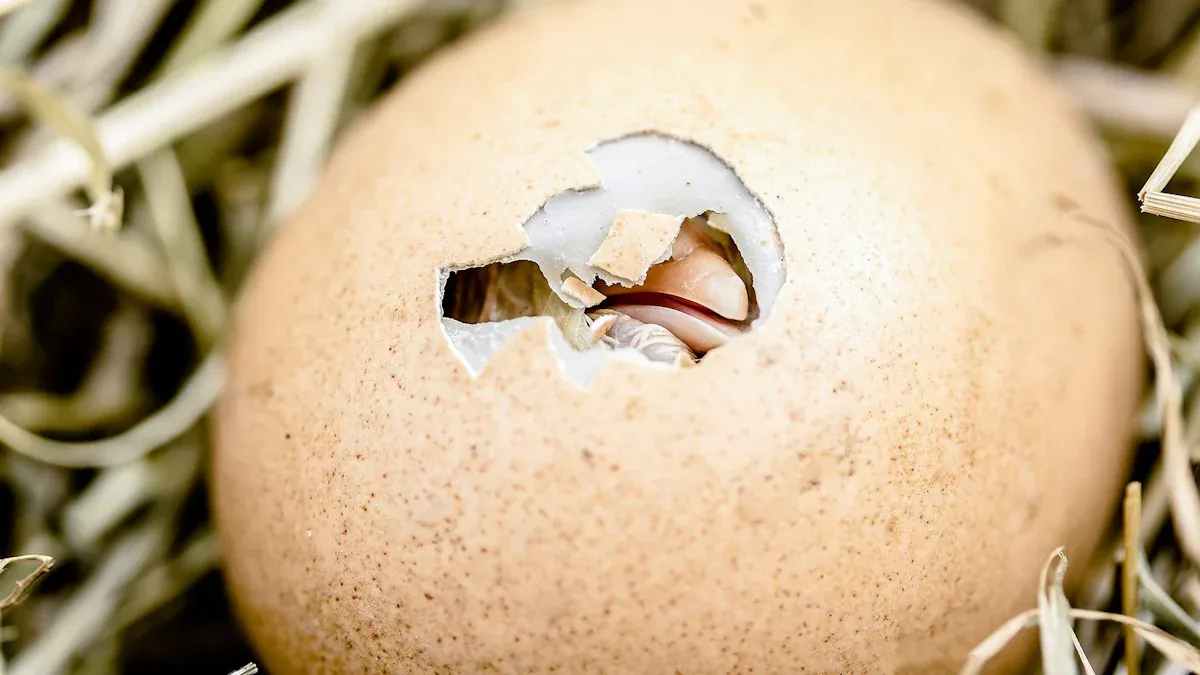
Healthy embryos show veining and activity by Day 7–10. If in doubt, compare against your prior batch notes.
Important Checkpoints
These milestones catch most problems early:
-
Day 7: Candle to remove clears; confirm air-cell size.
-
Day 14: Candle again; adjust RH if air-cell growth is off.
-
Lockdown (last 2–3 days): Stop turning; raise RH; ensure good ventilation.
-
Hatch Day: Record pips/outs and total hatch; avoid opening during zip unless medically necessary.
Note: Put these dates on the chart header when you set the eggs.
Adjustments for Species
Waterfowl often benefit from brief daily cooling and a light mist late in incubation. Geese and Muscovy, especially, respond well to this routine when air-cell growth is slow. Always match changes to your chart evidence, not guesswork.
-
Cool 10–15 minutes and mist lightly after Day 7 if needed.
-
Raise RH for lockdown across all species.
-
Document changes so future batches start closer to ideal.
Tip: Small, documented nudges beat big, last-minute swings.
Troubleshooting with Your Chart
Common Issues
Most failures trace back to RH/turning/temperature. Recognize patterns and correct the next batch earlier.
-
Shrink-wrapping: Dry, tight membrane from low RH at hatch.
-
Malposition: Poor turns or erratic RH lead to wrong pip position.
-
Drowning: RH too high; air cell too small to breathe during pip.
-
Early or late hatch: Temperature running high/low.
-
Weak chicks: Inadequate water loss or turning issues.
Tip: Your notes convert a mystery failure into a solvable pattern.
Using the Chart to Fix Problems
Read back through your entries. RH low during lockdown? Increase water surface area. Air-cell growth slow mid-set? Reduce RH earlier next time. Multiple malpositions? Verify turner angle and frequency, and confirm the unit is level.
Use your chart to:
-
Log temp/RH twice daily (min).
-
Record candling observations and air-cell size.
-
Confirm turns and note any missed cycles.
-
Compare this batch to your two most recent sets.
|
Problem |
What to Check in Chart |
Possible Solution |
|---|---|---|
|
Shrink-wrapping |
Lockdown RH |
Increase RH; add surface area; avoid opening lid |
|
Malposition |
Turning notes; angle/frequency |
Verify turner function; target ~45°, 3–5×/day |
|
Drowning |
Air-cell size too small |
Lower mid-set RH next batch; increase ventilation |
Note: Fix the cause you can prove in the notes; don’t change five variables at once.
Real-Life Success Story
Before Using a Chart
A small farm sets goose eggs in spring. Without a chart, turns are missed and RH isn’t measured—only “topped up.” Late shrink-wraps appear and overall hatch is poor, with many late deaths and weak goslings.
Untracked routines often stall around 40–50% hatch on waterfowl.
After Using a Chart
The same farm logs temp/RH twice daily, cools/mists lightly after Day 7, and raises RH correctly for lockdown. Air-cell notes drive small RH tweaks the next batch. Hatch improves and the window is tighter, with stronger goslings across the line.
Illustrative improvement when a basic chart routine is adopted:
|
Strain |
Hatch Rate Before Chart |
Hatch Rate After Chart |
Hatch Window Synchronization |
|---|---|---|---|
|
Farm Geese |
~45% |
~75% |
Tighter, fewer late assists |
|
Barred Plymouth Rock |
~55% |
~80% |
Improved |
|
Lohmann Brown |
~60% |
~85% |
Most synchronized |
Small, documented adjustments add up. A chart lets you repeat what worked.
Lessons Learned
Write it down, change one variable at a time, and compare batch to batch. Record keeping turns “luck” into a repeatable process.
Here is a summary of best practices:
|
Lesson Learned |
Description |
|---|---|
|
Equipment Control |
Verify with independent probes; keep the room stable. |
|
Quality Control |
Log temp/RH twice daily; match air-cell growth. |
|
Investigation |
Re-check lines with unusual losses; note shell porosity. |
|
Record Keeping |
Short, consistent notes; compare to the last two batches. |
The more you log, the less you guess—and the higher your hatch.
Tools and Resources
Printable Egg Hatching Chart
Keep one printed chart per batch. Clip it to the incubator or hang it on the wall. Kids love adding stickers for “turns” or “candling day,” which keeps the routine fun and consistent.
-
Record temp/RH AM & PM.
-
Tick turns or confirm auto-turner cycles.
-
Mark Day 7/14 candling and lockdown.
Your chart is your playbook. Treat it like a flight checklist.
Recommended Incubators and Accessories
Choose a unit with dependable temperature control, an accurate RH display, and an auto-turner. Add a separate digital thermometer/hygrometer for verification, a bright candler, and trays sized to your species.
Helpful accessories:
-
Independent thermometer/hygrometer to verify the built-in sensors
-
Auto-turner to ensure consistent, gentle movement
-
Bright candler for quick, low-stress checks
-
Swappable egg trays for quail to goose sizes
Match trays to egg size. Too-loose trays can cause vibration and hairline cracks.
Where to Learn More
Deepen your skills with step-by-step how-tos and troubleshooting guides on EggBloom:
|
Topic |
Description |
|---|---|
|
Set-up, checkpoints, and avoidable mistakes. |
|
|
Air-cell growth and red flags with photos. |
|
|
Species targets and how to verify accuracy. |
|
|
Selection, setup, and daily care in one place. |
|
|
Daily steps and targets for a fast, clean workflow. |
Internal how-tos create a strong learning loop: you read, you log, you review, you improve.
Quick wins you can apply today:
-
Check temp/RH AM & PM; aim 45–55% mid-set, 65–75% lockdown.
-
Set eggs pointy end down or on their side in proper trays.
-
Turn 3–5× daily (or verify auto-turner) until lockdown.
-
Candle around Day 7–10; remove clears; confirm air-cell size.
-
Stop turning ~3 days before hatch and raise RH.
-
During hatch, resist opening the lid; observe through the window.
Small, consistent actions plus a simple chart deliver the biggest lift in hatch success. Try one batch with disciplined logging—you’ll feel the difference on hatch day.
FAQ
How often should you update your incubation chart?
At least twice daily—morning and evening. Add quick notes when you adjust water, vents, or settings.
What is the best temperature for hatching quail eggs?
For forced-air incubators, target ~99.5°F (37.5°C). For still-air, a slightly higher reading at egg height (~101°F / 38.3°C) is typical.
Can you use the same chart for different bird species?
Yes. Keep one chart per batch and label species/rows clearly. Record their distinct incubation lengths and lockdown targets.
Why do you need to candle eggs during incubation?
Candling confirms development, checks air-cell growth, and removes clears to protect the rest of the set.
What should you do if humidity drops too low?
Add warm water to increase surface area, re-check in 10–15 minutes, and note the change. If RH often dips, reduce room drafts and partially close vents.


0 Comments