
You might feel nervous when you watch chicks hatch. Knowing when to assist chick hatching, and when to wait, helps you protect your flock. Helping too early can hurt the chicks. Many losses come from poor incubation, dirty tools, or mistakes with temperature and humidity. You can look at the table below to see the main cause types:
|
Cause Type |
Specific Causes |
|---|---|
|
Congenital |
Diseases, dirty utensils, wrong incubation settings |
|
Acquired |
Low or high temperature, humidity problems |
It is usually best to wait and watch. You should only help chicks hatch if you see clear warning signs and choose the right time. Every hatch teaches you something, even when you feel sad or blame yourself. Taking good care of the incubator is more important than dramatic rescue attempts.
Key Takeaways
-
Most chicks hatch successfully on their own. Wait at least 12 to 24 hours after the first pip before considering help.
-
Good incubator management is crucial. Keep the temperature at 99.5°F and humidity between 65% and 75% during hatching.
-
Assisted hatching should be a last resort. Only help if you see clear signs of trouble, like a dry membrane or no movement after 24 hours.
-
Opening the incubator too often can lower humidity and dry out membranes. This makes hatching harder for all chicks.
-
Look for warning signs before helping. If you see bright-red blood vessels or active bleeding, do not assist.
-
Use sanitized tools and work in short steps if you must help. Open the shell just enough for the chick to breathe, and moisten the membrane if needed.
-
After hatching, move chicks to a warm brooder quickly. Keep them clean and monitor for signs of infection or bleeding.
-
Each hatch is a learning opportunity. Review your process and improve your incubator setup for better results next time.
Why Assisted Hatch Is Risky
Natural vs. Assisted Hatch
You want your chicks to hatch safely. Most chicks hatch on their own when you keep the incubator at the right temperature and humidity. Natural hatching lets the chick break the shell slowly, absorb the yolk, and rest between steps. Chicks hatched naturally often show better feeding and resting behaviors. They usually have higher body weight and lower death rates than chicks that need major help. Chicks from hatcheries sometimes show dehydration and fear after transport.
Here is a table showing how survival rates compare:
|
Nest Type |
Fledging Success Rate |
Notes |
|---|---|---|
|
Managed Nests |
20–42% |
About ten times higher survival than unmanaged nests |
|
Unmanaged Nests |
~2% |
Lower fledging success reported |
You may think assisted hatch will save every chick, but research shows that chicks with major interventions survive less often. Chicks with minor help may reach around 82% survival after four months, but those needing major help can drop to about 69%. Most expert advice says you should only try assisted hatch as a true last resort.
Good Intentions, Bad Outcomes
You want to help when you see a chick struggling. You may feel anxious or guilty if a chick seems stuck. It helps to remember that most chicks do not need hands-on help. If you assist too early, you can kill the chick by cutting blood vessels or pulling it out before it absorbs the yolk. Opening the incubator lid too often also drops humidity, which dries the membrane and makes hatching harder. Many weak chicks do not survive even with careful technique. You should focus on flock welfare, not saving every single chick. If you feel sad or blame yourself, know that every hatch is part of your learning curve.
Tip: Waiting is usually safest. Assisted hatch is an advanced skill. Good incubator management prevents most problems.
Normal Hatch Timeline
You may worry if a chick takes a long time to hatch. Most chicks pip the shell on day 20 or 21. It can take up to two days for a chick to fully emerge after pipping. Many chicks finish hatching in 12–24 hours after the first crack. Some take 6–12 hours if conditions are very stable. You should not assist unless you see clear signs of trouble.
-
Incubation period: about 21 days
-
External pip: day 20 or 21
-
Hatch window: 12–24 hours after pip, sometimes up to 48 hours
If you see movement, peeping, or small changes, wait and watch. Patience is safer than rushing to help. For more details, read EggBloom’s eggs hatching signs and stages guide for step-by-step timelines and troubleshooting tips.
Understanding When to Assist Chick Hatching
It is normal to feel worried when you watch eggs. You might see a chick having trouble and wonder when to assist chick hatching. Most healthy embryos hatch alone if the incubator is set right. Learning the usual steps and timing helps you decide when to wait and when help might be needed.
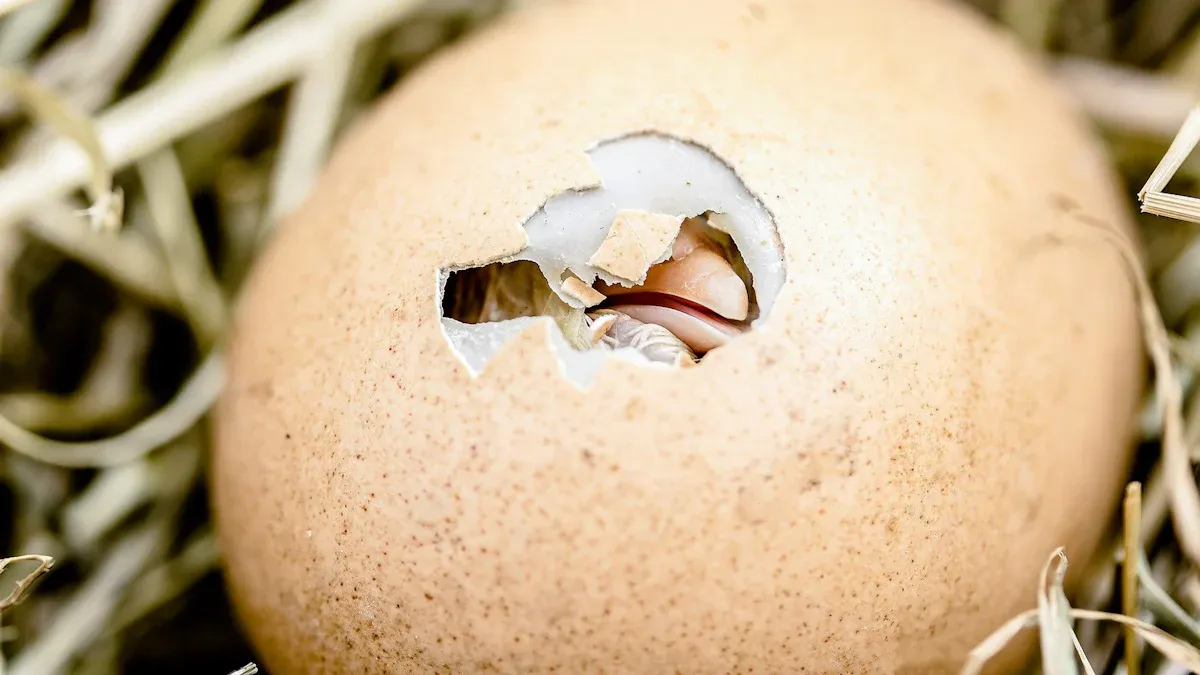
Pip-to-Hatch Stages
Chick hatching happens in three main steps. First is the internal pip. The chick breaks into the air cell inside the egg. You cannot see this from outside. It happens about one day before the chick cracks the shell. Next is the external pip. The chick makes a small hole in the shell. You will see a tiny crack or bump. Most chicks do this on day 20 or 21. Last is zipping. The chick turns inside the egg. It uses its beak to make cracks around the shell. This lets the chick push out and hatch.
Here is a simple table showing what happens at each stage:
|
Day |
Events During Hatching |
|---|---|
|
20 |
Yolk is absorbed. The chick starts to peck the shell. Lungs begin to work. First pipping happens. |
|
21 |
Most chicks hatch. The chick uses wings and legs to break the shell. The chick pushes out to finish hatching. |
Watch for movement, peeping, and changes in the pipped spot. These signs mean the chick is working to hatch.
Normal Wait Times
You may wonder how long to wait before helping. Most experts say patience is best. Use the Quick Reference Card for timing and settings to guide you.
Here are the wait times and settings:
|
Stage |
Recommended Wait Time |
Humidity Level |
Temperature |
Key Actions |
Development Stage |
|---|---|---|---|---|---|
|
First 18 Days |
18 days |
45–55% |
99.5°F |
Turn eggs 3–5 times each day |
Embryo grows |
|
Day 18 to Hatching |
3 days (lockdown) |
65–75% (70% is best) |
99.5°F (forced-air), 101–102°F (still-air) |
Stop turning eggs, raise humidity |
Yolk is absorbed, chick gets ready to hatch |
|
External pip to hatch |
12–24 hours (can be up to 48 hours) |
65–75% |
99.5°F |
Wait and watch |
Chick hatches |
Most chicks hatch in 12–24 hours after external pip. Some take up to 48 hours if temperature or humidity changes. If you see movement or hear peeping, keep the lid closed and wait. Opening the incubator lid lowers humidity. This can dry the membrane and make hatching harder.
When to Intervene
Only help if you see clear signs of trouble. For most backyard chicken keepers, waiting and watching is safer than jumping in too soon. Assisted hatching should stay a last-resort skill.
Here is a table to help you decide:
|
Situation/Symptom |
What It Probably Means |
Recommended Action |
|---|---|---|
|
Chick pipped within last 6–12 hours, moving or peeping |
Normal progress |
Wait and watch |
|
Chick pipped for 24 hours, little progress, membrane looks dry |
Possible shrink-wrapping, humidity issue |
Adjust incubator, consider gentle help if chick is healthy |
|
No peeping or beak movement for several hours |
Chick may be stuck |
Try gentle help |
|
Very white membrane at pipped area |
Membrane dried out, chick may be stuck |
Moisten membrane, gentle help |
|
Bright-red blood vessels, active bleeding |
Chick not ready, high risk |
Do not help |
|
Large unabsorbed yolk, foul odor |
Poor outlook, infection risk |
Do not help |
Look for these signs before you help:
-
No peeping or beak movement for hours.
-
Very white membrane at the pipped spot.
-
Membrane drying out, often from low humidity or opening the lid.
If you see bright-red blood vessels or bleeding, do not help. Pulling the shell or membrane too soon can cause deadly bleeding. Chicks with large unabsorbed yolks or bad smell rarely survive, even with help.
Note: Most chicks hatch best without help. Focus on good incubator care and flock health. Assisted hatching does not always save chicks. You may feel sad if a chick dies, but each hatch teaches you something new.
For more details, read EggBloom’s guides on assisted hatching, pip-to-zip timelines, and incubator troubleshooting.
Signs a Chick Needs Help
Knowing when to help chicks during hatching can feel stressful. You want to do the right thing for your flock. Most chicks hatch on their own if you keep the incubator at the right temperature and humidity. You should watch for certain signs before you decide to help a chick. Waiting and observing are usually safest. Assisted hatching is a last-resort skill for more experienced keepers.
Red Flags for Intervention
Some chicks show clear signs that they need help. You should look for these behaviors and physical changes:
-
Lethargy or very little movement
-
Isolation from other chicks
-
Ruffled feathers or a hunched, droopy tail or wings
-
Uninterested in surroundings
-
Not eating or drinking after hatching
-
Hiding or seeking seclusion with a hunched posture
-
Reluctance to move
If you see these signs, check the chick’s progress and compare it to the normal hatch timeline. Chicks that show no peeping, no movement, or a dry, white membrane at the pip site may be stuck. Do not rush to help. Opening the incubator can drop humidity and make things worse for all chicks.
Note: If you see bright-red blood vessels or active bleeding, do not assist. Pulling the shell or membrane too soon can cause deadly bleeding.
Green Flags to Wait
Many chicks take time to hatch. You should wait if you see these signs:
-
The chick pipped within the last 6–12 hours and is moving or peeping.
-
The chick makes small changes, like a bigger hole or new peeps, within 24 hours of the first pip.
-
The membrane looks moist and not dried out.
-
Other chicks in the batch are hatching normally.
These signs mean the chick is still working to hatch. Most experts say you should wait and watch. Good incubator management helps more chicks hatch without help. You can find more details in EggBloom’s guides on pip-to-zip timelines and incubator troubleshooting.
Shrink-Wrapped and Stuck Chicks
Sometimes, chicks get stuck because the membrane dries out. This is called shrink-wrapping. It happens when humidity drops, often from opening the incubator during lockdown. Sticky chicks can also result from humidity problems.
Here is a table showing common problems and causes:
|
Condition |
Cause |
|---|---|
|
Shrink wrapped |
Too little humidity throughout incubation or during lockdown; opening incubator during lockdown |
|
Sticky chick |
Too little humidity during lockdown |
|
Wet sticky |
Too high humidity throughout incubation |
|
Drowning |
Too high humidity throughout incubation |
To prevent these problems:
-
Keep humidity at 65–75% during lockdown, with 70% as a good target.
-
Avoid opening the incubator during lockdown.
-
Check that temperature stays at 99.5°F for forced-air incubators.
If you see a chick with a dry, tight membrane and no progress after 24 hours, you may consider gentle help. Only open enough shell for the chick to breathe. Moisten the membrane with warm, sterile water, but do not soak the chick. Always return the egg to the incubator between steps.
Here is a simple traffic light table to help you decide:
|
Zone |
Signs and Timing |
Action |
|---|---|---|
|
Green |
Chick pipped within 6–12 hours, moving or peeping; moist membrane |
Wait and watch |
|
Yellow |
24 hours since pip, little progress, dry membrane, chick still alive |
Double-check incubator, consider gentle help for shrink-wrapped chicks |
|
Red |
Bright-red blood vessels, active bleeding, large unabsorbed yolk, foul odor |
Do not assist; high risk |
Remember, not all chicks will survive, even with help. You may feel sad or guilty, but each hatch teaches you something new. Focus on the health of your whole flock. Good incubator care prevents most problems. For more support, see EggBloom’s guides on assisted hatching and incubator setup.
Common Mistakes During Assisted Hatch
You want to help your chicks, but many problems happen when you try to assist hatching. Most errors come from rushing, not watching carefully, or ignoring incubator settings. For many backyard keepers, patience and better setup are safer than frequent interventions. Good incubator management prevents most issues.
Assisting Too Early
You may feel worried if a chick seems slow to hatch. Opening the egg before the normal 12–24 hour pip-to-hatch window can cause harm. Chicks need time to absorb the yolk and retract blood vessels. If you help too soon, you risk heavy bleeding or pulling out a chick that is not ready. Most experts say you should wait and watch for movement, peeping, or small changes for at least 24 hours after external pip. Patience helps more chicks survive.
Cutting Live Blood Vessels
You might see a chick struggling and want to help. If you remove shell or membrane while red, active veins are still visible, you can cause serious bleeding. Chicks need these vessels to finish absorbing nutrients. Pulling the shell or membrane too soon can kill the chick. Always check for bright-red blood vessels before you assist. If you see them, stop and wait. Never force a chick out if you notice bleeding or a large unabsorbed yolk.
Letting Membranes Dry Out
Opening the incubator lid during lockdown drops humidity. This causes the membrane around the chick to dry out and shrink-wrap the chick. Membrane dehydration leads to water loss from the egg, which can cause embryo dehydration, lower hatching success, and poor growth. Chicks may become smaller and have trouble standing. Too much moisture loss can even cause embryonic death. If you keep humidity at 65–75% during lockdown and avoid opening the lid, you help prevent this mistake. Sticky chicks and improper positioning can also happen if moisture levels are not right.
Tip: Focus on keeping the incubator at 99.5°F and 65–75% humidity during lockdown. Avoid opening the lid unless you must help a truly stuck chick.
Top Mistakes That Accidentally Kill Chicks When You Try to Help
-
Assisting too early
You open the egg before the chick is ready. This can cause bleeding or pull out a chick with an unabsorbed yolk. -
Ignoring the rest of the hatch
You help one chick without checking if temperature and humidity are correct or if other chicks are hatching normally. -
Letting membranes dry out
You open the incubator lid too often during lockdown. This drops humidity and shrink-wraps the chick. -
Cutting into live blood vessels
You remove shell and membrane while red veins are still visible. This causes heavy bleeding. -
Pulling a chick out with unabsorbed yolk
You force the chick out while a large yolk sac is still attached. This can lead to fatal bleeding and infection. -
Over-handling weak chicks
You keep assisted chicks out of warmth too long for photos or handling. This lowers their chance of survival.
You may feel sad or guilty if a chick dies. Each hatch teaches you something new. Focus on flock welfare, not saving every chick. Good incubator care is more important than dramatic rescue attempts. For more help, see EggBloom’s guides on assisted hatching, pip-to-zip timelines, and incubator setup.
Over-Handling Weak Chicks
You want every chick to survive, but handling weak chicks too much can lower their chances. Chicks that need help hatching often start life weaker than others. If you keep them out of warmth for too long, they lose energy and may not recover. You should move assisted chicks quickly to a warm, draft-free brooder once they are stable and mostly dry. The Quick Reference Card recommends a brooder temperature that matches the chick’s needs. For most new chicks, keep the brooder at about 95°F during the first week.
Many keepers make the mistake of taking photos or showing the chick to others before it is ready. You may feel proud or relieved, but every minute outside the brooder can stress the chick. Weak chicks need quiet, warmth, and time to rest. Handling them too much can cause chilling, dehydration, and even death.
Here is a table to help you remember what to do:
|
Action |
Risk to Chick |
Safer Alternative |
|---|---|---|
|
Holding for photos |
Chilling, stress |
Quick transfer to brooder |
|
Passing chick to others |
Germ exposure |
Limit handling, wash hands |
|
Long inspection outside warmth |
Energy loss, dehydration |
Observe in brooder |
Tip: If you are unsure, always choose less handling. Place the chick in the brooder and watch for signs of recovery. Most experts say that waiting and observing is safer than trying to fix every problem with hands-on care.
You may feel sad or guilty if a chick does not survive after assistance. This is normal. Many weak chicks have problems you cannot see or fix. You should focus on the health of your whole flock. Good incubator management prevents most emergencies. If you want to learn more, check EggBloom’s guides on assisted hatching, pip-to-zip timelines, and incubator setup.
Remember these key points:
-
Move assisted chicks to warmth as soon as possible.
-
Limit handling to what is needed for care.
-
Wash and dry your hands before touching chicks.
-
Never promise survival, even with perfect technique.
Waiting before you intervene is often safest. Assisted hatching is a last-resort, advanced skill. You learn from each hatch, even when things do not go as planned. Focus on improving your incubator setup and flock care. This helps more chicks hatch strong and healthy.
Stepwise Decision: When to Intervene
You want to help your chicks hatch safely. Making the right decision starts with careful observation and patience. Follow these steps to decide when, or if, you should assist a chick.
Check Time and Progress
Step 1: Watch the Clock and Signs
-
Look for the first external pip. Most chicks pip on day 20 or 21.
-
Allow at least 12–24 hours after the first pip before considering help. Many chicks need this time to absorb the yolk and retract blood vessels.
-
Wait up to 36 hours for the whole batch to finish hatching. Some chicks may take up to 48 hours, especially if temperature or humidity fluctuated.
-
Keep the incubator closed. Opening it can drop humidity and cause shrink-wrapping, which makes hatching harder.
-
Monitor their progress by listening for peeping, watching for movement, and checking for changes in the pip hole.
⏳ Tip: Patience is usually safest. Most chicks hatch on their own if you wait and watch for normal signs.
Review Incubator Conditions
Step 2: Double-Check Your Setup
-
Temperature: Keep it steady at about 99.5°F for forced-air incubators. For still-air models, aim for 101–102°F near the top of the eggs.
-
Humidity: Maintain 65–75% during lockdown. Around 70% is a good target for most home setups.
-
Airflow: Make sure the incubator has good ventilation. This prevents carbon dioxide buildup and helps chicks breathe.
-
Avoid opening the lid unless you must help a truly stuck chick. Each time you open the incubator, humidity drops and membranes can dry out.
|
Condition |
Target Range |
Why It Matters |
|---|---|---|
|
Temperature |
99.5°F (forced-air) |
Keeps embryos growing |
|
Humidity |
65–75% (lockdown) |
Prevents membrane drying/shrink-wrap |
|
Airflow |
Good ventilation |
Maintains chick health |
🛠️ Note: Good incubator management prevents most emergencies. Focus on the whole flock, not just one chick.
Assess Chick’s Status
Step 3: Look for Warning Signs
-
Check if the chick is still peeping or moving. These are good signs.
-
Look at the membrane around the pip. If it is moist and the chick is active, wait longer.
-
If the membrane looks dry, tight, or white, and the chick has not made progress after 24 hours, you may need to help.
-
Never assist if you see bright-red blood vessels, active bleeding, or a large unabsorbed yolk. These signs mean the chick is not ready and helping can cause death.
-
If the chick is weak, not moving, or you notice a foul odor, the outlook is poor. Sometimes, even with help, the chick will not survive.
|
Status Check |
What You See |
What You Should Do |
|---|---|---|
|
Peeping, moving, moist pip |
Normal hatching |
Wait and watch |
|
Dry, tight membrane, no progress after 24 hours |
Possible shrink-wrap |
Consider gentle help |
|
Bright-red blood vessels, bleeding, large yolk |
High risk, not ready |
Do not assist |
|
Weak, no movement, bad smell |
Poor prognosis |
Focus on flock welfare |
🐣 Reminder: Assisted hatching is a last-resort, advanced skill. Never promise survival. Each hatch teaches you something new. If you feel sad or guilty, remember that learning and improving your incubator setup helps more chicks in the future.
You can find more details in EggBloom’s guides on assisted hatching, pip-to-zip timelines, and incubator troubleshooting.
Know When to Stop
You want to help your chicks, but knowing when to stop is just as important as knowing when to start. Assisted hatching carries real risks. If you go too far, you can cause more harm than good. Waiting is often the safest choice for most backyard keepers.
Here are clear signs you should stop or avoid assisting:
-
You see bright-red blood vessels in the membrane.
-
The chick starts bleeding when you remove a small piece of shell.
-
A large, unabsorbed yolk sac hangs from the chick’s abdomen.
-
You notice a strong, foul odor or leaking fluid from the egg.
-
The chick shows no movement, no peeping, and the membrane looks brown or discolored.
Note: If you see any of these signs, do not continue. Pulling the shell or membrane too soon can cause deadly bleeding. Forcing a chick out with an unabsorbed yolk often leads to fatal infection. Chicks with these problems rarely survive, even with help.
Use this table to guide your decision:
|
Situation |
What You Should Do |
Why |
|---|---|---|
|
Bright-red blood vessels visible |
Stop immediately |
Risk of heavy bleeding |
|
Active bleeding |
Stop and return to incubator |
Chick not ready |
|
Large unabsorbed yolk |
Do not assist further |
High risk of infection |
|
Foul odor or leaking fluid |
Do not assist |
Possible contamination |
|
No movement or peeping |
Wait, reassess conditions |
Chick may not survive |
You may feel sad or guilty if a chick does not make it. Many weak chicks have hidden problems you cannot fix. Even with perfect technique, some chicks will not survive. You should focus on the health of your whole flock. Good incubator management—steady temperature at 99.5°F, humidity at 65–75% during lockdown, and minimal lid opening—prevents most emergencies.
🐥 Tip: If you feel unsure, wait and watch. Most chicks hatch best without help. Assisted hatching is an advanced skill for rare cases.
You learn from every hatch. If you lose a chick, take time to review your process. Adjust your incubator settings for next time. Remember, your goal is a healthy flock, not saving every single chick. For more support, see EggBloom’s guides on assisted hatching, pip-to-zip timelines, and incubator setup/troubleshooting.
Key reminders:
-
Stop if you see blood, a large yolk sac, or signs of infection.
-
Never promise survival, even with careful help.
-
Waiting and observing are usually safest for both the chick and the rest of your hatch.
-
Each hatch is a chance to learn and improve.
You can care for your flock best by practicing patience, learning from each experience, and focusing on good incubator management.
Safe Assisted Hatch Techniques
Prepare Tools and Hygiene
You need to set up a clean and safe workspace before you assist any chick. A warm, draft-free area helps keep chicks comfortable during hatching. You should wash your hands and wear clean gloves. Always sanitize your tools, such as tweezers, scissors, and cotton swabs. Keep everything you need close by so you can work quickly and avoid lowering the incubator’s humidity. If you open the incubator too often, the membrane around the chick can dry out, making hatching harder. Careful monitoring and preparation help protect your flock.
Here is a checklist for preparing your workspace:
-
Wash your hands with soap and water.
-
Wear clean gloves to prevent germs.
-
Sanitize all tools before use.
-
Keep the workspace warm and free from drafts.
-
Work quickly to keep humidity stable.
🧼 Tip: Good hygiene lowers the risk of infection. A clean setup helps chicks recover faster.
Open Shell for Breathing Only
When you decide to help a chick, you should open the shell just enough for the chick to breathe. Do not remove large pieces of shell or try to pull the chick out. Use sanitized tweezers to gently lift a small part of the shell near the pip hole. Make sure you do not touch any bright-red blood vessels. If you see active bleeding, stop and return the egg to the incubator. Chicks need time to absorb the yolk and retract blood vessels. Rushing can cause deadly bleeding or infection.
Follow these steps:
-
Locate the pip hole and check for movement or peeping.
-
Use sanitized tweezers to gently lift a small piece of shell.
-
Stop if you see blood vessels or bleeding.
-
Return the egg to the incubator between steps to keep it warm and humid.
🚦 Note: Only open the shell for breathing. Never force the chick out. Waiting a little longer is often safer than pushing ahead.
Moisten Membrane Safely
Sometimes, the membrane around the chick dries out and becomes tight. You can help by moistening the membrane, but you must do this carefully. Use a warm, damp cloth to wrap the egg for a few minutes. You can also spritz the shell with a fine mist of warm water. Do not soak the chick or make the membrane dripping wet. Too much water can drown the chick. Always use clean, sterile water or saline. Work in short stages and return the egg to the incubator to keep the environment stable.
Here are safe ways to moisten the membrane:
-
Wrap the egg in a warm, damp cloth for a short time.
-
Spritz the shell with a fine mist of warm water.
-
Use sterile water or saline only.
-
Avoid soaking the chick or membrane.
|
Method |
How to Do It |
Risk Level |
|---|---|---|
|
Warm, damp cloth |
Wrap egg for a few minutes |
Low |
|
Fine mist spritz |
Spray shell lightly |
Low |
|
Soaking membrane |
Do not do this |
High |
💧 Tip: Keep the membrane moist, not wet. Always return the egg to the incubator between steps.
You may feel anxious or sad if a chick struggles. Assisted hatching is a last-resort, advanced skill. Most chicks hatch best when you incubate chicken eggs with patience and care. Good incubator management prevents most emergencies. If you want more details, check EggBloom’s guides on assisted hatching, pip-to-zip timelines, and incubator setup. Remember, you learn from each hatch. Focus on flock welfare, not saving every chick.
Work in Stages
You should always work in small steps when you assist a chick during hatching. Rushing can cause harm. Most chicks still do best when they hatch on their own, so any help should be slow and gentle.
Start by checking the time since the chick made its first external pip. Use the Quick Reference Card. Most chicks need about 12–24 hours from pip to hatch. Some take up to 48 hours. If you see movement or hear peeping, wait and watch. Only help if you see clear signs of trouble, such as a dry membrane or no progress after 24 hours.
When you decide to assist, follow these steps:
-
Open the shell just enough for the chick to breathe.
Use sanitized tweezers. Avoid touching blood vessels. If you see bleeding, stop and return the egg to the incubator. -
Moisten the membrane gently.
Use warm, sterile water or saline. Keep the membrane moist, not wet. Never soak the chick. -
Return the egg to the incubator between steps.
Keep temperature at 99.5°F and humidity at 65–75%. This prevents membrane drying and shrink-wrapping. -
Wait and observe.
Give the chick time to absorb the yolk and retract blood vessels. Do not rush to pull the chick out. -
Repeat only if needed.
Work in short sessions. Check for progress. If the chick becomes active, let it finish hatching on its own.
Tip: If you feel unsure, wait and watch. Most experts say patience is safer than dramatic rescue attempts.
Here is a table to guide your actions:
|
Step |
What to Do |
Why It Matters |
|---|---|---|
|
Open shell slightly |
Allow breathing, avoid blood vessels |
Prevent bleeding |
|
Moisten membrane |
Use sterile water, keep moist |
Prevent shrink-wrapping |
|
Return to incubator |
Maintain warmth and humidity |
Support chick’s recovery |
|
Wait and observe |
Watch for movement and peeping |
Let chick finish hatching |
You may feel sad or guilty if a chick does not survive. Many weak chicks have problems you cannot fix. Never promise survival, even with careful help. Focus on the health of your whole flock. Good incubator management—steady temperature, correct humidity, and minimal lid opening—prevents most emergencies.
🐣 Note: Assisted hatching is risky. You learn from each hatch. If you want more details, check EggBloom’s guides on assisted hatching, pip-to-zip timelines, and incubator setup/troubleshooting.
You help your flock most by practicing patience and improving your incubator setup. Each hatch teaches you something new. Prioritize flock welfare over saving every chick.
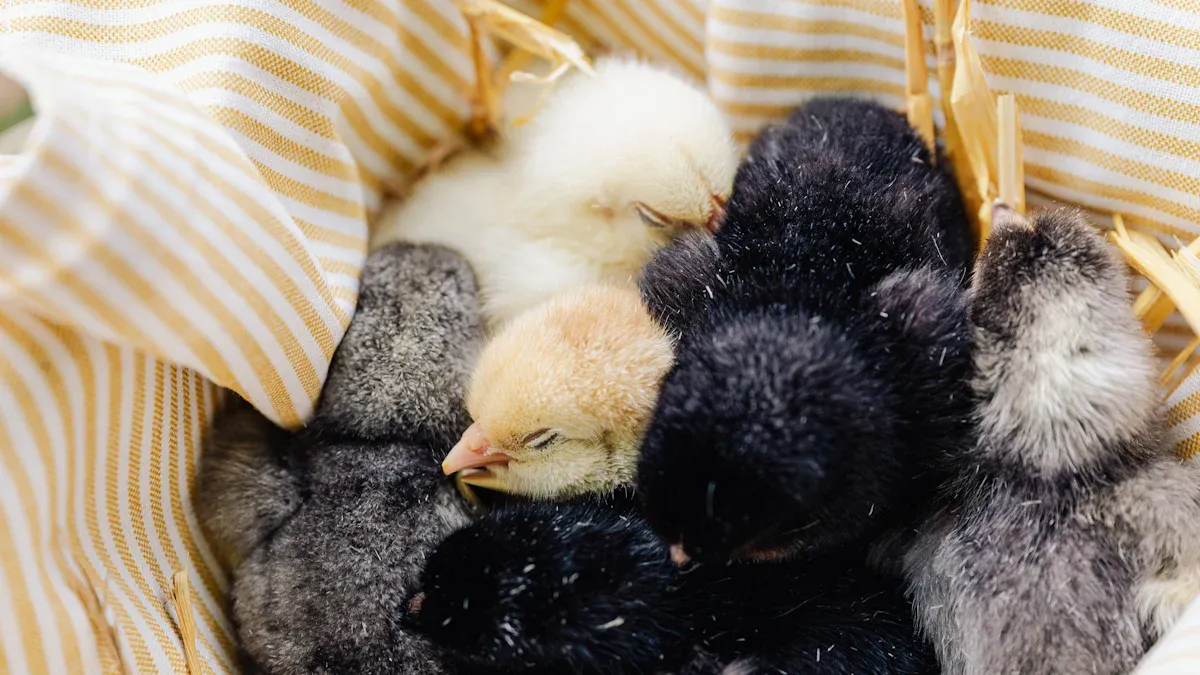
Aftercare for Assisted Chicks
Caring for new chicks after assisted hatching requires patience and careful steps. You want to give each chick the best chance, but you must remember that not all will survive. Focus on flock welfare and learn from each experience.
Move to Brooder Safely
You should move new chicks to a warm brooder as soon as they are stable and mostly dry. Set the brooder temperature to about 95°F for the first week. Use a thermometer to check the heat. Place the brooder in a draft-free spot. A broody hen will protect her chicks, but if you use an incubator, you must act as the caretaker. Make sure you provide a safe place for broodies if you have a hen raising chicks. Setting up a safe place helps prevent injury and stress.
Steps for moving new chicks:
-
Wash and dry your hands before handling.
-
Gently lift the chick and support its body.
-
Place the chick under the heat source right away.
-
Watch for signs of chilling or overheating.
Tip: Keep the brooder clean and dry. Change bedding often to reduce the risk of infection.
Watch for Bleeding or Infection
After you assist a chick, check for bleeding or signs of infection. Look at the navel area and the spot where the shell opened. If you see bright-red blood, return the chick to warmth and avoid further handling. Bleeding can happen if you pull the shell or membrane too soon. Infection may show as swelling, redness, or a foul smell. Weak chicks have a poor prognosis, even with good care.
|
Sign to Watch For |
What to Do |
|---|---|
|
Bright-red bleeding |
Return to warmth, observe |
|
Swelling or redness |
Keep chick clean, monitor |
|
Foul odor |
Isolate, consider culling |
You cannot promise survival for every chick. Some will not recover, even with perfect care. If you feel sad or guilty, know that every hatch teaches you something new. Review EggBloom’s guides on assisted hatching and troubleshooting for more support.
Support Weak Chicks
Weak new chicks need extra care. Place them close to the heat source. Offer clean water and starter feed. You may need to dip the chick’s beak in water to show it how to drink. Limit handling to reduce stress. A broody hen often knows how to support weak chicks, but you must watch closely if you use a brooder.
You can help weak chicks by:
-
Keeping them warm and quiet.
-
Making sure they have easy access to food and water.
-
Separating them from stronger chicks if they get trampled.
Note: Many weak chicks have hidden problems. Waiting and observing is often safer than trying to fix every issue. Focus on the health of your whole flock.
If you lose a chick, take time to review your process. Adjust your incubator settings for next time. Good incubator management prevents most emergencies. For more tips, see EggBloom’s guides on assisted hatching, pip-to-zip timelines, and incubator setup.
Prevent the Same Problems Next Hatch
You want each hatch to go better than the last. You can prevent the same issues by focusing on a few key areas. Careful planning and steady routines help you avoid emergencies and support healthy chicks.
Fix Incubator Issues
Start by checking your incubator settings and habits. Keep the temperature at 99.5°F for forced-air models. For still-air incubators, aim for 101–102°F near the top of the eggs. Set humidity at 45–55% for the first 18 days, then raise it to 65–75% during lockdown, with 70% as a good target. Use a reliable thermometer and hygrometer. Clean your incubator before each hatch. Dust, old shells, and bacteria can harm your chicks. Test your incubator before setting eggs to make sure it holds steady temperature and humidity.
Keep a notebook or chart for each hatch. Write down the dates, temperature, humidity, and any problems you notice. This record helps you spot patterns and fix mistakes. Adjust your settings if you see chicks hatching too early or late, or if you notice many stuck chicks. Seasonal changes can affect your incubator, so check your settings when the weather shifts.
Tip: Routine equipment checks and cleaning lower the risk of stuck or weak chicks. Good records help you learn from each hatch.
Choose and Store Eggs Well
Healthy chicks start with healthy eggs. Select eggs from young, well-fed hens and strong roosters. Feed your flock a balanced diet with enough protein, vitamins, and minerals. Avoid using eggs from sick or stressed birds. Collect eggs daily and store them in a cool, clean place. Keep eggs at about 55–60°F with moderate humidity. Do not wash eggs unless they are very dirty, as washing can remove the protective coating.
Set eggs within 7–10 days for best results. Older eggs lose moisture and may not hatch well. Turn stored eggs gently once or twice a day to keep the yolk centered. Discard eggs with cracks or odd shapes, as these often do not hatch.
-
Improve flock nutrition with quality feed.
-
Choose eggs from healthy, young breeders.
-
Store eggs in a clean, cool spot.
-
Set eggs soon after collection.
Upgrade Equipment if Needed
Sometimes, you need better tools to get better results. If your incubator struggles to hold steady temperature or humidity, consider upgrading to an Egg Incubator with reliable digital control and automatic turning. Look for models with accurate digital controls and good airflow. Add a separate thermometer and hygrometer to double-check readings. Replace old or worn parts, such as heating elements or fans.
Routine maintenance matters. Clean and check your incubator after every hatch. Fix any broken parts right away. Good equipment helps you avoid emergencies and gives your chicks the best start.
|
Prevention Step |
Why It Matters |
|---|---|
|
Accurate temperature |
Prevents early or late hatching |
|
Correct humidity |
Reduces shrink-wrapping and sticky chicks |
|
Clean equipment |
Lowers infection risk |
|
Good records |
Helps you spot and fix problems |
Note: Waiting is usually safest. Assisted hatching is a last-resort, advanced technique. Never promise guaranteed chick survival. Focus on flock welfare and steady improvement. For more tips, see EggBloom’s guides on assisted hatching, pip-to-zip timelines, and incubator setup.
You will learn from each hatch. Stay patient and keep improving your process. Good incubator management and healthy eggs prevent most emergencies.
You help your chicks most by being patient and watching closely. Keep the incubator at 99.5°F and humidity between 65–75% during hatching. Most chicks do better if you do not help them hatch. Assisted hatching should only be tried as a last resort. There are risks like the membrane drying out, bleeding, or weak chicks not making it. Always check the Quick Reference Card for the right numbers. Think of each hatch as a way to learn more. If you feel sad or blame yourself, remember you can always improve your setup and skills over time.
Data authenticity note: The temperatures, humidity ranges, timing estimates, and survival examples in this article are based on typical incubator manuals, standard poultry-keeping practice, non-branded poultry extension materials, and practical records from small backyard flocks. Actual results vary with breed, incubator model, room conditions, and flock health. Always follow your specific incubator’s manual and consult local experts or an avian veterinarian if you see signs of illness or distress in your birds.
FAQ
How long should you wait after a chick pips before helping?
Wait at least 12 to 24 hours after the first pip. Most chicks hatch by themselves during this time. If you see the chick moving or hear peeping, keep waiting. Being patient is usually the safest choice.
What temperature and humidity should you keep during hatching?
Set the incubator to 99.5°F if you use forced-air. Keep humidity between 65% and 75% during lockdown. Try to reach around 70% for most home setups. These settings help stop the membrane from drying out and shrink-wrapping the chick.
What are the main risks of assisted hatching?
Opening the incubator can dry out the membrane. Pulling the shell or membrane too soon can cause bleeding. Weak chicks often do not survive, even with help.
Waiting is safest for most chicks. Assisted hatching is only for special cases and takes practice and care.
How do you know if a chick is truly stuck?
Check for a dry, tight membrane and no progress after 24 hours. If the chick is not moving or peeping, it may be stuck. If you see bright-red blood vessels or bleeding, do not help. Look at EggBloom’s guides for more information.
What should you do if you feel sad or guilty after losing a chick?
Remember, every hatch teaches you something new. Focus on caring for your flock and making your incubator setup better next time. Feeling sad or guilty is normal. Read EggBloom’s troubleshooting guides if you need extra support.
Can you guarantee chick survival with assisted hatching?
No, you cannot promise every chick will live. Many weak chicks have problems you cannot see. Good incubator care helps more chicks hatch strong, but trying to save every chick does not always work.


0 Comments