
You want to hatch chicks for the first time and you do not want to guess. The most useful chicken hatching books for beginners include Hatching and Brooding Your Own Chicks by Gail Damerow, along with beginner friendly guides that cover both incubation and chick care. This page is not just a list of titles. It is a simple path that shows you what to read, when to read it, and which tools to keep by your incubator. Even if you have never touched an incubator before, you can follow these steps and feel calm and prepared instead of confused and stressed.
Key Takeaways
-
Choose one clear, beginner friendly book such as Hatching and Brooding Your Own Chicks as your main guide. Use it as your daily reference from the day you set eggs to the day the chicks move to the brooder.
-
Print simple checklists and charts. Use them to record temperature, humidity, egg turning, and hatch dates. When things get busy, paper on the wall will help you stay on track.
-
If you are teaching, let students join the work. Give them observation logs and storybooks so they can follow the life cycle, not just watch chicks pop out of eggs.
-
Do not panic if hatch day passes and you still hear nothing. Many good hatches spread over 24 to 48 hours. Keep the lid closed, breathe, and use your books and notes to check for real problems before you act.
-
Use fertile hatching eggs from a local farm or trusted hatchery. Good eggs, a steady incubator, and solid information together give you the best chance of a strong first hatch.
Your First Hatch Learning Path
Who This Guide Helps
Maybe you have a small incubator sitting on the kitchen counter right now. Maybe you have a class full of kids who keep asking, “When will the chicks come out?” Either way, you want more than random tips from the internet. You want one calm voice to walk you through the whole hatch.
This guide is for first-time hatchers, backyard chicken keepers, small homesteads, and teachers. You will see how to use books, printables, and online tools together. And if you are still choosing an incubator, you can browse the EggBloom Tool Shed for home egg incubators to find a simple machine that matches the kind of hatch you want to run.
How This Guide Is Different
Most lists just tell you, “Here are ten books, good luck.” That is not what you need on your first hatch. You need to know when to use each resource and how it fits into the 21 day journey from egg to chick.
-
Before you set the eggs: Read the early chapters of your main hatching book so you understand basic terms like temperature, humidity, and turning. Do a dry run with your incubator so it holds around 99.5°F (about 37.5°C) and roughly 45–55% humidity before any egg goes in.
-
During incubation: Keep your book open near the incubator and follow its day-by-day checks. Use simple charts to track turning and candling. When you are not sure what you see inside the egg, you can compare it with photos or drawings from your guide.
-
Lockdown and hatch: In the last three days, stop turning eggs and raise humidity into a higher range, often about 65–75%, to protect the membranes while chicks pip and zip. Use your resources to remind yourself why you should not open the lid unless there is a real emergency.
-
After the hatch: Move chicks to a brooder that is warm, dry, and draft free. Go back to the brooding sections of your book so your chicks stay healthy after all the work you put into incubation.
Tip: Keep your main book, a notebook, and your printouts right next to the incubator. When things get loud and busy on hatch day, those pages feel like an extra pair of steady hands.
So you are not just getting a list of chicken hatching books. You are getting a simple, real-world plan that matches what actually happens in a home or classroom hatch, with EggBloom as your barnside neighbor all the way through.
Quick Picks: Top Chicken Hatching Books & Resources
There are many books on chickens, but you only need a few that speak clearly to a first-time hatch. Let us keep this simple. Start with one main book, add one helper resource, and pick classroom tools only if you are working with kids.
Best Single Book for Beginners
If you only want one book by your incubator, choose Hatching and Brooding Your Own Chicks by Gail Damerow. It reads like a long, careful conversation with a very patient mentor. You get plain-language steps from choosing eggs, through the full 21 days of incubation, into the first weeks of brooding.
|
Title |
Author |
Why it helps on your first hatch |
|---|---|---|
|
Hatching and Brooding Your Own Chicks |
Gail Damerow |
Step-by-step guidance for incubation and brooding, practical charts, and clear troubleshooting advice you can use at home. |
Tip: Before you set any eggs, read the chapters on choosing eggs, setting up the incubator, and lockdown. Put sticky notes on the troubleshooting pages so you can find them fast when you are worried.
Book + Free Guide Combo
Some people like one main book plus a short printed guide for quick checks. In that case, pair a beginner level chicken book that covers hatching and chick care with a simple free PDF or chart that lists day-by-day targets. Use the book when you have time to read, and use the printable when you are standing in front of the incubator and just need “What should the numbers be today?”
|
Title |
Description |
Format |
Best for |
|---|---|---|---|
|
Beginner chicken and chick care book |
Covers basic incubation, brooding, and flock care in plain language. |
Print or eBook |
First-time home hatchers who want a broad overview. |
|
Simple incubation time and temperature guide |
Lists common working ranges for temperature, humidity, and lockdown days. |
PDF / printable chart |
Quick daily checks beside the incubator. |
Print the short guide and tape it near your incubator. Use it like a dashboard, and go back to the full book when you want to understand the “why” behind each number.
Fast Picks for Teachers
Teachers and homeschool parents need resources that work in a busy room, not just on a quiet couch. Your goal is to help students see a real life cycle, practice writing and measuring, and still keep everyone and every chick safe.
-
Simple storybooks that show the egg-to-chick journey in pictures and short text.
-
Life cycle posters and diagrams you can hang near the incubator so kids can match what they see to each stage.
-
Observation logs so every student can write, draw, and track changes each day.
-
Basic gear such as a safe brooder box, chick feeder and waterer, and a way to candle eggs without handling them too much.
A classroom hatch does more than teach biology. It also teaches patience, gentle hands, and what it means to care for living things from start to finish.
Note: Decide early who will care for chicks after the project ends. A good home or farm for the birds is part of good science.
With these quick picks, you already have a simple path into the best chicken hatching books and classroom tools for your first project. The rest of this guide will slow down and show you how each piece fits into the full 21 days.
Best Chicken Hatching Books for Beginners
Core Incubation Book
On your first hatch, you do not need a stack of books. You need one good one that talks to you like a steady friend. Hatching and Brooding Your Own Chicks by Gail Damerow does exactly that.
This book walks through the whole process in order. It starts with how to choose and store hatching eggs, moves into setting up the incubator and keeping it steady near 99.5°F (about 37.5°C), and then shows you how to brood chicks after they dry off. The photos, charts, and trouble lists are written for real barns and kitchens, not just laboratories.
Why does this book work so well for beginners?
-
It breaks incubation and brooding into small, clear steps you can check off.
-
It explains how to pick sound eggs and how to place them in the incubator for a safe start.
-
It shows you how and why to turn eggs, how to candle them, and when to stop turning near hatch day.
-
You get charts and lists that you can copy or adapt for your own notes.
-
There is a strong troubleshooting section you can lean on when something feels off.
Most new hatchers worry about missing a step or making one big mistake. A book like this gives you structure so you are not guessing. Keep it open near your incubator and treat it like a checklist you work through morning and evening.
Tip: Before you start, read the chapters on choosing eggs, incubator setup, and lockdown. Mark the pages that cover humidity changes and candling. Those are the spots you will come back to many times.
Technical Guide for Better Hatch Rates
Once you are past the “Will any of these eggs even hatch?” feeling, you may want to push your hatch rates higher or plan future breeding. More detailed books help here, especially if you plan to hatch year after year.
-
Storey’s Guide to Raising Chickens covers the whole life of a flock. The incubation and brooding chapters are more technical and give deeper background on fertility, egg handling, and embryo development.
-
The Homesteader’s Natural Chicken Keeping Handbook leans toward low-chemical, low-stress management. It includes sections on incubation and chick care that fit small farms and homesteads.
These books are good “second layer” reads. Use your main hatching book to run this hatch, and use these deeper guides when you want to understand how small changes in temperature, humidity, egg quality, or genetics show up in your final hatch rate.
Note: If you are using a modern incubator with digital controls, always read your incubator manual first. Then cross-check with your books so the numbers and steps match the way your own machine is built.
What the Books Agree On
Different authors explain things in different ways, but most good chicken hatching books agree on a few core needs for a home hatch. You will see the same ideas come up again and again.
|
Essential feature |
Why it matters |
|---|---|
|
Reliable incubator |
A forced-air incubator that can hold a steady temperature close to 99.5°F (about 37.5°C) with even airflow around the eggs. |
|
Thermometer and hygrometer |
Two accurate tools to check that temperature and humidity stay in your working ranges, often about 45–55% in the first 18 days and a higher range, around 65–75%, in the last few days. |
|
Egg turning system |
A way to turn eggs gently several times a day, or an automatic turner that does it for you, so the embryo does not stick to the shell. |
All of these books also remind you that steady care matters just as much as good equipment. Daily checks, careful note-taking, and patience during the hatch window will do more for your success than any single “trick.” When you want a deeper dive into how temperature and humidity work together inside a small incubator, you can pair your books with EggBloom’s guide on how to manage incubator temperature and humidity.
Remember: A small wobble in temperature for a short time will not ruin a whole hatch, but big swings and constant tinkering can. Set things right, keep notes, and let the incubator do its job.
With these core ideas in mind, your chicken hatching books stop being just “good reads” and start working as real tools you use every single day of your first hatch.
Trusted Free Guides and Printables
Books are great for evenings on the couch. During the day, when you are feeding birds, answering kids, and checking the incubator, short guides and simple printables shine. They help you remember the basics when your hands are busy and your brain is tired.
University Extension Guides
University extension guides are written by poultry science teams who test their advice over many years. They are dry to read, but very steady. Most of them say the same main thing for chicken eggs in a forced-air home incubator: aim to hold the temperature around 99–100°F (about 37–38°C), keep humidity in a moderate range through most of incubation, then raise humidity for the last few days before hatch.
-
They explain why stability matters more than chasing a perfect number.
-
They give simple rules for turning eggs and when to stop turning.
-
They show normal embryo development so you know what you should see at candling.
-
They give clear advice on cleaning, storage, and biosecurity.
Tip: Print one extension guide that you like and keep it near the incubator. Use it as a second opinion when you want to check what your book says about temperature, humidity, or timing.
Printable Checklists & Charts
Printables turn scattered advice into a daily rhythm. A good hatch log can be as simple as a grid with dates, times, and a column for “What did I notice today?” You do not need fancy graphics. You just need a place to write.
-
Use a simple calendar to mark day 1 through day 21 so you always know where you are in the process.
-
Create or print a chart with spaces for morning and evening readings of temperature and humidity.
-
Include a column for egg turning so you can quickly see if you missed a turn.
-
Mark the day you plan to stop turning and raise humidity near lockdown.
-
Write down what you see at each candling so later you can connect notes to your final hatch rate.
Note: Hang your main chart right beside the incubator. If you have to walk across the room to write your notes, you will skip more often than you mean to.
When you want to match your notes to what a healthy hatch should look like, it helps to have a clear day-by-day picture guide. For that, you can use EggBloom’s article on signs and stages to watch for while eggs are hatching. It turns what you see and hear in the incubator into a simple timeline.
Power-Outage & Troubleshooting Tips
Real life does not pause for your hatch. Power flickers, breakers trip, and storms roll in. A short outage that lasts only a few minutes will usually not harm the eggs, but a long one can cause trouble if you do not act calmly.
-
Plug your incubator into a good outlet and a surge protector to guard against sudden spikes.
-
If you live in an area with frequent outages, think about a small backup power source that can keep the incubator running for a while.
-
If the power goes out, keep the lid closed. Warm air and moisture leave fast when the lid is open.
-
Cover the incubator with a towel or light blanket to hold heat, but do not block vents completely.
-
If the outage lasts longer and your incubator supports it, switch to a safe battery backup or generator until power returns.
-
Once power is back, let the incubator come up to temperature and humidity again before you open it.
When something goes wrong, write down what happened and how long it lasted. That way, if you see weak chicks or late hatches, you can connect the dots and adjust next time.
These free guides and printables do not replace your chicken hatching books. They sit beside them and help you carry the advice from the page into your daily routine around the incubator.
Classroom Chick Hatching Resource Kit

A classroom or homeschool hatch can be one of the lessons your students remember for years. They get to watch a quiet egg turn into a busy chick and see the whole story in real time. The right mix of books and tools keeps that project safe and organized.
Storybooks & Visual Guides
For young students, story comes first. A good picture book gently explains where eggs come from, what happens inside the shell, and how a chick changes after hatch. Titles like farm-themed stories and simple life cycle books work well for early grades.
You can add posters and short videos that show the chick embryo at different days of growth. When students can look at a drawing of a day 7 egg and then see a real day 7 egg on the candler, the science “clicks” in their mind.
Hands-on activities such as cut-and-paste life cycle wheels, labeling exercises, and simple matching games help students connect what they see in the incubator with the words you use in your lessons.
Observation Logs & Posters
Observation logs turn a fun project into real science work. Each child can have a booklet or a set of pages to fill in over the 21 days. They learn to look closely, think about what they see, and put it into words and pictures.
Here are some helpful classroom tools:
|
Component |
Description |
|---|---|
|
Chick calendar recording page |
Lets students track days of incubation and note key changes. |
|
Journal writing pages |
Give space for daily sentences about what the class saw or heard. |
|
Blank journal observation pages |
Room for drawings of eggs, chicks, and the incubator setup. |
|
Chicken life cycle activity page |
Helps students place each stage of growth in order. |
|
A chick labelling page |
Lets students name basic chick body parts after hatch. |
|
Chicks: can, have, are chart |
Collects what students know about what chicks can do, have, and are. |
|
Student reflection page |
Gives students a place to think about what they learned and how they felt. |
Before you start, make a plan for the chicks. Have a brooder box ready with a heat source, bedding, feeder, and waterer. Decide which family or farm can take the birds when the project ends so you are not scrambling after the fun part is over.
Tip: Keep a small basket or box near the incubator with your books, logs, and a simple rule card. That way, any adult in the room can step in and keep the project running smoothly.
With these pieces in place, your classroom chick project will feel less like chaos and more like a well-run little barn inside your school.
Troubleshooting & Realistic Expectations
Normal Hatch Windows & Rates
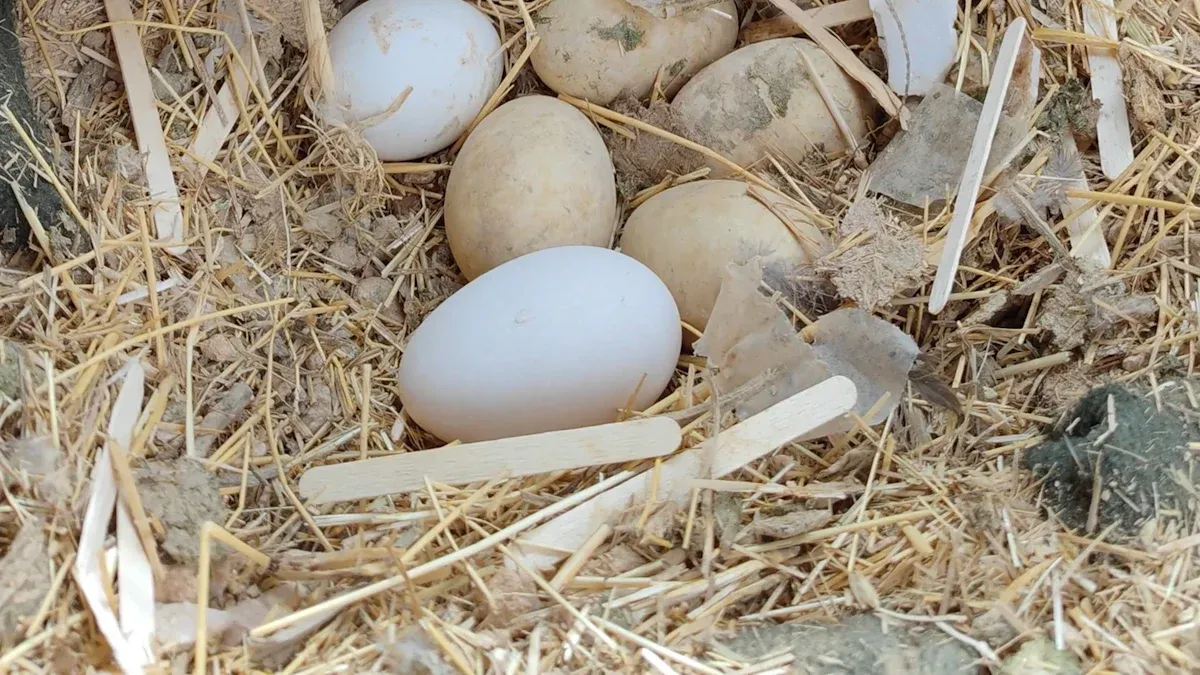
One of the hardest parts of your first hatch is the waiting. You read “21 days” and your brain hears “At the start of day 21, all chicks will burst out on schedule.” Real hatches are not that tidy.
Healthy chicken eggs usually take about 21 days to hatch, but most home hatches spread over a full day or two once the first chick breaks through. Some chicks arrive a bit early, some a bit late, even when your incubator and eggs are both good.
-
Expect a normal hatch to take many hours, not a single moment.
-
Some eggs will pip and pause for quite a while before they finish hatching.
-
A few fertile eggs may never hatch, even when you did your best.
During hatch, keep the incubator closed as much as you can. Every time you open the lid, warm, moist air rushes out. That can dry the inner membranes and make it harder for chicks to move and breathe. If you need to check on a chick that seems stuck, wait until several chicks have hatched and dried so opening the lid once solves more than one problem.
Learning from a Poor Hatch
Sometimes you will open the incubator after the hatch window and see more empty shells than you hoped for, or unhatched eggs that feel heavy and full. It stings. Every experienced hatcher has been there.
Here are a few patterns that books and charts often point out:
-
Fully formed chicks that never pip the shell can be a sign of long-term humidity or temperature issues during incubation.
-
Chicks that hatch very early and look small or weak may have been incubated too warm.
-
Sticky or dried-out chicks can point to humidity being too low near hatch or to too much lid-opening during lockdown.
-
Obvious deformities can come from parent nutrition, genetics, severe temperature swings, or a mix of these factors.
Good hatching books usually include “what went wrong” charts to help you match what you see in unhatched eggs or weak chicks with likely causes. You can also review a clear step-by-step article like EggBloom’s guide on how to hatch chicken eggs in an incubator and compare your notes against each stage.
Use a notebook to record what you did this time: average room temperature, which incubator you used, how often you opened the lid, and how steady your readings were. That way the next hatch is not just “try again and hope,” but “try again and adjust with a plan.”
Remember: A rough hatch does not mean you failed. It means you gathered data. Every strong hatcher you meet has a page of tough hatches behind them.
Reading Path & Next Steps
Simple Reading Plan
Here is a simple way to use your books and printables without feeling buried in paper.
-
Before day 1, read the early chapters of your main hatching book that cover egg selection, incubator setup, and basic incubation terms.
-
Print a one-page daily checklist and a temperature and humidity log. Put them beside the incubator with a pen tied on a string.
-
Each day, read a short section about what is happening inside the egg around that point in the 21 days. This builds your sense of what “normal” looks like.
-
Write down morning and evening readings plus anything that seems odd or worrying. Little notes now will help you a lot when you review the hatch later.
-
Use videos and photo guides for candling so you can compare what you see with healthy examples without guessing.
Tip: Make reading and checking the incubator part of your daily routine, like feeding the dog or making coffee. Small, steady habits beat last-minute panics every time.
By the end of your first hatch, you will have a marked-up book, a stack of checklists, and a notebook full of notes. That pile is not clutter. It is your personal hatch log and will make your second hatch feel much less scary.
Setting Up Your Incubator
Good reading will not save a badly set incubator, so let us tie the two together. Here is a simple path from page to practice.
-
Choose an incubator that fits your space and the number of eggs you plan to set. If you are still shopping, look for clear lids, auto-turning, and steady digital controls.
-
Clean and dry the incubator before you use it. Warm, moist air is a lovely place for germs too, so start with clean trays and walls.
-
Turn the incubator on and let it run empty until it holds close to 99.5°F (about 37.5°C) and a steady humidity in the 45–55% range. Use your own thermometer and hygrometer to double-check the built-in display.
-
Set eggs with the pointed end slightly down. If you turn by hand, mark each egg with a simple “X” and “O” on the shell so you can see at a glance that every egg has been turned.
-
Candle eggs after about a week. Remove any that are clearly clear or show early death, using your book or a photo guide for comparison.
-
Around day 18, stop turning the eggs and raise humidity into a higher working range, often about 65–75%, to prepare for hatching. Then resist the urge to open the lid.
-
Have your brooder ready before the first chick is out. That means warm bedding, clean water, chick starter feed, and a place where curious kids or pets cannot hurt the chicks.
-
After the hatch, clean the incubator again, then sit down with your notes and book to see what worked well and what you want to change next time.
If you want more detailed setup help, you can pair this reading plan with EggBloom’s full guide to caring for chicks after they hatch so you are ready for the brooder stage too.
EggBloom is here as your barnside partner, not just for this first hatch but for the ones that come after it. With a few good chicken hatching books, steady tools, and a calm plan, you can give each egg a fair chance and enjoy the process instead of fearing it.
You now have a short list of chicken hatching books, free guides, and classroom tools that actually serve a first-time hatch. Use them to choose good eggs, set up a stable incubator, keep clean notes, and care for chicks in a safe brooder. Every expert started with a first nervous hatch. Yours can be the one that teaches you a lot and still fills your brooder with bright, healthy peeps.
FAQ
What if my eggs do not hatch on day 21?
Do not panic the moment the calendar flips to day 21. Many healthy hatches run into day 22 or even day 23. If your temperature has been a little low, development can simply take longer. Keep the incubator closed, watch for pips, and give the eggs extra time before you decide that the hatch is over.
Can I use grocery store eggs for hatching?
No. Most grocery store eggs are not fertile and have also been stored in ways that are not friendly to embryos. Always get hatching eggs from a local farm or a hatchery that knows you are incubating them. Ask how old the eggs are and how they were stored.
How do I know if my incubator is set up right?
Run the incubator empty first. Check that it can hold close to 99.5°F (about 37.5°C) with only small, slow changes and that humidity stays in your chosen range. Use your own thermometer and hygrometer instead of trusting one single built-in display. If the numbers sit steady for a full day, you are ready to set eggs.
What should I do if there is a power outage?
Keep the incubator closed to hold heat in place. Cover it lightly with a towel and wait if the outage is short. For longer outages, use a safe backup power source if you have one. Once power returns, let the incubator come back to temperature and humidity and then watch how the hatch progresses. Make a note of the outage in your log.
Can I hatch chicks in my classroom safely?
Yes, if you plan ahead. Use a sturdy incubator with a clear lid. Teach students to keep hands off the incubator and to wash hands after any contact with eggs or chicks. Decide who will care for chicks after the project ends. Good rules, clean tools, and clear roles make a classroom hatch safe and meaningful.


0 Comments