
You want an egg incubator that fits your space, your batch size, and your daily routine. The easiest way to choose is to start with three basics: how many eggs you plan to hatch, where the incubator will live, and which features reduce mistakes. For most beginners, an automatic turner and clear, steady monitoring make hatching calmer and more consistent. This checklist helps you compare sizes and features so you can set up a steadier hatch, open the lid less, and clean up faster after each batch.
Key Takeaways
-
Think about how many eggs you want to hatch at one time. Most beginners do best starting with 6 to 12 eggs, then scaling up after they learn the routine. If you want an easier first hatch with less daily handling, consider an Automatic Egg Incubator with auto turning and simple monitoring.
-
Pick the incubator type that fits your space. Desktop models work well for small batches on a counter or classroom table. Cabinet models are better for larger batches or frequent hatching.
-
Look for features that reduce common mistakes, like auto turning, a steady fan (forced-air), and humidity management that doesn’t require constant lid opening.
-
Always do a dry test before you put in eggs. This helps you catch temperature or humidity issues early, before they affect a full batch.
-
Do not overfill your incubator. If you pack eggs too tightly, air cannot move well. Uneven airflow can cause uneven heat and weaker hatch results.
Egg Incubator
Choosing the right egg incubator does not have to feel complicated. You can make a smart choice in just a few steps. This beginner-friendly guide helps you choose a size you can manage, then pick features that make your hatch more stable and less stressful.
Set your egg count and hatching frequency
Start by deciding how many eggs you want to hatch at one time. That number helps you choose the right size. Then think about how often you want to hatch. If this is your first hatch, a smaller batch is easier to learn. If you plan to hatch often, a larger model can save time later.
Tip: Most beginners do best with a batch of 6–12 eggs. This size is easier to monitor and easier to clean up after.
Capacity Planner Table (EggBloom Models):
|
Batch Size |
Egg Count Range |
EggBloom Model Example |
Good For |
|---|---|---|---|
|
Learning Batch |
6–12 eggs |
6-egg auto-turn desktop |
First-time hatching |
|
Regular Home Use |
12–30 eggs |
16-egg or 24-egg desktop |
Small flocks, repeat use |
|
Large Batch |
30+ eggs |
68-egg cabinet |
Homestead, large groups |
Example:
If you want to hatch a dozen eggs for a science project, a small desktop model is easier to manage. If you want to hatch eggs regularly, a larger desktop model or a cabinet model can fit better.
Pick desktop or cabinet for your space and batch size
Next, look at your space and your batch size. Desktop incubators fit on a table or counter. Cabinet incubators stand on the floor and hold more eggs.
EggBloom Incubator Type Table:
|
Type |
Typical Capacity |
Notes |
|---|---|---|
|
Desktop |
6–24 eggs |
Compact, portable, and easier to clean. A good fit for beginners and small spaces. |
|
Cabinet |
30–270 eggs |
More capacity and often steadier for frequent hatching, but needs more room. |
Note: Always check the space you have before you buy. A desktop model can work well in a kitchen or classroom. A cabinet model needs more room but handles bigger batches.
Green/Yellow/Red Decision Table:
|
Your Situation |
Best Choice (Green) |
Maybe (Yellow) |
Not Recommended (Red) |
|---|---|---|---|
|
First-time, small batch, little space |
6–12 egg desktop |
16–24 egg desktop |
Cabinet model |
|
Regular hatching, small flock |
16–24 egg desktop |
30-egg cabinet |
68+ egg cabinet |
|
Large batch, homestead, backup needed |
68+ egg cabinet |
30-egg cabinet |
Desktop model |
Quick Steps:
-
Count your eggs.
-
Decide how often you want to hatch.
-
Check your space.
-
Match your needs to the table above.
-
Visit the egg incubators category page to compare models.
You can always start small and move up as you gain experience. The right incubator helps you build a steady routine and enjoy the hatching process.
Egg incubator size and capacity planning
Choosing the right size helps you set up for a smoother hatch. You want a batch size you can manage without rushing, especially during the last few days when opening the lid can cause fast humidity drops.
Learning batch sizing (6–12 eggs)
If you are new to hatching, start with a small batch. A learning batch means 6 to 12 eggs. This size lets you focus on good habits like steady temperature, clean handling, and quick checks without feeling overwhelmed.
Tip: A small auto-turn desktop model is a good fit for first-time users. It fits on a counter and helps you avoid missed turns.
Example:
You want to try hatching for the first time. You start with a small desktop incubator and a few eggs. You learn how the display behaves, how fast the incubator recovers after a quick opening, and how humidity changes with your room.
Regular home use (12–30 eggs)
If you plan to hatch eggs for a small flock or repeat hatches, choose a regular home batch size. This means 12 to 30 eggs. You get more practice and can grow your flock faster, while still keeping the routine manageable.
Capacity Planner Table (EggBloom Models):
|
Batch Size |
Egg Count Range |
EggBloom Model Example |
Good For |
|---|---|---|---|
|
Learning Batch |
6–12 eggs |
6-egg auto-turn desktop |
First-time hatching |
|
Regular Home Use |
12–30 eggs |
16-egg or 24-egg desktop |
Small flocks, repeat use |
|
Large Batch |
30+ eggs |
68-egg cabinet |
Homestead, large groups |
Example:
You want to hatch eggs regularly for your backyard flock. You choose a mid-size desktop incubator so you can manage your batches without crowding eggs or rushing daily checks.
Large batch options (30+ eggs)
If you need to hatch many eggs at once, look at large batch options. These models hold 30 or more eggs. Cabinet incubators often work best for this job because they are built for higher capacity and repeat use.
Large incubators can save time when you hatch often. They can also reduce crowding, which helps airflow and temperature stay more even across the batch.
Comparison Table:
|
Feature |
Large Batch Incubators |
Smaller Models |
|---|---|---|
|
Capacity |
30+ eggs |
Less than 30 eggs |
|
Design |
Cabinet and automatic |
Desktop and compact |
|
Efficiency |
High for repeat batches |
High for learning and small batches |
|
Maintenance |
Less frequent refills and handling |
More hands-on day to day |
|
Reliability |
Often steadier in busy hatch seasons |
Depends more on room conditions |
-
Large batch incubators can save time across many hatches.
-
They help reduce crowding so airflow is more even.
-
You often spend less time opening the unit for routine tasks.
Example:
You want to hatch eggs for a homestead or a larger project. You choose a cabinet incubator and set it up in a safe, stable room where it won’t be bumped or exposed to drafts.
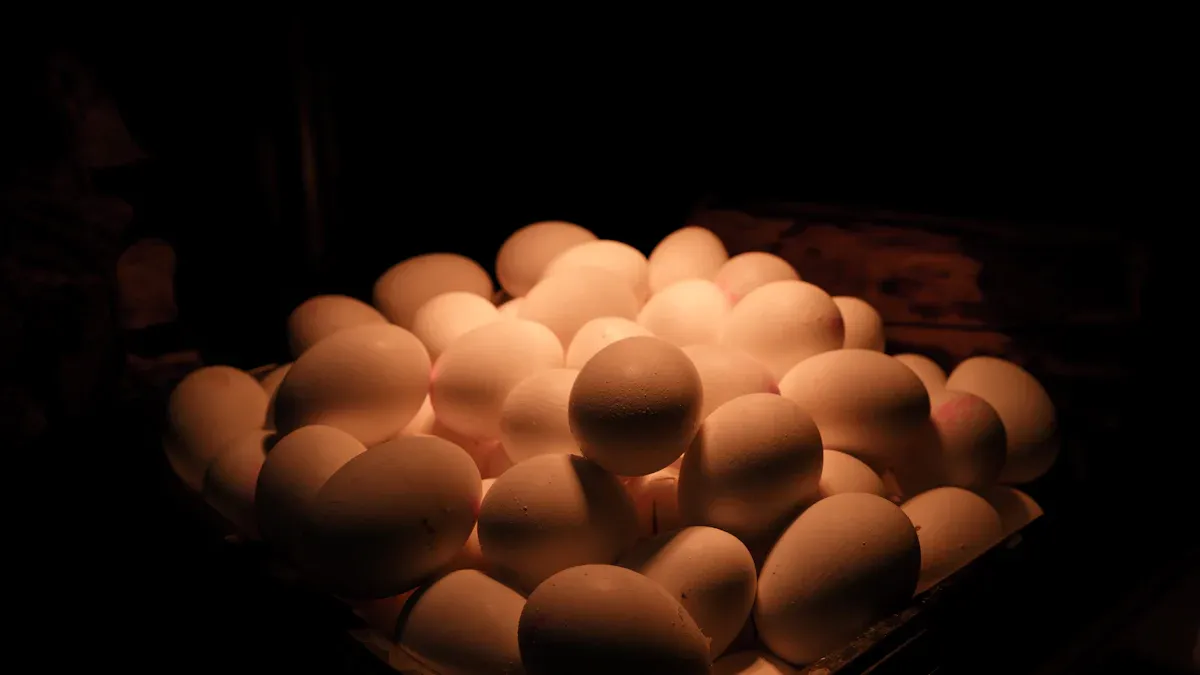
Risks of overfilling your egg incubator
Never overfill your egg incubator. Too many eggs can block airflow and cause uneven temperatures. Chicks may struggle if heat and humidity cannot reach every egg evenly. Overfilling also makes cleaning harder and can increase contamination risk.
Alert: Always follow the maximum egg count listed for your model. Leave a little space between eggs for best airflow.
If you want to hatch more eggs, use a larger incubator or split your eggs into smaller batches. This keeps your routine safer and your results more predictable.
Egg turning: auto vs manual
Turning eggs is a key step in incubation. You need to decide if you want auto turning or manual turning. Start by thinking about your daily routine and how often you can check the incubator. The right choice helps you keep the process steady and reduces last-minute stress.
Auto turning benefits for beginners
Auto turning makes hatching easier. An incubator with auto turning gently moves each egg on a set schedule. This reduces missed turns, lowers the need to open the lid, and helps beginners keep a steadier routine.
Tip: Auto turning helps you avoid missed turns, which can improve results for beginners.
Manual turning habits and limits
Manual turning means you turn each egg by hand. You usually do this about three to five times a day. If you choose manual turning, set reminders so you do not forget. Use clean hands every time, and try to keep lid-open time short so temperature and humidity recover faster.
Here is a quick table to show the best turning habits:
|
Egg Type |
Turning Frequency |
Technique Description |
|---|---|---|
|
Chicken Eggs |
Turn 3–5 times per day |
Turn gently each time and keep a consistent routine. Mark eggs with pencil if it helps you track turns. |
Manual turning can work well for small batches, but it takes commitment. If you miss turns often, the embryo may stick to the shell.
When to stop turning eggs (Day 18 for chicken)
You need to stop turning chicken eggs at Day 18. This helps the chick settle into hatch position. After you stop turning, focus on stable temperature, higher hatch humidity (lockdown), and keeping the lid closed.
-
The chick moves into hatching position.
-
Extra handling can slow recovery and cause humidity drops.
-
Opening the lid can dry membranes during hatch.
Alert: Mark your calendar for Day 18. Stop turning and avoid opening the incubator during hatch.
Choosing the right turning method helps you build a steady routine. Auto turning makes consistency easier. Manual turning can work if you have time and a reliable schedule.
Chicken egg incubator temperature control
Forced-air vs still-air incubators
You have two main choices for incubators. Forced-air incubators use a fan to move warm air. This helps temperature stay more even inside. Still-air incubators do not use a fan, so temperatures can vary more by height and location. Many beginners prefer forced-air incubators because they are easier to manage and recover faster after brief openings.
Here is a quick comparison:
|
Incubator Type |
Typical Airflow |
Temperature Uniformity |
What It Means for Beginners |
|---|---|---|---|
|
Forced-air |
Fan-assisted |
More even |
Easier to manage and faster recovery after quick checks |
|
Still-air |
No fan |
More variable |
Needs careful egg-height measuring and steadier room conditions |
If you want a simpler start, a forced-air incubator can reduce surprises from hot and cool spots.
Stable temperature for successful incubation
You need to keep temperature steady for healthy chicks. Many forced-air setups run close to 99.5°F (about 37.5°C) at egg level. Still-air models often need a higher target at egg height because heat layers differently. The key is stability: avoid frequent swings and always follow your incubator manual for your specific model.
Here is a table to help you remember the best temperature ranges:
|
Stage of Incubation |
Optimal Temperature Range (°C) |
|---|---|
|
First 18 days |
37.5 - 37.8 |
|
Hatching period |
37.5 - 37.8 |
Check temperature and humidity every day, but don’t chase every tiny number change. Watch for patterns and keep your routine steady.
Tip: Write your readings in a notebook. A simple log helps you spot problems early.
Fast recovery after opening the incubator
Sometimes you need to open the incubator to add water or check eggs. When you open it, temperature and humidity drop fast. Forced-air models often recover faster because the fan spreads heat. Still-air models can take longer to settle.
To keep your eggs safe:
-
Only open the incubator when you must.
-
Prepare what you need first, then work fast and gently.
-
Close the lid tightly when you finish.
Short, planned checks help your incubator recover quickly and keep conditions more stable for developing chicks.
Incubation humidity control made simple
Humidity accuracy and why it matters
You need the right humidity for healthy chicks. Humidity management helps eggs lose the right amount of moisture during incubation. Many keepers aim for humidity around 45% to 50% during most of incubation, then raise it during lockdown so chicks can hatch without membranes drying out.
-
Too much humidity early can reduce moisture loss and make hatch harder.
-
Too little humidity can dry eggs out and weaken chicks.
-
Big swings often come from frequent lid opening or a room that is very dry.
Tip: Use a digital hygrometer to check humidity. Record readings so you can see trends instead of guessing.
Easy water refill methods
You can keep humidity steadier with simple water refill habits. Try these methods based on your incubator design:
-
Add small amounts of water more often, instead of large changes all at once.
-
Use a deeper tray if your room is very dry, so you refill less often.
-
For larger units, follow the water guidance in your manual and avoid overfilling.
-
If you need a boost, increase evaporation surface inside the incubator as your manual allows, and keep water away from electrical parts.
Alert: Do not open the incubator for too long. Work quickly to protect temperature stability. Never pour hot water inside, and do not splash water on eggs or sensors.
Lockdown humidity for hatching eggs
Lockdown is the last three days before chicks hatch. You raise humidity during this time to help chicks zip and hatch without drying out. Many keepers aim for about 60% to 75% during lockdown, depending on incubator design and room conditions.
-
Stop turning eggs at day 18.
-
Add water as needed so humidity stays higher and steadier.
-
Keep the lid closed as much as possible during hatch.
Note: During lockdown, “hands off” usually helps more than constant checking. Give the incubator time to do its job.
EggBloom incubator comparison table
Model, type, best use, turning, capacity, standout feature, price
It is smart to compare your options before buying. A table helps you see the key differences quickly. Focus on the features that matter most for your routine: turning style, capacity, ease of cleaning, and how steady the incubator stays in your room.
Tip: First decide your batch size and where the incubator will sit. Then use the table to narrow down models that fit your needs.
|
Model Name |
Type |
Best For |
Turning |
Capacity (Chicken Eggs) |
Standout Feature |
Price |
|---|---|---|---|---|---|---|
|
6-Egg Auto-Turn Desktop |
Mini |
First-time, classroom |
Auto |
6 |
Simple controls, compact |
$24.99 |
|
USB 6-Egg Auto Roller |
Mini |
Science projects |
Auto |
6 |
USB powered, easy refill |
$56.98 |
|
16-Egg Digital Desktop |
Tabletop |
Home, repeat batches |
Auto |
16 |
Digital display, stable |
$107.00 |
|
24-Egg Interchangeable Tray |
Tabletop |
Small flocks |
Auto |
24 |
Swappable trays, easy clean |
$119.00 |
|
30-Egg Drawer Cabinet |
Cabinet |
Large batch, workflow |
Auto |
30 |
Drawer design, easy access |
$289.00 |
|
68-Egg Cabinet with Outage Protect |
Cabinet |
Homestead, backup needs |
Auto |
68 |
Power outage protection |
$580.96 |
This table helps you narrow down models by batch size and routine. For a small classroom project, a compact desktop model can be easier to supervise. For bigger batches or frequent hatching, a cabinet model can reduce crowding and support steadier airflow.
Note: Always check the EggBloom website for the newest prices and features before you buy. Pick the model that fits your space, batch size, and daily routine.
Egg incubator shortlist: best fit for beginners
Picking your first incubator can feel overwhelming. A short list helps you focus on models that reduce common mistakes and make your routine easier to manage.
Best starter model (auto turning, easy humidity)
You want a model that is simple to use and easy to clean. A small desktop incubator can be a good starter for families and classrooms. Automatic turning helps you avoid missed turns, and a clear lid helps you check progress with fewer lid openings.
Tip: Start with a small batch. You will learn faster and feel less stress.
Example:
A family wants to hatch eggs for the first time. They choose a compact desktop incubator and start with six eggs. They check the display each day, keep notes, and avoid opening the lid during lockdown. The steady routine helps them learn without rushing.
Best step-up model (stable, less maintenance)
If you want to hatch more eggs, you may want a step-up model with steadier airflow and controls. This can reduce daily fussing, especially if your room temperature changes during the day.
Why upgrade?
You can hatch more eggs at once, and you may spend less time correcting small swings.
Step-up Model Advantages Table:
|
Advantage |
What It Means for You |
|---|---|
|
More consistent conditions |
Less guessing from day to day |
|
Reduced labor |
Less daily work and fewer missed tasks |
|
Flexible use |
Can support different egg types with the right trays |
|
Logging habits |
Track your routine and improve over time |
Best cabinet model (large batches, outage protection)
If you want to hatch many eggs, a cabinet incubator can be a good choice. More capacity can reduce crowding, and some cabinet models include backup features to reduce risk during outages. If you hatch in a storm-prone area, outage planning matters.
Safety First:
For big batches, steadier airflow and a backup plan can protect your time and your eggs.
Cabinet Model Features Table:
|
Feature |
Benefit for You |
|---|---|
|
Power outage-proof |
Helps protect eggs during short outages |
|
Manual monitoring mode |
Lets you keep checks simple if power is lost |
You can compare desktop and cabinet types to find your best fit. If you are deciding between sizes, explore desktop egg incubators for learning batches and cabinet incubators for bigger batches.
Egg incubator setup basics after purchase
Dry run test before adding eggs
You should always run a dry test before placing any egg inside your incubator. This step helps you spot problems early and keeps your routine safer. Follow these steps for a smooth start:
-
Clean the incubator with a gentle cleaner to remove dust and residue.
-
Place the incubator in a room with steady temperature and no drafts.
-
Plug in the incubator and let it run for 24 hours.
-
Watch the temperature and humidity. Adjust the controls if needed.
-
Use this time to check airflow and make sure the fan works (if your model has one).
Tip: Start setting up the incubator one or two days before you plan to add eggs. This gives you time to fix issues before they affect your batch.
Example:
You clean your desktop model, set it on a stable table, and let it run overnight. In the morning, you confirm the numbers stay steady and the lid seals well.
Sensor placement and calibration
Accurate readings help you keep a steady environment for eggs. Place sensors at egg height and give them time to stabilize before you trust the numbers. If your readings look unusual, recheck placement and confirm your incubator is fully warmed up.
-
Read the manual to see if your incubator needs a calibration step.
-
Clean the sensor area before you start.
-
Place the sensor at the same height as the eggs for the best temperature reading.
-
Use a trusted method to cross-check humidity if readings seem off.
-
Make sure sensors stay dry. Water can cause wrong readings.
-
Give sensors time to adjust before you record “final” numbers.
Note: A quick check before each hatch is usually more useful than constantly adjusting during a hatch.
Daily routine and what to avoid
A simple daily routine keeps your incubator working well. You should:
-
Check and refill water trays as needed to keep humidity steady.
-
Recheck sensors before each hatch and anytime readings suddenly look unusual.
-
Make sure vents stay clear for good airflow.
-
Listen for the fan. It should run quietly.
-
Inspect wires and the door seal for damage.
-
Clean the incubator after each hatch with a gentle cleaner and let it fully dry.
Alert: Do not use harsh chemicals or let water touch electronic parts or sensors. Unplug the incubator before cleaning.
Example:
Each morning, you check the water tray, listen for the fan, and look at the display. You keep the area around the incubator clear so vents are not blocked.
By following these steps, you build a safer, steadier routine for setting up the incubator and caring for your eggs.
Common egg incubator buying mistakes
Buying too large too soon
Some people think a bigger incubator is always better. But starting with a large one can make things harder. It takes more space, more planning, and more cleaning. Many beginners learn faster with a smaller batch and a simpler routine.
Choosing by egg count only
Picking an incubator is not just about how many eggs it holds. Look for features that support a steady process, like auto turning, airflow (fan), easy water refill, and easy cleaning.
No plan for turning eggs
Turning eggs supports healthy development. If you forget turns, embryos can stick and hatch success can drop. Auto turning helps keep your routine consistent, especially on busy days.
Ignoring cleaning and access
You must clean your incubator after every hatch. If your model is hard to open or has tight corners, cleaning becomes harder. Choose a design with trays you can remove and surfaces you can reach.
Opening incubator too often during hatch
Opening the incubator often drops temperature and humidity. Chicks need stable conditions when hatching. Clear lids and reliable displays help you check progress without frequent openings.
Overfilling the incubator
Too many eggs inside can block airflow and cause uneven heat. Always follow the maximum egg count for your model and leave space between eggs.
Not checking humidity accuracy
Humidity supports a safe hatch. If you do not check it, eggs can lose too much or too little moisture. If readings seem off, confirm your sensor placement and use a consistent method to verify.
Skipping dry run before first hatch
A dry run helps you catch problems with temperature, airflow, or lid seal. Always run your incubator for 24 hours before adding eggs so you can adjust calmly.
Not calibrating sensors
If you do not check sensors, you might trust the wrong numbers. This can lead to avoidable hatch problems. Recheck placement and verify readings before each hatch, then avoid constant mid-hatch adjustments.
Neglecting ventilation needs
Eggs need fresh air to develop. If vents are blocked or airflow is poor, development can suffer. Keep vents clear and avoid crowding eggs.
Not planning for power outages
Power loss can damage a hatch. Choose a model that fits your risk level and make a backup plan to protect warmth during short outages.
Using wrong temperature for incubator type
Forced-air and still-air incubators often use different targets at egg height. Always follow your model’s instructions and confirm readings at egg level.
Not stopping turning at Day 18
You must stop turning chicken eggs at Day 18. This helps chicks get ready to hatch. Mark your calendar so you do not forget.
Not considering ease of water refill
If you cannot refill water easily, humidity can drop. A design that supports quick refills can help you open the lid less and keep conditions steadier.
📝 Tip: Keep a simple hatch log. Stable routines and good notes usually help more than constant tinkering.
You can find the right egg incubator by following a simple checklist. Choose a size that fits your eggs and space. Decide whether auto turning fits your routine. Focus on stable temperature and humidity, easy cleaning, and fewer lid openings. Use the tables to compare options, then do a dry test before you load eggs. A steady setup and calm routine usually lead to a better hatch experience.
FAQ
How do you clean your egg incubator after hatching?
You should unplug the unit and remove all trays. Wash each part with warm water and mild soap. Dry everything before reassembling. This helps keep your next batch safer.
What is the best room temperature for running an incubator?
You should place your incubator in a room between 68°F and 75°F. This helps the machine keep a steady temperature. Avoid windows, direct sun, and drafts for best results.
Can you use the same incubator for different types of eggs?
Yes, you can use one incubator for chicken, quail, or duck eggs if the model supports the right trays and settings. Adjust the settings for each type and follow your incubator manual.
What should you do if the power goes out during incubation?
You should keep the lid closed to hold heat. If your model has backup features, use them as directed. If not, keep the incubator insulated and avoid frequent opening until power returns.
How often should you check the eggs during incubation?
You should check the display once or twice a day for temperature and humidity. Only open the lid when you must (like adding water), and work quickly so conditions recover fast.
Data authenticity note: The temperatures, humidity ranges, hatch timing tips, and capacity guidance in this article are based on typical incubator manuals, standard poultry and aviculture practice, non-branded extension or training materials, and aggregated small-flock records. Actual results vary with egg fertility and handling, incubator model, sensor placement, room conditions, and flock health. Always follow your specific incubator manual, and consult local experts or an avian veterinarian for bird health concerns.


0 Comments