
You want to set up an egg incubator for your budgies or cockatiels at home. Start by choosing a reliable model, then clean, preheat, and stabilize it before you place any eggs. Once the incubator is running smoothly, add your eggs and monitor the temperature and humidity every day. Even small changes can affect the chicks, so avoid sudden adjustments. With a simple routine and steady conditions, you can help your eggs hatch safely, even if this is your first time.
Key Takeaways
-
Choose an incubator that fits small parrot eggs and keeps both temperature and humidity stable from day to day.
-
Check the temperature and humidity every day. In most forced-air incubators, keep the temperature close to 99–99.5°F (100–101°F for still-air units). Aim for about 45–55% humidity during most of incubation, then increase to roughly 65–75% for the last three days before hatch.
-
Turn the eggs 4–6 times each day so the embryo does not stick to the shell. Stop turning the eggs three days before the expected hatch date.
-
Collect and store eggs correctly. Mark the date on each egg, and keep them in a cool, slightly humid room until you are ready to start incubation.
-
Use candling after about 7 days to look for veins and movement so you can see which eggs are fertile and track their development.
-
Prepare for the lockdown stage by stopping egg turning and raising humidity three days before hatch. This makes it easier for chicks to break out of their shells.
-
Clean and disinfect the incubator after every hatch. A clean machine protects future clutches from germs.
-
Write down temperature, humidity, turning times, and candling results each day. Simple records help you find problems early and improve each hatch.
Do You Need an Egg Incubator for Budgies or Cockatiels?
Parent Birds vs. Artificial Incubation
You may wonder whether to use an Egg Incubator or let your birds do the work. In many homes, parent birds handle incubation well. They keep eggs warm, turn them often, and protect the nest. When the parents are calm and healthy, natural incubation is usually the best option. The table below compares natural and artificial methods:
|
Incubation Method |
Success Rate |
|---|---|
|
Natural Incubation |
90% and above |
|
Artificial Incubation |
Varies significantly |
If your birds sit steadily, do not damage eggs, and stay relaxed in the nest, let them incubate. Use artificial incubation only when parents ignore eggs, break them, or become stressed. In most homes, an incubator is a backup tool, not the first choice.
Tip: Parent birds usually know what to do. Use an Egg Incubator only when natural incubation is clearly not working.
Power, Time, and Commitment
Artificial incubation needs more than just a machine. You need steady power, time every day, and a plan for each chick after hatch. Eggs depend on warmth and moisture around the clock. If power is lost for too long, embryos can die. The table below shows how power loss can affect hatching based on reported experiences:
|
Power Outage Duration |
Outcome |
Incubator Model |
|---|---|---|
|
14 hours |
Successful hatch |
Hovabator 1602N |
|
2 hours |
Successful hatch |
N/A |
|
24 hours (estimated) |
N/A |
Brinsea Octogon 20 |
You must check the incubator many times each day. Plan to be home and available for at least three weeks to watch eggs and chicks. Think about your usual routine. If you travel often or work long shifts, artificial incubation may not be a good fit for you.
Risks of Small Parrot Eggs
Small parrot eggs, like those of budgies and cockatiels, are very sensitive. Even small shifts in heat or moisture can harm the developing chicks. If you use an Egg Incubator, you must keep conditions steady. Too much heat or air that is too dry can quickly cause problems.
Here are some risks to watch for:
-
Eggs can lose too much or too little water, which can weaken chicks and lower hatch rates.
-
Laying too many eggs can drain calcium from the parent birds. This can cause:
-
Egg binding (when a bird cannot lay an egg, leading to pain, shock, or distress)
-
Weak bones and broken bones
-
Seizures from low calcium levels
-
Egg binding is hard to see at first. If it is not treated, it can lead to paralysis or death. Always limit the number of clutches per year and make sure each chick will have a suitable home.
Decision Table: Is Artificial Incubation Right for You?
Ask yourself these questions before you choose artificial incubation:
|
Question |
Yes |
No |
|---|---|---|
|
Are parent birds stable and not abandoning or damaging eggs? |
||
|
Does your home have reliable electricity and at least three weeks of time for daily checks? |
||
|
Do you have a responsible plan for each chick's future home and care? |
If you can honestly answer "Yes" to all questions, you may not need artificial incubation because your birds and setup are already stable. If you answer "No" to any question, think carefully before using an Egg Incubator, and only proceed if you can meet all the needs listed above.
Note: Let parent birds incubate whenever they are healthy and reliable. Use artificial incubation as a backup, and always plan ahead for every chick's care.
When to Start Incubation
You want to give each egg the best chance to hatch. Timing matters. If you start incubation too early or too late, hatch rates can drop. Use these steps to decide when to begin:
-
Collect Eggs Daily
Check the nest every day. Pick up eggs gently and mark the date on each shell with a pencil. This helps you track the age of each egg. -
Store Eggs Properly
Place eggs in a cool room. Keep the temperature between 55°F and 65°F with humidity around 60–70%. Store eggs with the big end slightly up and shift their position once a day so the embryo does not stick to the shell. -
Watch the Age of Eggs
Eggs usually stay strong for about 7 days after laying. Try to set eggs in the Egg Incubator within this time. If you wait longer than 10 days, the chance of hatching goes down and chicks may be weaker. -
Check Parent Birds
If parent birds ignore eggs, break them, or seem very stressed, start artificial incubation right away. If parents are caring well for the eggs, let them continue. -
Prepare for Incubation
Before setting eggs, clean and preheat your Egg Incubator. Make sure temperature and humidity are stable. This helps prevent sudden changes that could harm embryos.
Tip: Write down the date you place each egg in the incubator. This makes it easy to count days and plan for lockdown and hatch.
Here is a simple decision table to help you choose the right time:
|
Situation |
What You Should Do |
|---|---|
|
Egg is less than 7 days old, parents ignore it |
Start incubation now |
|
Egg is less than 7 days old, parents care well |
Wait and let parents continue |
|
Egg is more than 10 days old |
Incubation may have a lower success rate |
|
Egg is between 7–10 days old |
Start soon, do not delay |
Incubation means keeping eggs warm and at the right humidity until chicks hatch. You control this process with an Egg Incubator. If you follow these steps, you give each egg a much better start.
Note: Always wash your hands before and after handling eggs. Clean tools and surfaces to keep germs away.
By following this process, you avoid wasting eggs and give each chick a safer chance to grow.
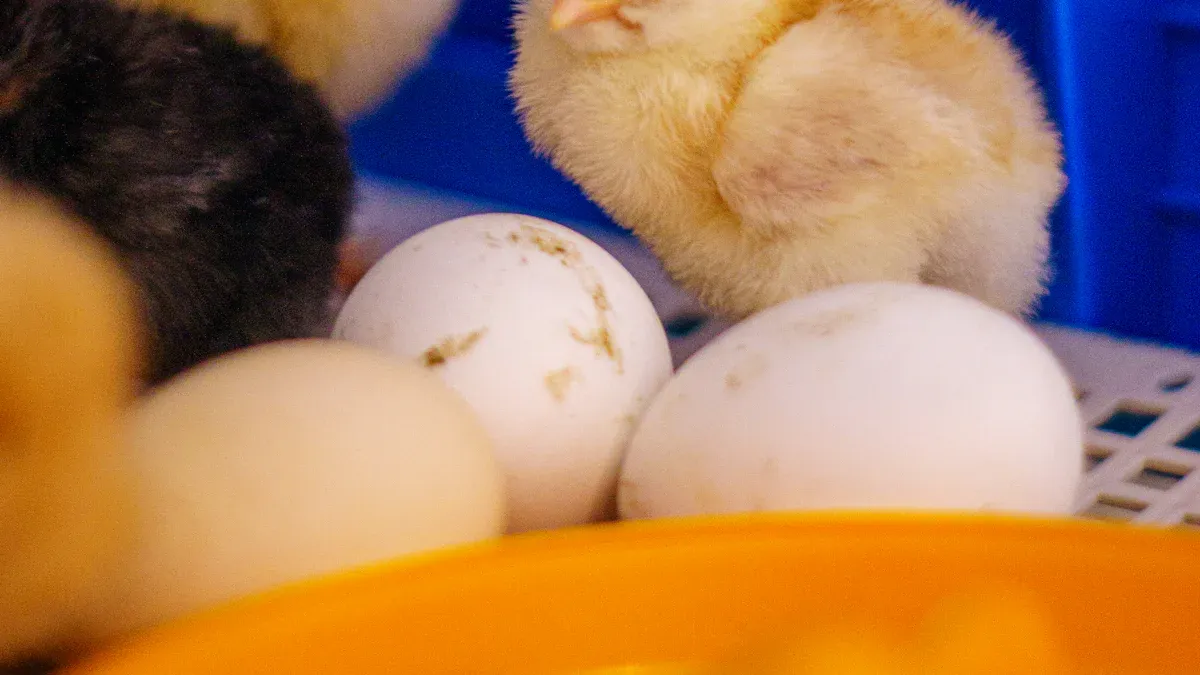
Budgie and Cockatiel Egg Basics
Incubation Days Compared
You may want to know how long budgie and cockatiel eggs take to hatch. Budgie eggs usually need between 17 and 20 days to finish incubation. Cockatiel eggs often hatch in about 18 to 21 days. These ranges help you plan your schedule and check progress. If eggs take much longer, review your setup and conditions.
Tip: Write down the date you set each egg in your Egg Incubator. This makes it easier to track days and notice problems early.
Temperature and Humidity Ranges
You must keep temperature and humidity steady for healthy chicks. Use the table below to find the best ranges for budgie and cockatiel eggs. Forced-air incubators use a fan to move air, while still-air incubators do not. “Hatching” here means the last three days before chicks break out of their shells.
|
Incubator Type |
Temperature Range (°F) |
Humidity Range (%) |
|---|---|---|
|
Forced-air |
99–99.5 |
45–55 |
|
Still-air |
100–101 |
45–55 |
|
Hatching (last 3 days) |
N/A |
65–75 |
If you keep these numbers steady, you give your eggs a strong chance to hatch. Sudden changes can harm embryos, so check your Egg Incubator at least twice a day.
Weight Loss and Air Cell Targets
Eggs lose weight during incubation because water slowly leaves the egg and air enters. This is normal and helps the chick breathe later. By hatch day, you want each egg to lose about 13–15% of its starting weight. If eggs lose too much, the air cell grows too quickly and chicks may dry out. If eggs lose too little, chicks may struggle to breathe at hatch.
-
Budgie and cockatiel eggs should lose around 13–15% of their weight by hatch.
-
Water leaves through the shell while air enters to support breathing.
-
Temperature and humidity together control how fast eggs lose weight.
Weigh eggs every few days using a small kitchen scale and record the numbers. If you see weight loss outside the normal range, adjust humidity. If the air cell looks too small or too large when you candle the eggs (shine a light through the shell), you may also need to change your settings.
Note: Candling means shining a light through the egg to see the air cell and embryo. You can do this with a small flashlight in a dark room.
Decision Table: What Should You Do?
|
Situation |
Action to Take |
|---|---|
|
Incubation days match normal range |
Continue your routine and keep records |
|
Temperature or humidity outside target range |
Adjust settings immediately |
|
Weight loss less than 10% after 2 weeks |
Lower humidity |
|
Weight loss more than 15% before hatching |
Raise humidity |
|
Air cell looks too small or too large |
Check both weight and humidity and adjust |
Follow these checks to keep your eggs healthy. Small, steady adjustments help you avoid losing a clutch.
Choosing the Right Egg Incubator
Selecting the right incubator for budgie and cockatiel eggs helps you protect every clutch. Many keepers start with a compact desktop egg incubator that fits small eggs, keeps conditions steady, and runs safely in a family home. Follow these steps to make a confident choice.
Tray Size and Shape for Small Eggs
Start by checking the tray. Budgie and cockatiel eggs are tiny and roll easily. Look for trays with small, rounded slots or soft padding. This design keeps eggs from moving too much. If the tray is too large, eggs may crack or shift. Some incubators offer adjustable trays. You can add a soft cloth or foam to cushion eggs if needed.
Step-by-step guide:
-
Measure your eggs. Most budgie and cockatiel eggs are about the size of a grape.
-
Choose an incubator with trays designed for small eggs or with adjustable slots.
-
Test the tray by placing a similar-sized object in each slot. Make sure it does not roll or bump into others.
Tip: Soft padding helps prevent cracks and keeps eggs safe during turning.
Temperature and Humidity Controls
Eggs need steady warmth and moisture. Look for an incubator that keeps the temperature between 99.3°F and 99.5°F (about 37.4°C). Humidity should stay around 45–55% for most of incubation, then rise to about 65–75% for the last three days. A reliable unit, such as a digital automatic 22-egg incubator, usually includes a built-in thermometer, fan, and water channels to help control these settings. You can also use a second digital thermometer or hygrometer to double-check the readings.
Key features to look for:
-
Consistent temperature control (around 99.3–99.5°F for forced-air units).
-
Water tray or channels for humidity, using clean or distilled water.
-
Built-in thermometer and space for a backup thermometer or hygrometer.
-
Fan for even heat distribution.
-
Easy-to-clean surfaces and removable trays.
|
Brand/Model |
Features |
User Feedback |
|---|---|---|
|
Nurture Right 360 |
360° visibility, egg candler, automatic turner, reliable |
Top rated incubator |
|
Brinsea Ovation Series |
Automatic turners, high hatch rates, easy controls |
Highly recommended by breeders |
Note: Run your incubator empty for 12–24 hours before adding eggs. This test helps you check temperature and humidity stability and calibrate your thermometers.
Safety, Noise, and Placement
Place your incubator in a quiet, safe spot. Avoid kitchens, dining tables, or places where food is prepared. Choose a room with little foot traffic and no direct sunlight. Make sure children and pets cannot reach the incubator. Some units make noise when turning eggs or running fans, so test the sound level before starting. Clean the incubator before and after each use to keep germs away.
Checklist for safe placement:
-
Quiet room, away from food and busy areas.
-
Stable surface, not near windows, vents, or heaters.
-
Out of reach of children and pets.
-
Easy access for daily checks.
🛡️ Always wash your hands before and after handling eggs or the incubator.
Decision Table: Choosing Your Egg Incubator
|
Feature Needed |
Yes |
No |
What to Do Next |
|---|---|---|---|
|
Tray fits small eggs |
Add padding or choose another model |
||
|
Temperature stays steady |
Test and calibrate or upgrade |
||
|
Humidity control available |
Use water tray or upgrade |
||
|
Safe, quiet placement possible |
Move to a better location |
Follow these steps to select and set up your Egg Incubator. If you plan to hatch more than one clutch at a time, a three-tray automatic incubator for birds and quail can give you extra capacity while still fitting on a shelf. Careful planning helps you avoid wasted eggs and gives each chick the best start.
Setting Up Your Egg Incubator
Setting up your incubator the right way gives your budgie and cockatiel eggs the best chance to hatch. Follow these steps to prepare your equipment and eggs before you begin incubation.
Cleaning and Preheating
Start by cleaning your incubator. A clean incubator keeps germs away from your eggs. Use a disinfectant that is safe for both you and your birds. The table below can help you choose the right cleaning agent:
|
Disinfectant Type |
Characteristics |
|---|---|
|
Quaternary Ammonia Compounds |
Non-irritating, non-corrosive, low toxicity, works even with some dirt present |
|
Multiple Phenolics |
Kills many germs, low toxicity, but can irritate skin |
|
Iodophors |
Kills many germs, cost-effective, but can stain and corrode in acid solutions |
You can also use:
-
Hydrogen peroxide after cleaning for extra disinfection.
-
Vinegar as a mild disinfectant, but never mix it with hydrogen peroxide.
Wash all trays, surfaces, and tools. Rinse well and let everything dry completely. Drying helps prevent mold and bacteria.
After cleaning, plug in your incubator and turn it on. Let it run empty for 12 to 24 hours. This step is called preheating. Preheating helps you check if the temperature and humidity stay steady. If you see any problems, fix them before adding eggs.
🧼 Tip: Always wash your hands for at least 20 seconds before and after touching eggs or the incubator.
Calibrating Temperature and Humidity
You need to make sure your incubator shows the correct temperature and humidity. Calibrating means checking whether your thermometer and hygrometer (humidity meter) are accurate.
Follow these steps:
-
Check your thermometer: Fill a glass with ice and water. Wait until the glass is half ice and half water. Put your thermometer in the glass. It should read 32°F (0°C). If it does not, adjust your thermometer if possible or remember the difference.
-
Set the temperature: For budgie and cockatiel eggs, keep the incubator between 99.3°F and 99.5°F (about 37.4°C to 37.5°C) in a forced-air model.
-
Set the humidity: Aim for about 45–55% humidity during most of incubation. Raise it to around 65–75% during the last three days before hatching.
-
Check humidity: Use a hygrometer. If you want to double-check, weigh your eggs before incubation and write down the weight. Eggs should lose about 11–13% of their weight by the time you stop turning them (called “lockdown”). If you see too much or too little weight loss, adjust the humidity.
📏 Note: Humidity affects how much water leaves the egg. If eggs lose too much water, chicks may get stuck in the shell. If eggs keep too much water, chicks may drown before hatching.
Placing and Marking Eggs
Collect eggs every day. Store them in a cool room at 55–65°F (13–18°C) and 60–70% humidity. Place eggs with the big end slightly up and change their position once a day to keep the embryo from sticking to the shell.
When you are ready to set the eggs:
-
Mark each egg: Use a pencil to write the date on the shell. You can also draw a small “X” on one side and an “O” on the other. This helps you see if you have turned the egg.
-
Place eggs in the incubator: Put eggs in the tray with the big end up or lying on their side. Make sure eggs do not touch each other so air can move around each egg.
-
Start your turning schedule: Turn eggs 4–6 times a day. Stop turning three days before the expected hatch date. Turning keeps the yolk from sticking to the shell and helps the chick grow strong.
🥚 Tip: Handle eggs gently and avoid washing them. The natural coating on the shell helps protect against germs.
Decision Table: Egg Placement and Marking
|
Situation |
What You Should Do |
|---|---|
|
Egg is dirty |
Wipe gently with a dry cloth only |
|
Unsure about egg age |
Mark with the date collected |
|
Eggs touch each other in tray |
Rearrange to leave space between eggs |
|
Unsure if eggs are being turned enough |
Use “X” and “O” marks to track turning |
By following these steps, you help each egg stay safe and healthy in your Egg Incubator. Careful setup and monitoring can make a big difference in your hatching success.
Incubation Routine and Monitoring
A good incubation routine helps you keep your eggs safe and healthy. You need to set the right temperature, humidity, and turning schedule. Daily checks and simple records help you spot problems early. Follow these steps to make your incubation process smooth and successful.
Turning Schedule and Methods
Turning eggs keeps the embryo from sticking to the shell. Turn each egg 4–6 times a day. If your incubator has an automatic turner, check that it works well. If you turn eggs by hand, use clean hands and turn them gently. Mark each egg with an “X” on one side and an “O” on the other so you always know which side was up last.
Step-by-step turning routine:
-
Wash your hands before touching eggs.
-
Turn each egg from “X” to “O” side, or vice versa.
-
Turn eggs at regular times, such as morning, noon, afternoon, and evening.
-
Stop turning eggs three days before the expected hatch date. This is called the “lockdown” stage.
🥚 Tip: Turning eggs at slightly different angles helps the chick grow strong and balanced.
Daily Checks and Adjustments
You need to check your Egg Incubator at least twice a day. Use a digital thermometer and hygrometer to monitor temperature and humidity. Write down the readings in a notebook or on your phone. This record helps you see changes over time.
Daily checklist:
-
Check temperature and humidity every morning and evening.
-
Add warm water to the water tray if humidity drops.
-
Make sure the turning system works correctly.
-
Look for any signs of mold, leaks, or bad smells.
-
Keep a log of all readings and actions.
📋 Keeping a log helps you spot trends and fix problems before they harm your eggs.
Tracking Weight Loss and Air Cell
Eggs lose water as they incubate. This is normal and helps the chick breathe before hatching. Weigh each egg every 3–4 days using a small kitchen scale and record the numbers. Aim for a total weight loss of around 13–15% by hatch day. If eggs lose too much or too little weight, you may need to adjust humidity.
How to track weight loss and air cell:
-
Weigh each egg before incubation and record the starting weight.
-
Weigh eggs every 3–4 days and compare to the starting weight.
-
Candle eggs (shine a small light through the shell) once a week to check the air cell. The air cell should grow larger as the egg loses water.
Decision Table: Adjusting Humidity Based on Weight Loss
|
Situation |
What You Should Do |
|---|---|
|
Weight loss less than 11% after 18 days |
Lower humidity |
|
Weight loss more than 13% after 18 days |
Raise humidity |
|
Air cell too small |
Lower humidity |
|
Air cell too large |
Raise humidity |
💡 Note: If you see that the air cell is not growing as expected when you candle the egg, adjust humidity as shown above.
By following this routine, you give each egg the best chance to hatch. Careful monitoring and small adjustments help you avoid losing a clutch.
Hatching and Aftercare
Lockdown Stage
You reach the most important part of incubation when you enter the lockdown stage. Lockdown means you stop turning the eggs and prepare for hatching. For budgies and cockatiels, start lockdown three days before the expected hatch date. At this point, raise the humidity in your incubator to about 65–75%. Higher humidity helps chicks break out of their shells without getting stuck. Do not open the incubator unless you see a clear problem. Opening the door can let out moisture and heat, which can harm the chicks.
Lockdown Steps:
-
Stop turning eggs three days before hatch.
-
Raise humidity to around 65–75%.
-
Check water trays and refill if needed.
-
Avoid opening the incubator during hatching.
Tip: Write down the lockdown date on your calendar so you do not forget.
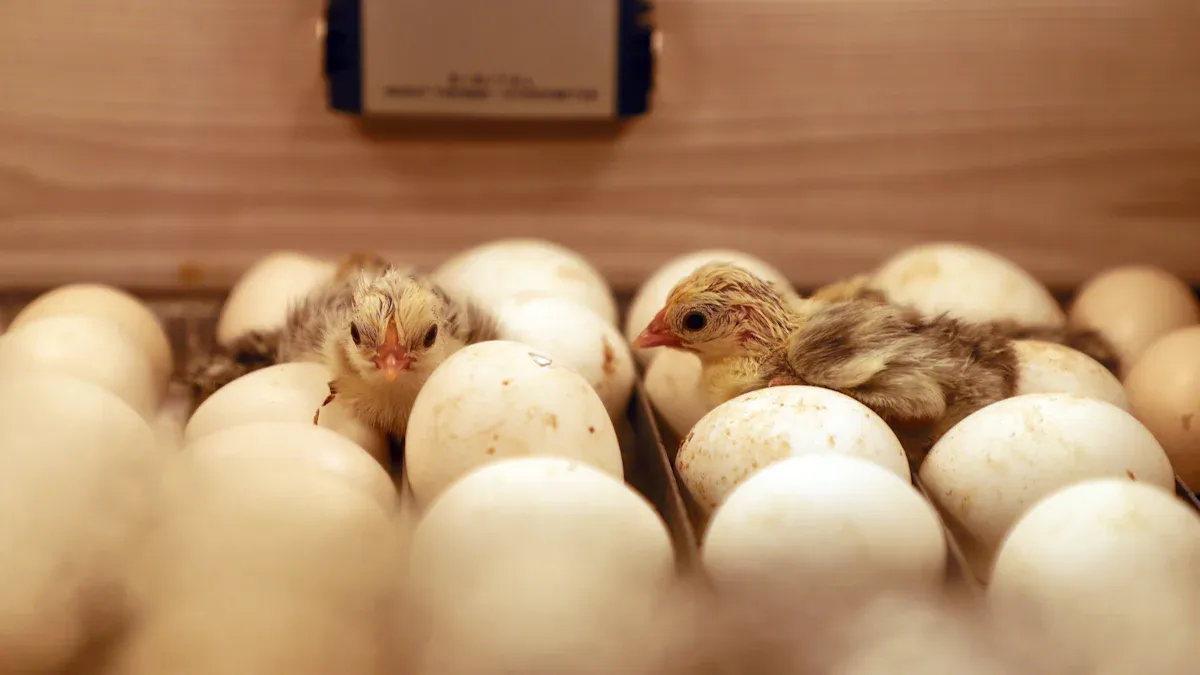
What to Expect at Hatch
You will notice signs that chicks are ready to hatch. Look for small cracks or holes on the eggshells. These are called “pips.” Chicks use their beaks to break through the shell. You may hear soft peeping sounds. Candle the eggs (shine a small light through the shell) to check for these signs:
-
External pips on the eggshell.
-
The embryo fills most of the egg.
-
Blood vessels are visible near the air cell.
-
A dark shadow appears in the air cell, showing the chick has started to breathe air.
Most chicks hatch within 24 hours after pipping. Some may take longer, so be patient. Do not help chicks out of the shell unless you see clear signs of trouble, such as no progress for more than 24 hours after pipping and obvious distress.
Decision Table: Hatch Timing and Actions
|
Situation |
What You Should Do |
|---|---|
|
Pipping starts, humidity is high |
Wait and watch |
|
No pipping after 21 days |
Candle eggs, check for signs of life |
|
Chicks stuck after pipping |
Raise humidity, wait longer, and seek expert advice if needed |
|
Chicks hatch and look healthy |
Prepare brooder box and move chicks once they are dry and fluffy |
Note: A brooder box is a warm, safe place for chicks after hatching.
Cleaning and Disinfection
After all chicks have hatched and you move them to the brooder, clean your incubator right away. Warm, damp conditions help germs grow fast. Cleaning keeps your next clutch safer.
Cleaning Steps:
-
Remove all eggshells and debris.
-
Wipe all inside surfaces with a diluted bleach solution (1 part bleach to 100 parts water). Do not use alcohol-based cleaners, as they can damage plastic.
-
Soak trays and non-electrical parts in the bleach solution for one hour, then rinse well.
-
Use compressed air to blow dust from the fan and electrical parts. Wipe these areas with a damp cloth.
-
Let all parts air dry completely before storing.
-
Store the incubator in a cool, dry place.
Never use a dishwasher for any incubator parts. Always check whether you need to replace any worn parts before storing.
🧼 Always wash your hands after cleaning the Egg Incubator.
By following these steps, you protect your chicks and eggs from germs and give your next clutch a better chance to hatch.
Troubleshooting and Safety Tips
Common Problems and Solutions
You may face some common problems during incubation. Quick action can help you save your clutch. Use this table to spot issues and find solutions:
|
Problem |
What You See |
What You Can Do |
|---|---|---|
|
Low hatch rate |
Few or no chicks hatch |
Review your notes. Check temperature and humidity logs. Make sure you turned eggs often enough. If problems repeat, pause breeding and check parent bird health. |
|
Egg binding |
Female bird looks tired, breathes hard, or strains |
Give warmth and rest. Offer fluids and a calcium source. Call a vet if you see no improvement. Good nutrition and exercise help prevent this. |
|
Mold or bad smell |
Eggs look dirty or smell bad |
Remove affected eggs. Clean the incubator. Check humidity and air flow. |
|
Uneven temperature |
Chicks die before hatching |
Calibrate your thermometer. Move the incubator away from windows, vents, or heaters. |
|
Sticky chicks |
Chicks cannot break free from shell |
Raise humidity during the last three days. Avoid opening the incubator during hatching. |
Tip: Keep a daily log of temperature, humidity, and egg turning. This helps you spot problems early.
When to Stop or Return to Parents
Sometimes, you need to decide whether to stop artificial incubation or return eggs to the parent birds. Use this step-by-step guide:
-
Watch the eggs for signs of life. Candle eggs after 7 days. If you see no veins or movement, the egg may not be fertile.
-
Check if parent birds are calm and caring. If they start sitting on eggs again, you can return suitable eggs to them.
-
If you see repeated low hatch rates, stop using the Egg Incubator. Review your process and talk to a vet or experienced breeder.
-
If you must leave home for more than a day, consider returning eggs to parents if they accept them.
Decision Table: Should You Continue Artificial Incubation?
|
Situation |
What You Should Do |
|---|---|
|
Eggs show no signs of life after 10 days |
Stop incubation and remove eggs |
|
Parent birds want to sit on eggs |
Return eggs to parents if they accept them |
|
Two clutches in a row do not hatch |
Pause breeding and seek advice |
|
You cannot monitor eggs daily |
Return eggs to parents if possible |
Note: Always put the health of your birds and chicks first. Do not risk more losses if problems continue.
Home Safety and Hygiene
You can keep your home and birds safe by following these simple steps:
-
Handle eggs gently to avoid cracks.
-
Clean and disinfect the incubator after every hatch. Use safe cleaning agents and let all parts dry fully.
-
Calibrate your temperature and humidity sensors often so your readings stay accurate.
-
Place the incubator in a quiet spot, away from windows, kitchens, and busy areas.
-
Wash your hands for at least 20 seconds before and after touching eggs or chicks.
-
Keep children and pets away from the incubator and brooder box.
🧼 Good hygiene protects both your birds and your family from germs.
By following these troubleshooting and safety tips, you give your eggs the best chance to hatch. Careful records, quick action, and a clean setup help you avoid wasting a clutch.
Quick Reference: Budgie and Cockatiel Egg Incubator Guide
One-Page Parameter Chart
You can use this chart to quickly check the most important numbers and steps for budgie and cockatiel egg incubation. This table helps you keep track of what your eggs need at each stage.
|
Parameter |
Budgies |
Cockatiels |
|---|---|---|
|
Incubation Days |
18–21 |
18–21 |
|
Egg Turning Stops |
Day 15 |
Day 18 |
|
Incubation Temperature |
99–99.5°F |
99–99.5°F |
|
Humidity (Incubation) |
45–55% |
45–55% |
|
Humidity (Lockdown) |
≥65% (last 3 days) |
≥65% (last 3 days) |
|
Weight Loss Target |
13–15% by hatch |
13–15% by hatch |
|
Wait After Pip |
24–36 hours |
24–36 hours |
|
Safe Intervention Area |
Air cell only |
Air cell only |
Tip: “Lockdown” means the last three days before hatching. You stop turning eggs and raise humidity.
Home Checklist
Follow these steps to prepare and run your home incubation smoothly:
-
Collect and Store Eggs
-
Gather eggs daily. Store at 55–65°F and 60–70% humidity.
-
Mark each egg with the date using a pencil.
-
-
Prepare the Egg Incubator
-
Clean and disinfect all parts. Let everything dry.
-
Preheat the incubator for 12–24 hours before adding eggs.
-
-
Set and Monitor Eggs
-
Place eggs with the big end up or on their side.
-
Turn eggs 4–6 times a day until the last three days.
-
Check temperature and humidity twice daily.
-
Weigh eggs every 3–4 days to track weight loss.
-
-
Lockdown and Hatch
-
Stop turning eggs three days before hatch.
-
Raise humidity to at least 65%.
-
Watch for pipping (small cracks) and hatching.
-
-
Aftercare
-
Move chicks to a brooder box after hatching.
-
Clean and disinfect the incubator before the next use.
-
📝 Keeping a simple notebook helps you remember dates and changes.
Decision Guide
You may wonder if you should use an incubator or let the parent birds do the work. Use this guide to help you decide:
Some birds never make good breeders. If your birds ignore or damage eggs, you may need to use an incubator. Always rest your breeding pair for about six months between clutches. Budgies and cockatiels often do best with natural incubation. Incubators can be expensive, and hand-raising chicks from day one is very demanding. Chicks usually get the best start when parents feed and warm them in the early days.
Step-by-step decision table:
|
Question |
Yes |
No |
What to Do Next |
|---|---|---|---|
|
Are parent birds calm and caring for eggs? |
If yes, let parents incubate. |
||
|
Do you have reliable power and time for daily checks? |
If yes, you can use an incubator responsibly. |
||
|
Have you planned for every chick’s future home? |
If no, wait before breeding. |
||
|
Did the last clutch have problems with parents? |
If yes, consider incubator use as a backup. |
🐣 If you answer “no” to any question, try to solve the problem before starting. This helps you avoid wasted eggs and weak chicks.
By following this quick reference, you can give your eggs the best chance to hatch healthy chicks at home and, as your flock grows, move from a small desktop unit to a larger cabinet incubator if you need higher-capacity hatching.
You can set up and run an egg incubator at home by following clear steps. Start by choosing a reliable incubator. Keep the temperature steady at about 99–99.5°F in a forced-air unit (100–101°F for still-air models). Adjust humidity from about 45–55% during most of incubation to 65–75% before hatching. Turn eggs several times each day. Watch your eggs through the viewing window. Use this table to check your setup:
|
Feature |
What to Do |
|---|---|
|
Temperature |
Keep steady at about 99–99.5°F (forced-air) or 100–101°F (still-air) |
|
Humidity |
Hold around 45–55%, then raise to about 65–75% at lockdown |
|
Turning |
Turn eggs 4–6 times daily until the last 3 days |
|
Air Circulation |
Make sure air moves inside and vents are not blocked |
Stay alert and keep everything clean. Use the quick reference and checklist for each clutch. With care and patience, you can help your chicks hatch strong and healthy!
FAQ
How do I know if my incubator temperature is correct?
Check the digital thermometer at least twice daily. For forced-air incubators, the display should read about 99.3–99.5°F. If you see numbers outside this range, adjust the incubator. Use a backup thermometer for accuracy.
What should I do if the humidity drops too low?
Add warm water to the incubator’s water tray. Check the humidity gauge. If it stays below your target range (around 45–55%), place a small wet sponge inside to increase moisture. Monitor the reading every few hours.
How often should I turn the eggs?
Turn each egg 4–6 times a day. Use a pencil to mark an “X” on one side and an “O” on the other. This helps you track turning. Stop turning three days before the expected hatch date.
What does “lockdown” mean in egg incubation?
Lockdown means you stop turning eggs and raise humidity for the last three days before hatching. This helps chicks hatch safely. Do not open the incubator during this time unless you see a serious problem.
Can I open the incubator during hatching?
Avoid opening the incubator during hatching. Opening the lid can cause heat and moisture loss, which may shrink-wrap chicks in their shells. Only open if you see a serious problem, like a bad smell or a clearly distressed chick.
How do I know if an egg is fertile?
Candle the egg by shining a small flashlight through it after about 7 days. Look for visible veins or a dark spot that moves. If you see only a clear egg with no veins, it may not be fertile.
What should I do if chicks do not hatch on time?
Use this decision table:
|
Situation |
What You Should Do |
|---|---|
|
No pipping after 21 days |
Candle eggs, check for signs of life and review settings |
|
Chicks pip but do not hatch |
Raise humidity, wait longer, and seek expert or veterinary advice if unsure |
|
No movement or sound |
Remove egg carefully and check for health following safe guidelines |
Stay patient. Some chicks need extra time.
Data authenticity note: The temperature, humidity, timing, and weight-loss ranges in this guide are based on small-parrot breeding practice, modern egg-incubator equipment manuals, and aggregated hatching logs from experienced keepers. Always compare them with the instructions for your specific incubator and, when needed, seek advice from an avian veterinarian.


0 Comments