
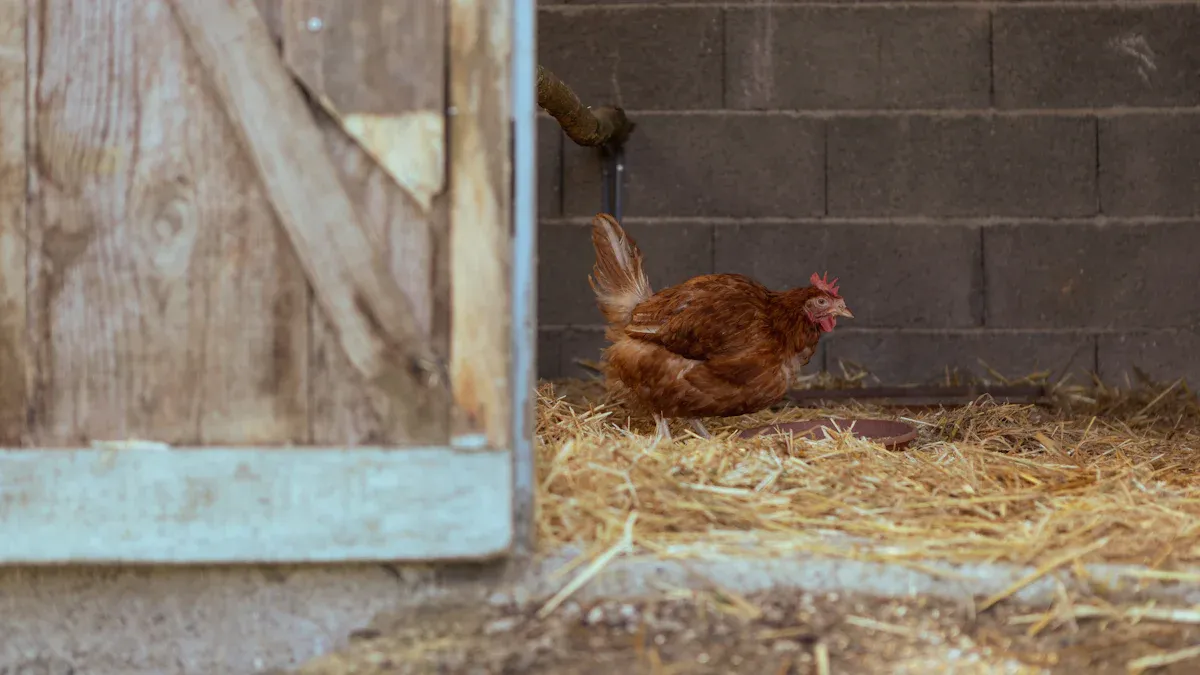
Chickens in winter can thrive and keep laying eggs if you give them the right care. Most healthy birds handle cold weather well when you keep them dry, out of drafts, and well fed. You may face a few challenges, like keeping water from freezing, protecting your flock from predators, or staying comfortable while working outside. With simple steps and the right setup, you can help your hens stay cozy and productive, even if you are new to backyard chicken keeping. If you are just getting started, you can also follow a beginner’s backyard chickens guide to plan your first flock before winter hits.
Key Takeaways
-
Chickens maintain a body temperature of 105–107°F, using feathers for insulation. Fluffing up is a natural way to stay warm.
-
Keep the coop at about 35–45°F at roost height on the coldest nights as a practical winter target. Healthy chickens can handle colder outdoor air if they stay dry and well fed.
-
Watch for signs of cold stress, such as shivering or pale combs. Act quickly to address any issues to keep your flock safe.
-
Perform daily checks on water, feed, and bedding. Chickens need fresh water and may eat up to 25% more in cold weather.
-
Use deep bedding (4–6 inches) to trap heat and absorb moisture. Stir bedding regularly to maintain a cozy environment.
-
Consider adding supplemental light to provide 14 hours of light daily, which helps maintain egg production during winter.
-
Inspect your coop for drafts and moisture. Seal any gaps and ensure good ventilation to prevent frostbite risks.
-
Regularly check each chicken for health issues and signs of frostbite. Early detection helps keep your flock healthy.


Chickens in Winter: Cold Tolerance and Signs
Chicken Body Temperature
You might wonder how your flock handles the cold. Adult chickens in winter keep their bodies much warmer than the air around them. Their average body temperature stays between 105°F and 107°F. This high temperature helps them stay active and healthy, even when the weather turns chilly. Chickens use their feathers to trap heat close to their skin. When you see your hens fluff up, they are making a natural winter coat.
-
Chickens in winter maintain a body temperature of 105–107°F.
-
Feathers act as insulation, keeping warmth in and cold out.
-
Fluffing up is a normal way for chickens to stay cozy.
Comfort Zone and Cold-Hardy Breeds
You want your chickens in winter to feel comfortable. In general, most breeds are very comfortable in temperatures around 60–75°F, but you do not need to heat the coop that high in winter. Healthy, fully feathered birds can safely handle much colder air as long as they stay dry, out of drafts, and well fed, especially when the air around the roosts is kept in the mid-30s to mid-40s°F. Some breeds handle the cold better than others. These cold hardy chickens have thick feathers, larger bodies, or special combs that resist frostbite.
Here is a quick guide to some of the best cold hardy chickens for your backyard:
|
Chicken Breed |
Average Hen Weight |
Average Rooster Weight |
Notable Features |
|---|---|---|---|
|
Brahmas |
9-10 pounds |
12-13 pounds |
Profuse feathering, feathered feet, tiny pea comb for frostbite prevention. |
|
Buff Orpington |
7 pounds |
9 pounds |
Dense feathering, calm personality, single comb with frostbite risk. |
|
Plymouth Rock |
6-7 pounds |
8-9 pounds |
Developed for harsh winters, friendly nature, single comb with frostbite risk. |
|
Australorp |
7-9 pounds |
8-9 pounds |
Calm, reliable egg layers, single comb. |
|
Wyandotte |
6-7 pounds |
7-8 pounds |
Dense, fluffy feathers, rose comb for frostbite prevention. |
|
Faverolles |
6-7 pounds |
7-8 pounds |
Dense feathers, feathered feet, friendly nature, smaller single comb. |
If you live in a region with harsh winters, choosing cold hardy chickens makes winter care easier. Always check your coop temperature. If you ask, "what temperature is too cold for chickens?"—most healthy birds can handle temperatures just above freezing, but you should keep the coop at or above 35°F at roost height for best results.
Signs of Cold Stress
You need to watch your flock for signs of trouble. Chickens in winter show clear signals when they feel too cold. If you notice these signs, take action right away:
-
Chickens puff up their feathers and stay fluffed up for long periods.
-
Combs and wattles turn pale or bluish.
-
Birds shiver or tremble.
-
Hens huddle tightly together and move less.
-
You hear more distressed clucking or loud vocalizations.
-
Egg production drops as chickens use energy to stay warm.
-
Frostbite appears as pale patches on combs, wattles, or toes.
If you see these signs, ask yourself again, "what temperature is too cold for chickens?" Check your coop for drafts, dampness, or low temperatures. Make changes quickly to keep your chickens in winter safe and comfortable.
Quick Comfort Checklist
You want to make sure your chickens stay comfortable all winter. Use this checklist to quickly assess your flock and coop. Check these items every morning and evening. If you spot a problem, act right away.
Daily Comfort Checks for Your Flock:
-
🐔 Observe your chickens: Watch for birds huddling tightly, standing on one foot, or staying fluffed up. These signs mean your chickens feel cold.
-
🌡️ Check coop temperature: Use a thermometer at roost height. Aim for 35–45°F during the coldest nights. If the temperature drops below 35°F, consider safe supplemental heat.
-
💨 Feel for drafts: Stand inside the coop. If you feel cold air blowing on you or your birds, block the draft but keep upper vents open for airflow.
-
🧹 Inspect bedding: Make sure you have 4–6 inches of dry straw or shavings. Stir bedding under the roosts and add more if needed.
-
🚰 Look at waterers: Confirm water is liquid and not frozen. Check 2–3 times a day. Use heated waterers if possible.
-
🍽️ Check feed supply: Make sure feeders are full. Chickens eat up to 25% more in cold weather. Store extra feed in a dry, rodent-proof container.
-
🥚 Collect eggs: Gather eggs at least twice daily. Eggs can freeze and crack quickly in cold weather.
-
👀 Inspect combs, wattles, and toes: Look for pale, gray, or black spots. These may signal frostbite. If you see these signs, warm the bird slowly and seek advice if the area looks severe.
Tip: If you smell ammonia or see condensation on windows, increase ventilation. Moisture raises frostbite risk.
Quick Reference Table: Winter Comfort Numbers
|
Item |
Target Value |
|---|---|
|
Coop Temp (Roost) |
35–45°F |
|
Bedding Depth |
4–6 inches |
|
Roost Height |
At least 12 inches |
|
Roost Space |
9 inches per bird |
|
Water Checks |
2–3 times per day |
|
Feed Increase |
Up to 25% more than usual |
|
Light Hours |
14 hours (with supplement) |
Weekly Comfort Actions:
-
Deep clean under roosts.
-
Inspect vents and windows for moisture.
-
Check all birds for frostbite and general health.
-
Review feed and bedding supplies.
You can print this checklist and keep it near your coop door. Regular checks help you catch problems early and keep your flock cozy all winter.
How to Keep Chickens Warm: Coop Setup
Ventilation Without Drafts
You want to keep chickens warm, but you also need fresh air in the coop. Good ventilation removes moisture and ammonia, which can build up fast in winter. Too much moisture makes frostbite more likely. At the same time, you must block cold drafts that blow directly on your birds.
Start by checking for drafts. Stand inside your coop on a windy day. If you feel cold air moving across your face or hands, you have a draft. Seal cracks at bird level with weatherproof tape or boards. Leave vents or small windows open near the ceiling. This lets warm, moist air escape without chilling your flock.
Use your nose and eyes to check air quality. If you smell ammonia or see condensation on windows or walls, you need more ventilation. Open upper vents a little more until the smell or moisture goes away. If the coop feels stuffy but not cold, open vents wider. If the coop gets too hot, open more ventilation until the air inside matches the outside temperature.
Here is a quick guide for adjusting ventilation:
|
Condition |
Recommended Action |
|---|---|
|
Coop too hot |
Open more ventilation until isothermal with outdoors |
|
Ammonia smell present |
Increase ventilation |
|
Drippy condensate or frost |
Increase ventilation |
|
No smell or condensate, but cold |
Adjust ventilation until ammonia odor or frost appears, then slightly open it up |
Tip: Always keep at least one upper vent open, even during the coldest nights. This helps prevent moisture buildup and keeps your chickens healthy.
Insulation and Deep Bedding
Insulation helps with keeping chickens warm in winter. You do not need to heat up the coop if you use the right materials. Focus on keeping the coop dry and blocking drafts. You can add foam board, rigid insulation, or even thick cardboard to the walls. Cover insulation with plywood or paneling so chickens do not peck at it.
Deep bedding is another key step. Spread 4–6 inches of clean straw or pine shavings on the floor. This bedding traps heat and absorbs moisture. Stir the bedding every few days, especially under the roosts where droppings pile up. Add fresh bedding as needed. A deep layer acts like a blanket for your flock.
Place a 6–8 inch kickboard at the door to keep bedding inside. This helps maintain the right depth and keeps the coop floor warmer. Deep bedding also gives chickens a place to scratch and stay busy during long winter days.
Roost Design for Warmth
Roosts give your chickens a safe, warm place to sleep. Set up roosts at least 12 inches off the floor. This keeps birds away from cold drafts and damp bedding. Use a wide, flat board or a sturdy wooden pole. Each chicken needs about 9 inches of roost space.
Chickens fluff up and sit close together on the roost. Their bodies share heat, which helps keep chickens warm through the night. Make sure the roost is wide enough so birds can cover their toes with their feathers. This protects their feet from frostbite.
Check that the roost is stable and not wobbly. Place it away from windows and doors to avoid cold spots. Clean under the roost often, since droppings build up quickly in winter.
Do this:
Check for drafts at bird level and seal them.
Add or repair insulation on coop walls.
Set up roosts at least 12 inches off the floor.
Give each chicken 9 inches of roost space.
Use 4–6 inches of dry bedding and a 6–8 inch kickboard at the door.
Stir bedding and clean under roosts weekly.
Increase ventilation if you smell ammonia or see condensation.
You now know how to keep chickens warm with the right coop setup. These steps help your flock stay cozy and healthy all winter. Good winter preparations make a big difference for your birds and your egg basket.
Pre-Winter Coop Checklist
You want your chickens to stay warm and healthy all winter. A careful coop inspection before the cold sets in makes a big difference. Use this step-by-step checklist to prepare your coop for winter weather:
-
Inspect the Coop Structure
Walk around your coop. Look for cracks, gaps, or holes in the walls, roof, and floor. Even small openings can let in cold drafts or moisture. Seal any gaps with weatherproof caulk or boards. -
Check Windows and Doors
Open and close every window and door. Make sure they fit tightly and latch securely. Replace any broken glass or damaged frames. Add weatherstripping if you feel cold air coming through the edges. -
Test for Drafts at Bird Level
Stand inside your coop on a windy day. Move your hand along the walls and near the floor. If you feel cold air, block the draft with insulation or extra boards. Keep upper vents open for airflow, but block drafts at chicken height. -
Patch Roof Leaks
Look for signs of water stains or drips on the ceiling. Fix any leaks with roofing tar or new shingles. A dry coop keeps your flock safe from dampness and frostbite. -
Upgrade Insulation
Add or repair insulation in the walls and ceiling. Use foam board, rigid insulation, or thick cardboard. Cover insulation with plywood so chickens cannot peck at it. In very cold areas, add extra layers to the walls and even the floor. -
Set Up Adjustable Vents
Make sure you have vents near the ceiling. These let out moist air without chilling your birds. Adjust the size of the opening based on the weather. Always keep at least one vent open, even on the coldest nights. -
Prepare Deep Bedding
Spread 4–6 inches of clean straw or pine shavings on the floor. Place a 6–8 inch kickboard at the door to keep bedding inside. Stir bedding under the roosts and add more as needed. -
Check Roosts for Stability and Height
Roosts should be at least 12 inches off the floor. Each chicken needs about 9 inches of space. Make sure roosts are sturdy and not wobbly. -
Review Feed and Water Setup
Store extra feed in a dry, rodent-proof container. Plan for up to 25% more feed in winter. Set up heated waterers or plan to check water 2–3 times a day to prevent freezing. -
Test Lighting and Timers
If you use supplemental light, check bulbs and timers. Set the timer to provide 14 hours of total light each day. Place lights safely away from bedding and water.
Tip: Print this checklist and hang it near your coop door. A quick review each fall helps you catch problems early and keeps your flock cozy all winter.
Pre-Winter Coop Prep Table
|
Task |
Target/Action |
|---|---|
|
Seal cracks/gaps |
No drafts at bird level |
|
Insulation |
Walls, ceiling, floor if possible |
|
Bedding depth |
4–6 inches |
|
Roost height |
At least 12 inches |
|
Roost space |
9 inches per bird |
|
Water check |
2–3 times per day or use heated base |
|
Feed supply |
Up to 25% more than usual |
|
Light hours |
14 hours (with timer if needed) |
|
Ventilation |
At least one upper vent always open |
You can use this checklist every fall. Careful preparation keeps your chickens safe, warm, and productive all winter long.
Keeping Chickens Warm: Safe Heating Options
When to Add Supplemental Heat
You might ask, can chickens survive winter without heat? Most of the time, they can. Healthy hens do fine in cold if they stay dry, out of drafts, and well fed. Try to keep your coop at 35–45°F at roost height during cold nights. If the coop stays above 35°F, you usually do not need extra heat. If it drops below 35°F for several nights, you should think about safe supplemental heat. If you prefer to hatch eggs indoors rather than under a broody hen during the coldest months, a reliable desktop egg incubator lets you maintain precise temperatures without heating the whole coop.
Decision Guide:
If your coop temperature stays above 35°F → you usually don’t need extra heat.
If it regularly drops below 35°F → consider safe supplemental heat as described below.
Safe Heat Sources
You have a few safe ways to heat your coop. Not all heaters work the same. Many people ask about heat lamps or space heaters. Heat lamps can warm the coop, but they can start fires, especially with dry bedding. If you use a heat lamp, secure it with two supports and keep it away from anything that can burn. There are safer choices.
A bulb heater or a flat-panel radiant heater is safer for most coops. A bulb heater uses a ceramic part or a low-watt infrared bulb. It gives gentle heat and does not have an open flame. A flat-panel heater hangs on the wall and sends heat out. Both lower fire risk and keep chickens comfortable.
A space heater made for small animals can help too. Pick one with a tip-over shutoff and a thermostat. Put the space heater on a steady surface, away from bedding and water. Never use an extension cord unless it is made for outdoor use. Always check cords for damage.
Do this:
Add heat only if coop temperature drops below 35°F at roost height.
Use a thermostatically controlled bulb heater or flat-panel radiant heater.
Avoid using a heat lamp unless absolutely necessary, and secure it well.
Place any space heater on a stable, non-flammable surface.
Keep cords out of reach of chickens and away from bedding.
Check all heaters daily for dust, debris, and proper function.
Monitor for fire risk and never leave unsafe heaters unattended.
Overheating and Frostbite Risks
Too much heat can cause problems for chickens. If the coop is too warm, chickens may not grow thick winter feathers. Big changes in temperature can stress your flock. Keep the coop just above freezing, not hot.
Frostbite can happen when it gets very cold, especially if the coop is wet or has poor airflow. Combs, wattles, and toes are most at risk. You can stop frostbite by keeping the coop dry, blocking drafts, and using safe heat.
Here is a table showing the main frostbite risk factors and how you can prevent them:
|
Risk Factors |
Preventive Measures |
|---|---|
|
Temperature |
Provide outdoor shelter and windbreaks during severe cold. |
|
Wind chill factor |
Use plastic sheeting or tarps to block wind, rain, and snow from the run. |
|
Exposure duration |
Limit outdoor time during extreme cold, wind, or precipitation. |
|
Humidity/moisture |
Keep the coop clean and dry to prevent moisture buildup. |
|
High altitude |
Give chickens a protected outdoor space to avoid long confinement indoors. |
|
Diminished circulation |
Manage the coop environment to maintain warmth and reduce drafts. |
You may still wonder, can chickens survive winter without heat? Most of the time, yes. Focus on a dry, draft-free coop and use safe heat only when needed. These steps help your flock stay cozy and safe all winter.
Heating Setup Steps
You want to set up safe heating for your chickens in winter. Follow these steps to keep your flock warm and your coop safe:
-
Check the Coop Temperature
Place a thermometer at roost height. Look for readings below 35°F during the coldest nights. If the temperature stays above 35°F, you do not need extra heat. If it drops below, prepare to add supplemental heat. -
Choose a Safe Heater
Pick a flat-panel radiant heater, a thermostatically controlled bulb heater, or a small animal-safe space heater. Avoid open-flame heaters. If you must use a heat lamp, secure it with two supports and keep it away from bedding. -
Select the Right Location
Mount or place the heater near the roosts, but not touching wood, bedding, or water. Keep at least 18 inches between the heater and anything flammable. Make sure the heater cannot tip over or fall. -
Install the Heater Securely
Use brackets, screws, or mounting hardware to fix the heater in place. If you use a heat lamp, double-check that both supports hold it firmly. Never hang heaters by their cords. -
Manage Cords and Power
Use only outdoor-rated extension cords if needed. Keep cords off the floor and away from chickens. Secure cords to walls or ceilings. Check for frayed wires or damage before plugging in. -
Set the Thermostat or Timer
Adjust the heater’s thermostat to keep the coop at 35–45°F at roost height. If your heater has a timer, set it to run only during the coldest hours. Avoid overheating the coop. -
Test the Setup
Turn on the heater and watch for 10–15 minutes. Make sure it works as expected. Check that the area around the heater stays cool and dry. Look for any signs of smoke or burning smells. -
Monitor Daily
Check the heater every morning and evening. Feel the area around it for heat. Make sure bedding stays dry and no dust builds up on the heater. Clean the heater as needed.
Tip: Always keep at least one upper vent open, even when using heat. Good airflow prevents moisture and frostbite.
Heating Safety Table
|
Step |
What to Do |
|---|---|
|
Temperature Check |
Use thermometer at roost height |
|
Heater Choice |
Flat-panel, bulb heater, or animal-safe unit |
|
Placement |
18 inches from bedding, away from water |
|
Cord Safety |
Outdoor-rated, secured, undamaged |
|
Thermostat/Timer |
Set for 35–45°F, avoid overheating |
|
Daily Check |
Inspect heater, bedding, and air quality |
You can print this table and keep it near your coop. Careful setup and daily checks help you keep your chickens warm and safe all winter.
Daily Care: Feed, Water, and Routine
Water in Freezing Weather
Water is the most important part of your chickens’ daily care in winter. Chickens need access to fresh, unfrozen water at all times. Cold weather makes this a challenge. You should check waterers two to three times each day. If you see ice, swap out the water right away. Heated waterers or heated bases work well for most backyard coops. Rubber tubs are another good choice because you can knock out the ice easily.
When temperatures drop, provide warm water in the morning and again in the afternoon. Chickens drink more when the water is not icy. This helps them digest feed and stay healthy. Place waterers on a stand to keep bedding out and reduce spills. Always keep waterers away from heaters and electrical cords for safety.
Tip: If you cannot use a heated waterer, bring waterers inside overnight and refill them with warm water each morning. This simple step keeps your flock hydrated and comfortable.
Increased Feed Needs
Chickens burn more calories to stay warm in winter. You should increase their feed by up to 25% during cold months. Always keep feeders full and check them daily. Store extra feed in a dry, rodent-proof container. Keep the feed area clean to avoid attracting pests.
Follow these best practices for feed storage:
-
Ensure proper airflow to prevent moisture and heat buildup.
-
Maintain humidity below 65% to avoid mold and nutrient loss.
-
Seal cracks and keep the area clean to keep pests away.
-
Store different types of feed separately to prevent cross-contamination.
-
Inspect feed for color, texture, and odor to ensure freshness.
You can feed warm food to your chickens in the morning or evening. Warm oatmeal, cooked grains, or scrambled eggs give extra energy and encourage eating. When you feed warm food, you help your flock generate body heat and stay active.
Quick Winter Care Routine
A simple routine keeps your chickens healthy and productive all winter. Start each day by checking the coop for drafts and moisture. Make sure ventilation is working but no cold air blows on the birds. Stir bedding under the roosts and add more if needed.
Feed your flock early in the morning. Increase feed by up to 25% and offer scratch grains to encourage movement. Always provide warm water at least twice a day. Collect eggs in the morning and afternoon to prevent freezing.
Inspect your chickens for signs of frostbite or illness. Look at combs, wattles, and toes. If you see pale or dark spots, warm the bird slowly and seek advice if needed.
Do this:
Check water 2–3 times per day and provide warm water each time.
Use heated waterers or rubber tubs to prevent freezing.
Keep extra feed on hand and increase feed by up to 25%.
Feed warm food in the morning or evening.
Collect eggs at least twice daily.
Stir bedding and check for moisture.
Inspect birds for frostbite and overall health.
A steady winter routine helps your flock stay cozy, hydrated, and laying eggs even when it is cold outside.
Daily/Weekly Checklist
You want your chickens to stay healthy and productive all winter. A clear checklist helps you remember every important step. Use this guide each day and week to keep your flock cozy, safe, and laying eggs.
🗓️ Daily Winter Chicken Care
-
🐔 Check your flock
Watch your chickens for signs of cold stress. Look for birds that huddle, stand on one foot, or stay fluffed up. -
🌡️ Read the thermometer
Check the coop temperature at roost height. Aim for 35–45°F. -
💨 Feel for drafts
Stand inside the coop. Block any cold air blowing at bird level. -
🧹 Stir bedding
Mix bedding under the roosts. Add fresh straw or shavings if needed. -
🚰 Check waterers 2–3 times
Make sure water stays liquid. Use heated waterers or swap out frozen water. -
🍽️ Refill feeders
Keep feeders full. Increase feed by up to 25% in cold weather. -
🥚 Collect eggs at least twice
Gather eggs in the morning and afternoon. Remove any cracked eggs. -
👀 Inspect combs, wattles, and toes
Look for pale, gray, or black spots. These may signal frostbite.
Tip: Print this checklist and hang it near your coop door. Quick checks help you catch problems early.
🗓️ Weekly Winter Chicken Care
-
🧼 Deep clean under roosts
Remove droppings and add fresh bedding. -
🪟 Inspect vents and windows
Check for moisture, frost, or ammonia smell. Adjust ventilation if needed. -
🐓 Health check for each bird
Pick up each chicken. Check for weight loss, injuries, or signs of illness. -
🥕 Review feed and bedding supplies
Make sure you have enough feed and bedding for the week. -
🔦 Test lights and timers
If you use supplemental light, check bulbs and timer settings.
📝 Printable Winter Chicken Care Table
|
Task |
Frequency |
Target/Action |
|---|---|---|
|
Check flock for cold stress |
Daily |
Watch for huddling, fluffed feathers |
|
Coop temperature |
Daily |
35–45°F at roost height |
|
Water check |
2–3 times/day |
Water always liquid, use heated waterer if possible |
|
Feed refill |
Daily |
Up to 25% more feed, keep feeders full |
|
Egg collection |
2+ times/day |
Remove eggs before they freeze |
|
Bedding stir/add |
Daily |
4–6 inches deep, dry and clean |
|
Frostbite check |
Daily |
Inspect combs, wattles, toes |
|
Deep clean under roosts |
Weekly |
Remove droppings, add bedding |
|
Vent/window check |
Weekly |
No condensation, frost, or ammonia smell |
|
Health check (each bird) |
Weekly |
Check weight, injuries, illness |
|
Feed/bedding supply review |
Weekly |
Enough for next week |
|
Light/timer test |
Weekly |
14 hours total light, bulbs/timers working |
Note: Consistent care keeps your chickens warm, healthy, and laying eggs all winter.
Egg Production: Light and Collection
Why Laying Slows in Winter
You may notice that your hens lay fewer eggs during the winter months. This change happens because chickens need enough daylight to keep their reproductive systems active. Most hens require about 14 to 16 hours of light each day for steady egg production. When the days get shorter, natural daylight drops to only 9 or 10 hours. Your hens’ bodies sense this change. Their hormones slow down, and egg production drops or even stops.
-
Chickens need 14–16 hours of light daily for best egg production.
-
During winter months, daylight can fall to 9–10 hours.
-
Less light means hens lay fewer eggs.
You cannot change the seasons, but you can help your flock with the right setup. Understanding why hens lay less in winter months helps you plan for a steady supply of eggs.
Supplemental Light for Eggs
You can keep your hens laying through the winter months by adding supplemental light to the coop. This extra light tricks your hens’ bodies into thinking the days are longer. Their hormones stay active, and egg production continues.
Set up coop lighting to reach a total of 14 hours of light each day. Use a low-wattage bulb, such as an LED or CFL, to provide gentle, steady light. Place the light where it shines over the roosts and nest boxes but does not overheat the coop. A timer makes this job easy. Set the timer to turn the light on before sunrise, so your hens wake up to a bright coop. Adjust the timer as days get longer after December.
Tip: Use a timer for your coop lighting. This keeps the schedule steady and saves you from turning lights on and off by hand.
Here is a simple table to help you set up your lighting:
|
Step |
What to Do |
|---|---|
|
Light Source |
Use a low-watt LED or CFL bulb |
|
Total Light Hours |
14 hours per day (natural + artificial) |
|
Timer Setup |
Add light in early morning before sunrise |
|
Light Placement |
Over roosts and nest boxes, away from bedding |
|
Adjust as Needed |
Change timer as days lengthen after December |
Adding light does not mean you must make the coop bright all night. Hens need darkness to rest. Always keep the light gentle and only use it to reach the 14-hour total.
Collecting Eggs Before They Freeze
Eggs can freeze quickly during the winter months. A freshly laid egg is warm, but if the air drops below 32°F, the egg can freeze and crack in less than an hour. Frozen eggs are unsafe to eat if the shell cracks, so you need to collect eggs often.
Check the nest boxes at least twice a day—once in the morning and again in the afternoon. During very cold snaps, check even more often. Bring a basket or container to carry eggs safely. If you find any eggs with cracked shells, discard them to avoid food safety risks.
Note: Frozen eggs with intact shells are safe to use if you cook them right away. Never eat eggs with cracked shells from freezing.
Keep nest boxes clean and filled with fresh bedding. This helps insulate the eggs and keeps them from freezing as fast. Encourage your hens to lay in the boxes by keeping them dark and private.
Do this:
-
Provide 14 hours of total light each day using a timer.
-
Use a low-watt bulb for safe, steady coop lighting.
-
Collect eggs at least twice daily during winter months.
-
Discard any eggs with cracked shells.
-
Keep nest boxes clean and filled with dry bedding.
-
Adjust your light timer as days get longer after December.
By following these steps, you help your hens keep up egg production and protect your eggs from freezing during the winter months.
Light Timer Setup
Setting up a light timer in your chicken coop helps you keep egg production steady during winter. You want your hens to get the right amount of light each day. A timer makes this easy and reliable. Follow these steps to set up your lighting system for the best results:
-
Wait Until Hens Are Mature
Begin supplemental lighting only after your chickens reach at least 20 weeks of age. Young hens need time to develop before you add extra light. -
Choose the Right Bulb
Use a regular 25-watt or 40-watt bulb. Hang the bulb in a safe spot, away from feathers, bedding, and water. Make sure the fixture cannot fall or touch anything flammable. -
Install the Timer
Plug your light into a timer. Set the timer to turn the light on in the early morning hours, before sunrise. Avoid adding light at night. Early morning light keeps your hens’ natural sleep cycle healthy. -
Set the Total Light Hours
Adjust the timer so your hens get a total of 14 hours of light each day. Count both natural daylight and the hours from your bulb. For example, if you get 9 hours of daylight, set the timer to add 5 more hours in the morning. -
Increase Light Gradually
Add extra light in small steps. Increase the light by 30 to 60 minutes each week until you reach 14 hours. Sudden changes can stress your flock. -
Check and Adjust Regularly
As days get longer after December, reduce the artificial light so your hens always get about 14 hours total. Adjust the timer every few weeks to match the changing daylight. -
Keep Safety First
Inspect cords and fixtures often. Use only outdoor-rated extension cords if needed. Keep all wiring out of reach of chickens and away from bedding.
Tip: Place the light above the roosts and nest boxes. This helps hens wake up gently and encourages them to lay eggs in the right spot.
Sample Light Timer Schedule Table
|
Month |
Daylight Hours |
Timer Setting (Add) |
Total Light Hours |
|---|---|---|---|
|
December |
9 |
5 (early morning) |
14 |
|
January |
10 |
4 |
14 |
|
February |
11 |
3 |
14 |
|
March |
12 |
2 |
14 |
You can print this table and keep it near your coop for easy reference. A timer takes the guesswork out of winter lighting. Your hens will stay on a steady schedule, and you will enjoy more fresh eggs all season.
Winter Health and Safety
Frostbite Prevention
Frostbite can harm your chickens in winter, especially when temperatures drop below 10°F or the coop stays damp. You need to watch for early signs. Look for pale, gray, or blackened spots on combs, wattles, or toes. Chickens may also hold up a foot or seem less active.
You can prevent frostbite by following these steps:
-
Apply a thin layer of protective ointment, such as Vaseline, to combs and wattles. This creates a barrier against cold and moisture.
-
Keep the coop well-ventilated to reduce humidity. Moisture in the air increases frostbite risk, and if you also hatch eggs in winter this humidity management guide for incubators can help you understand how moisture affects shells and chick health.
-
Choose cold-hardy breeds with smaller combs, like Orpingtons or Brahmas, if you live in a very cold area.
-
Lay down a hay or straw pathway outside so chickens can walk on something warm instead of snow.
-
Watch your flock for changes in behavior or appearance. Early action helps prevent serious problems.
Tip: Always keep bedding dry and stir it often. Wet bedding raises humidity and frostbite risk.
Weekly Health Checks
You should check your chickens every week during winter. This helps you catch problems early and keep your flock healthy. Gather your supplies before you start. You will need exam gloves, a towel, a scale, nail trimmers, styptic powder, gauze, bandage scissors, chicken-safe disinfectant, saline flush, ointment, tweezers, and recordkeeping supplies.
During your check, look for:
-
Red, swollen, or blackened toe tips. These may be early signs of frostbite.
-
Weight loss or changes in body condition.
-
Cuts, scrapes, or signs of injury.
-
Lice, mites, or other parasites.
-
Clean feathers and bright eyes.
-
Normal eating and drinking habits.
Pick up each chicken gently. Check their feet, combs, wattles, and skin. Write down anything unusual. Treat minor injuries right away and call a vet if you see serious problems.
Family Hygiene and Biosecurity
Keeping your family safe around chickens is important, especially in winter. Germs can spread from birds to people. You can protect your household by following these biosecurity steps:
-
Keep your chickens away from visitors and other birds. Limit who enters your coop.
-
Clean your shoes, tools, and equipment after every visit to the coop.
-
Wash your hands with soap and water for at least 20 seconds after handling chickens or eggs.
-
Do not share tools or equipment with neighbors. This helps prevent disease from spreading.
-
Watch for signs of illness in your flock, such as sudden deaths or unusual behavior.
-
Report any serious sickness or unexpected deaths to your local animal health office.
Note: Always keep a pair of coop-only shoes and never bring them inside your home.
Do this:
-
Check for frostbite signs on combs, wattles, and toes every day.
-
Keep the coop dry and well-ventilated.
-
Apply ointment to combs and wattles during cold snaps.
-
Perform a weekly health check on each chicken.
-
Clean hands, shoes, and tools after every coop visit.
-
Limit visitors to your flock and avoid sharing equipment.
By following these steps, you help your chickens stay healthy and your family stay safe all winter.
Quick Reference: Winter Numbers and Checklists
Coop Temperature and Heating
You want your chickens to stay comfortable and safe during winter. Keep the coop temperature at roost height between 35–45°F on the coldest nights. Most healthy chickens can handle colder air, but you should avoid letting the coop drop below 35°F for long periods. Insulate the coop and block drafts at bird level. Always keep at least one upper vent open for fresh air.
Here is a quick temperature guide:
|
Temperature Range |
Description |
|---|---|
|
65–75°F |
Ideal for chickens (not needed in winter) |
|
40°F |
Comfortable in a well-insulated coop |
|
35–45°F |
Target range at roost height in winter |
|
Low teens (°F) |
Short periods in the low teens (°F) may be tolerated by many healthy, cold-acclimated birds if they are dry and well fed, but this is not a comfort zone and you should aim to keep the coop warmer. |
Winter Heating Tips:
-
Insulate walls and ceiling to hold warmth.
-
Use 4–6 inches of straw or shavings for bedding.
-
Only add safe supplemental heat if the coop drops below 35°F.
-
Secure any heaters and keep them away from bedding.
Tip: If you smell ammonia or see condensation, increase ventilation even in cold weather.
Light Hours and Egg Laying
Egg production slows down in winter because hens need more light. To keep your hens laying, provide about 14 hours of total light each day. Natural daylight is not enough in most regions, so you may need to add artificial light.
-
Hens need 14–16 hours of light daily for steady egg production.
-
Use a low-watt bulb and a timer to add light in the early morning.
-
Adjust the timer as days get longer after December.
Note: Do not use bright lights at night. Hens need darkness to rest.
Feed and Water Guidelines
Chickens burn more energy in winter to stay warm. You should increase their feed by up to 25%. Always keep feeders full and check waterers two to three times a day. Chickens need fresh, unfrozen water at all times.
|
Requirement |
Details |
|---|---|
|
Feed |
Up to 25% more than usual. Use high-energy feeds like grains and seeds. |
|
Water |
Check 2–3 times daily. Use heated waterers or swap out frozen water. |
|
Water Ratio |
Chickens often drink around 2 pounds of water for every pound of feed. |
Daily Feed and Water Steps:
-
Fill feeders every morning.
-
Store extra feed in a dry, rodent-proof container.
-
Check waterers at least twice daily, more often during freezing weather.
-
Use heated bases or rubber tubs for easy ice removal.
🐔 Remember: Well-fed and hydrated chickens stay warmer and lay more eggs in winter.
Safety and Hygiene Rules
Keeping your chickens healthy in winter means you also need to protect yourself and your family. Good hygiene and safety habits help prevent illness and keep everyone safe. Follow these rules every time you care for your flock.
Essential Safety and Hygiene Steps
-
🧼 Wash your hands
Always wash your hands with soap and running water for at least 20 seconds after you handle chickens, eggs, bedding, or anything from the coop. Teach children to do the same. -
👟 Use coop-only shoes
Keep a pair of shoes or boots just for the chicken coop. Never wear them inside your house. This keeps germs and dirt outside. -
🚫 No snuggling or kissing chickens
Do not kiss or snuggle chickens close to your face. Teach children to keep birds away from their mouth and eyes. -
🧹 Clean tools and equipment
Wash and disinfect tools, feeders, and waterers regularly. Do not bring coop equipment into your kitchen or living spaces. -
🐔 Limit visitors
Only allow trusted family members to enter the coop. Ask visitors to wear clean shoes and wash their hands before and after visiting. -
🦠 Watch for illness
Check your flock for signs of sickness, such as sudden changes in behavior, eating, or drinking. If you see several sick birds or any sudden deaths, contact your local animal health office. -
🐭 Store feed safely
Keep feed in rodent-proof, dry containers. Clean up spilled feed right away to avoid attracting pests.
Quick Safety Table
|
Rule |
What to Do |
|---|---|
|
Handwashing |
20 seconds with soap and water after each visit |
|
Coop-only shoes |
Never wear in the house |
|
No face contact |
Keep birds away from mouth and eyes |
|
Clean tools |
Disinfect after use, keep out of kitchen |
|
Limit visitors |
Only trusted people, clean shoes, handwashing |
|
Feed storage |
Rodent-proof, dry containers |
Tip: Keep a bottle of hand sanitizer near your coop door for quick cleanups, but always use soap and water when you get inside.
Biosecurity Reminders
-
Never share tools or equipment with other chicken keepers.
-
Keep chickens and coop items out of your kitchen and living areas.
-
Change clothes and wash hands after working with your flock, especially before eating or preparing food.
By following these safety and hygiene rules, you protect your family and your flock. Good habits keep everyone healthy through the winter and beyond.
You can keep your chickens warm and laying all winter by following a few simple steps. Block drafts, use 4–6 inches of dry bedding, and check water and feed every day. Add supplemental light for 14 hours total if you want steady eggs. Watch your flock’s health and look for frostbite. Use the quick reference checklist for daily confidence.
🥚 With these habits, you will enjoy fresh eggs and happy hens—even on the coldest days.
FAQ
How cold is too cold for chickens in winter?
You should keep your coop at or above 35°F at roost height. Most healthy chickens can handle colder air if they stay dry, out of drafts, and well fed. Watch for signs of cold stress and act quickly if you see them.
Do chickens need a heat lamp in winter?
You usually do not need a heat lamp if your coop stays above 35°F. Only add safe supplemental heat if temperatures drop below this point for several nights. Always use heaters designed for animal use and follow fire safety rules.
How often should I collect eggs in freezing weather?
You should collect eggs at least twice a day in winter. During very cold snaps, check nest boxes more often. Eggs can freeze and crack quickly when the air drops below 32°F. Discard any eggs with cracked shells.
How much more feed do chickens need in winter?
Increase your chickens’ feed by up to 25% during cold weather. Chickens burn more calories to stay warm. Keep feeders full and store extra feed in a dry, rodent-proof container.
What is the best way to keep water from freezing?
Use a heated waterer or a heated base for your water fount. If you do not have one, check waterers two to three times daily and replace frozen water right away. Place waterers on a stand to keep bedding out.
How many hours of light do hens need to keep laying?
Hens need about 14 hours of total light each day for steady egg production. Use a low-watt bulb on a timer to add light in the early morning. Adjust the timer as days get longer after December.
How can I prevent frostbite on my chickens?
Keep the coop dry and well ventilated. Block drafts at bird level. Apply a thin layer of ointment to combs and wattles during cold snaps. Check for pale, gray, or black spots on combs, wattles, and toes every day.
What are the most important winter safety rules for my family?
Always wash your hands with soap and water for 20 seconds after handling chickens or eggs. Use coop-only shoes. Do not bring chickens or coop equipment into your house. Teach children to keep birds away from their face and mouth.
Data authenticity note: The winter temperature targets, light-hour ranges, feed and water estimates, bedding depths, cold-stress and frostbite checks, and heater safety practices in this article are adapted from small-flock poultry handbooks, cold-weather backyard chicken management guides, hatchery and breed reference charts, and multi-year logs kept by home chicken keepers. All figures are rounded into practical working ranges for family flocks and are not a substitute for local veterinary, electrical, or building-safety advice. Always confirm regional regulations before you modify your coop, and consult a poultry veterinarian or extension service if you see serious disease signs or repeated losses.
References (no external links)
-
Backyard and small-flock poultry winter management handbooks covering housing, ventilation, deep-litter bedding, stocking density, and cold-weather welfare.
-
Small-flock nutrition and lighting guides that summarize winter energy needs, feed-adjustment ranges, and photoperiod requirements for consistent egg production.
-
Public-health style recommendations on backyard poultry hygiene and biosecurity, including handwashing, coop-only footwear, and keeping poultry equipment out of living spaces.
-
Hatchery and breed reference catalogues describing cold-hardiness, comb types, body weight, and typical annual egg-production ranges for common laying breeds.
-
Aggregated winter logs and observation notes from home chicken keepers tracking coop temperatures, heating strategies, feed and water use, and health outcomes across multiple seasons.


0 Comments