
Watching Muscovy duck eggs develop through candling is one of the most fascinating parts of incubation. With just a light source and patience, you can observe how life grows inside the shell — from a clear yolk to a fully formed duckling.
This step-by-step visual guide explains the candling stages of Muscovy duck eggs, complete with photos and tips to identify normal embryo development. Whether you’re a beginner or an experienced poultry keeper, this post will help you understand what to look for during each stage of incubation.
🥚 What Is Egg Candling and Why It Matters
Candling means holding an egg up to a bright light to see what’s happening inside. Farmers and hobby breeders use it to check whether eggs are fertile and how well the embryo is growing.
Muscovy ducks have a long incubation period — about 35 days, which makes candling even more useful. By candling regularly (every few days), you can monitor embryo health, remove infertile eggs, and prevent contamination inside the incubator.
💡 Tip: Always candle eggs gently and for a short time. Avoid overheating or shaking the egg — the developing embryo is very fragile.
🔦 Muscovy Duck Egg Candling Stages (with Photos)
Below you’ll find each key stage of embryo development, what to expect, and how to interpret what you see during candling.
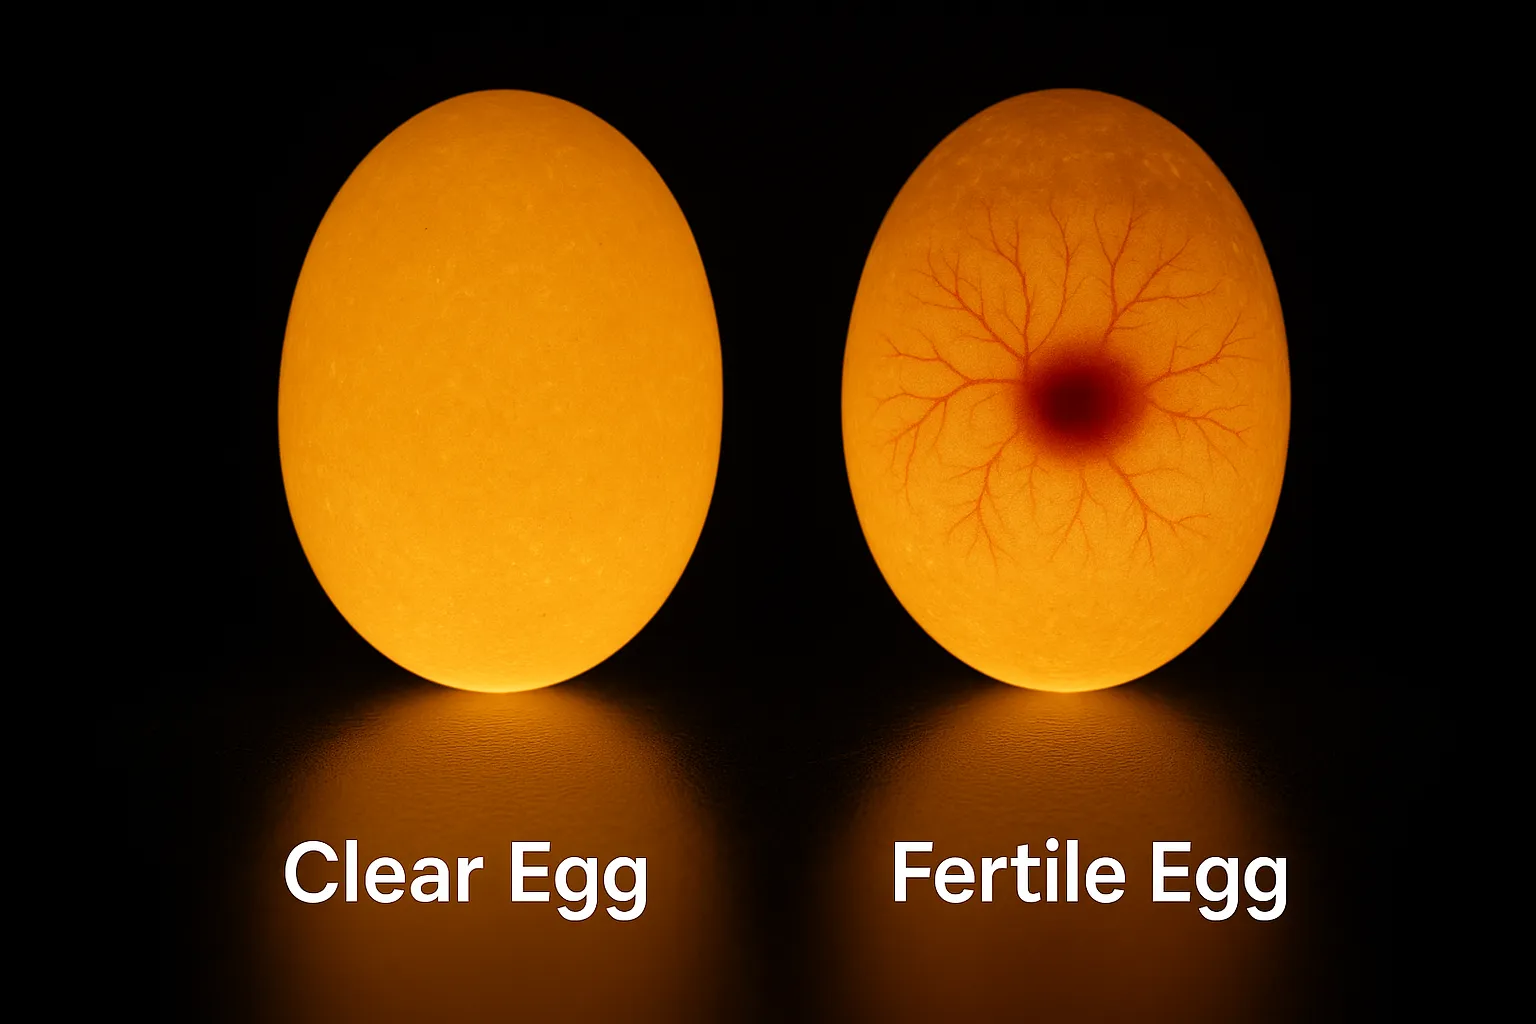
Day 1–3: Clear Egg or Fertile?
In the first few days, the egg will appear clear when candled. You’ll see the round shape of the yolk, but no visible veins or movement yet.
If you notice a small dark shadow or a faint dot near the yolk’s edge, the egg may be fertile — this is the very beginning of embryo formation. However, if the egg stays entirely clear after 3 days, it’s likely infertile.
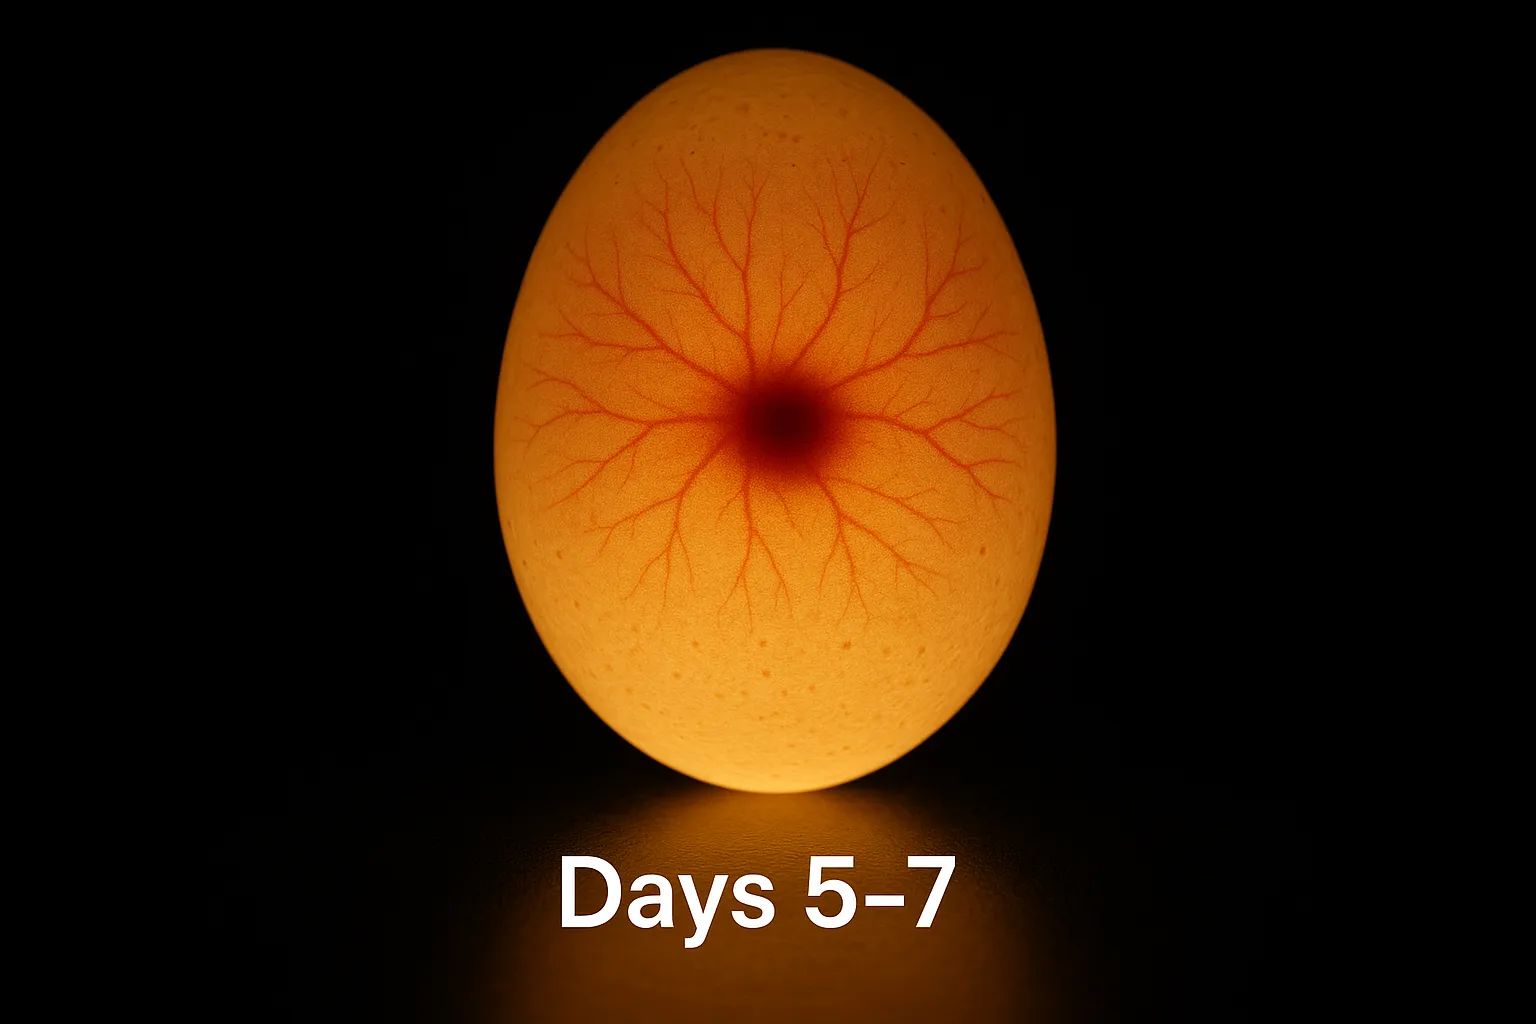
Day 4–7: Veins and Embryo Spot Appear
By day 4, the first signs of life become visible. A tiny dark spot appears in the center, surrounded by thin red veins branching outward. This confirms that the egg is fertile and the embryo is developing normally.
By day 7, the network of veins is stronger and more noticeable. The embryo itself looks like a small black dot moving gently when the egg is tilted.
Day 8–14: Rapid Embryo Growth
During this stage, embryo development accelerates dramatically. The embryo is now clearly visible as a dark, moving shape surrounded by a vibrant web of blood vessels.
You’ll also see the air cell begin to form at the wider end of the egg. Movement is easier to spot as the duckling twitches or shifts position within the egg.
If the egg looks cloudy, has no veins, or emits a foul smell, remove it — these are signs of bacterial contamination or early embryo death.

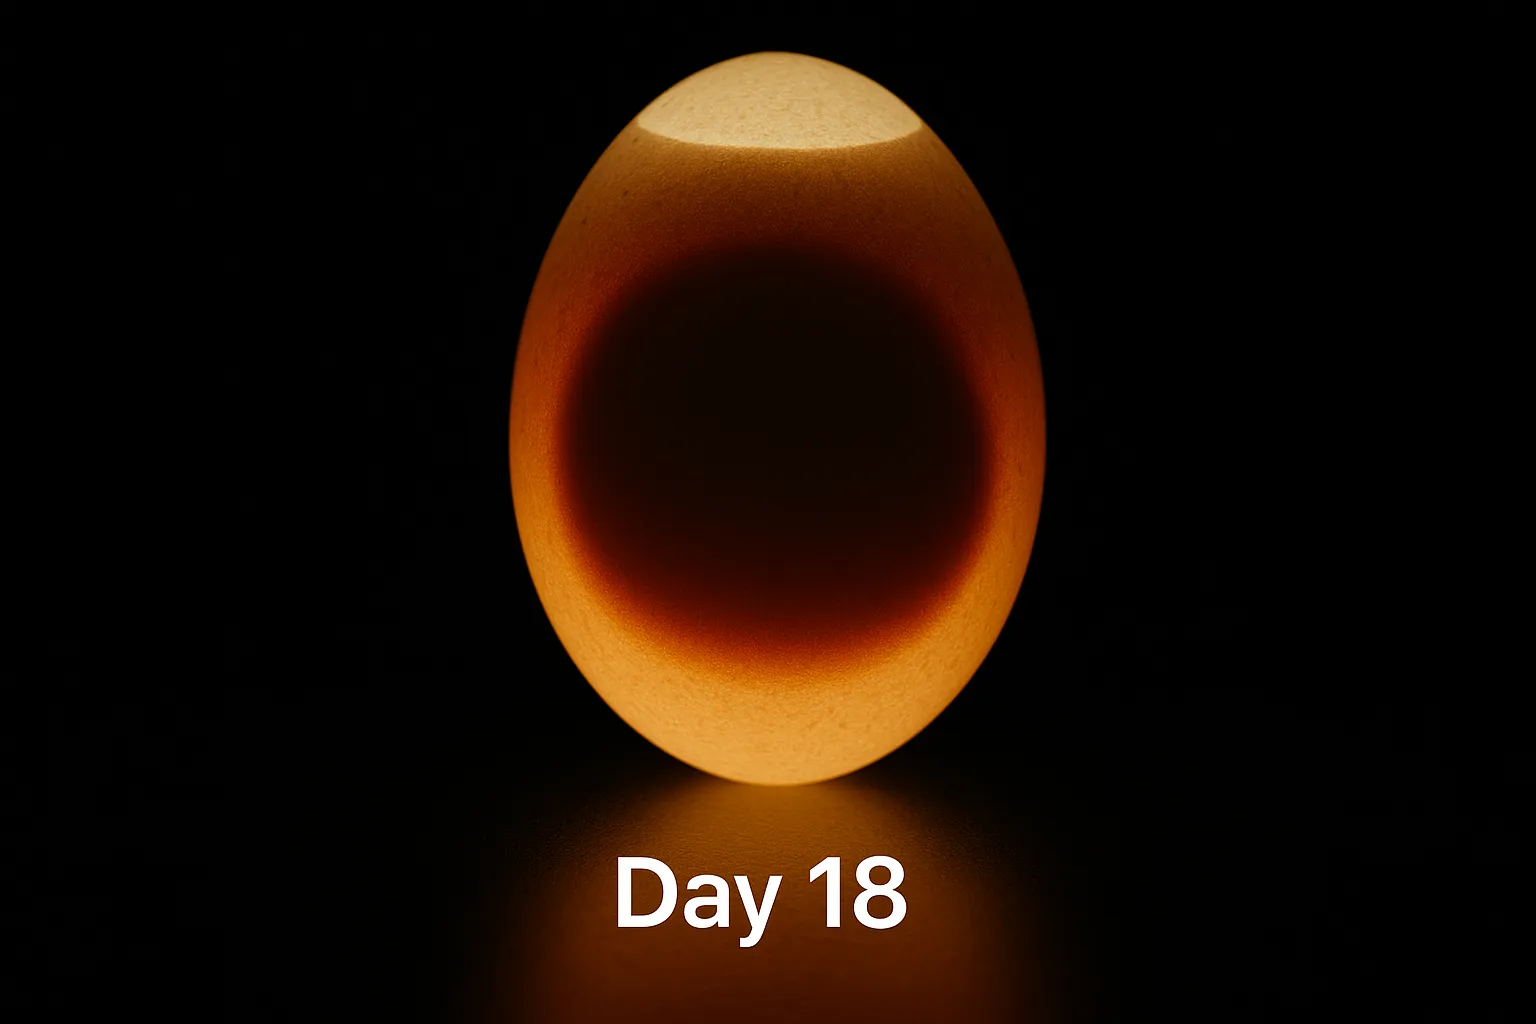
Day 15–21: Mid-Incubation – Expanding Shadow
By this point, the embryo fills nearly half of the egg’s interior. When candled, you’ll see a dark shadow that moves slightly when rotated. The air cell is now more distinct, and the veins are thick and concentrated near the top.
Healthy embryos will show a clear boundary between the dark mass and the air cell. If you notice a blood ring — a red circle floating inside — it’s a sign that the embryo has stopped developing.
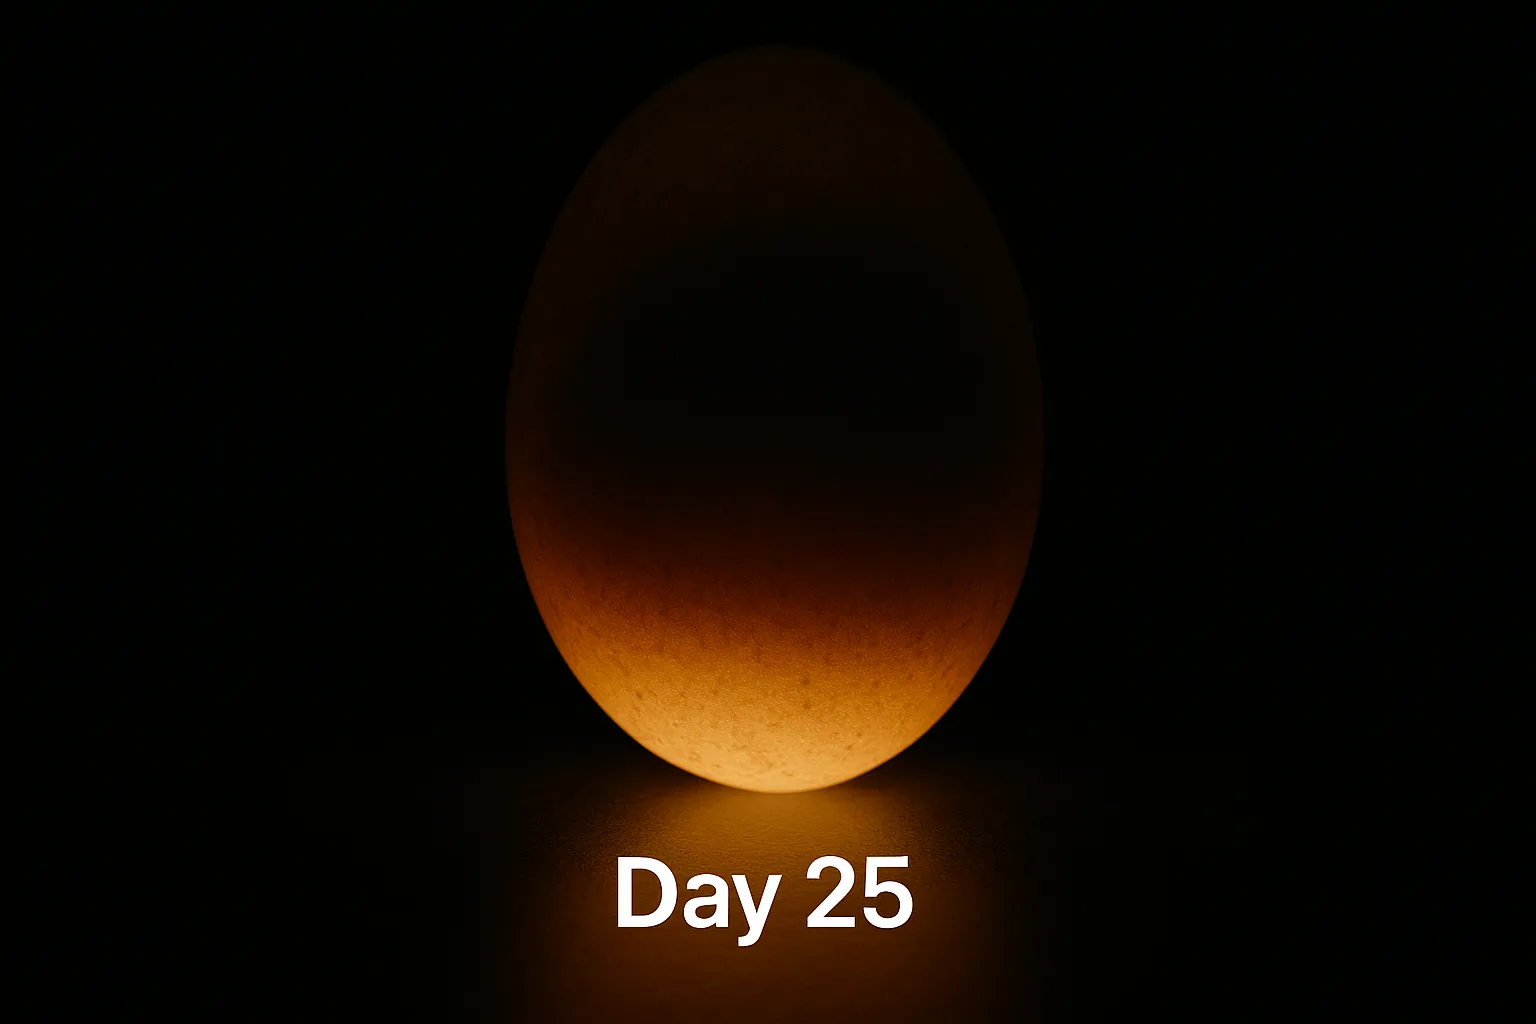
Day 22–28: Late Candling – Limited Visibility
The developing duckling now occupies most of the egg. When candled, you’ll only see a dark mass with a bright oval (the air cell) at the top.
Movement may still be visible as flickers of light or subtle shifts. If you can’t see much, don’t worry — this is normal at the later stages of embryo development.
Avoid candling too frequently during this period to prevent overheating or stress.
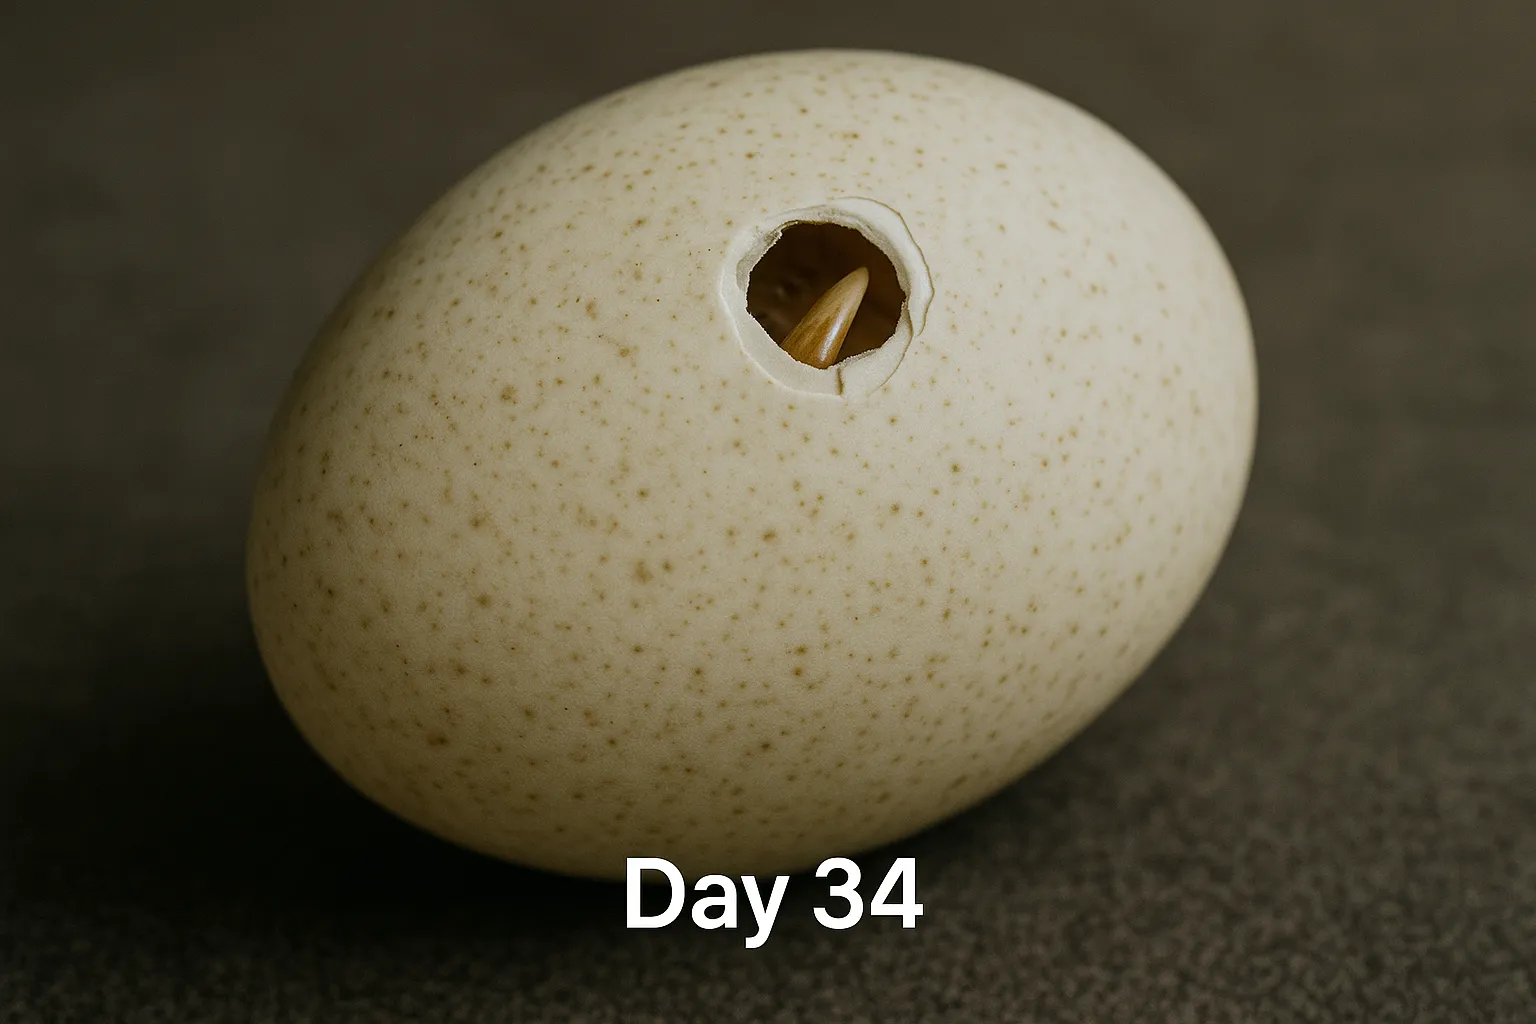
Day 29–35: Pre-Hatch – Internal Pipping Stage
In the final week, the duckling is almost ready to hatch. The interior looks completely dark except for the large air pocket at one end.
If you candle carefully around day 33–34, you might notice the internal pip — when the duckling’s beak breaks into the air cell for its first breath. Once you see this, it’s best to stop candling and let the hatching process continue naturally.
🧠 How to Read Candling Results
Here’s a quick reference table to help you interpret what you see during candling:
| Observation | Meaning |
|---|---|
| Clear egg after 7 days | Infertile |
| Blood ring visible | Embryo death (early) |
| Strong veins and movement | Healthy embryo |
| Enlarged air cell | Normal late development |
| No movement after day 25 | Possibly non-viable; recheck later |
🐣 Final Thoughts
Candling Muscovy duck eggs gives you a front-row seat to the miracle of life. By understanding each candling stage and recognizing normal embryo development, you’ll increase your hatch success and reduce losses.
Whether you’re running a farm or just exploring nature’s wonders, take your time, observe carefully, and enjoy every moment as your ducklings grow and prepare to hatch.


0 Comments