
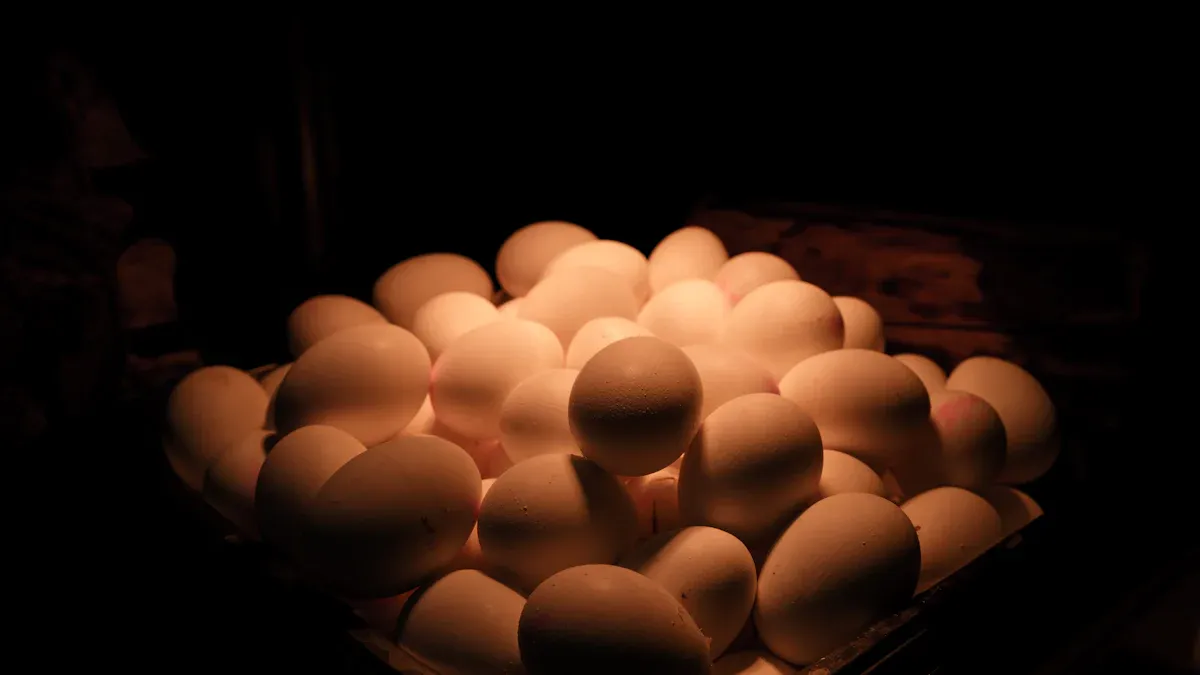
Candling gives you a clear look inside your eggs so you can check embryo growth and air cell size. Use a bright LED in a dark room for best results. Candle your eggs on day 5–7 and again on day 14. Avoid candling in the final three days before hatch. Tracking air‑cell growth helps you fine‑tune humidity; most chicken eggs lose about 12–14% of weight by hatch, as a general target.
|
Average Weight Loss Percentage |
|---|
|
12–14% |
When candling fertile eggs at the right times, you often see hatch rates between 50% and 75%. Sometimes, hatch rates reach 90% or more, but 100% is rare. Always handle eggs gently. Never collect wild bird eggs and follow local laws and animal welfare standards.
-
Hatch rates for fertile eggs can range from 25% to 100%
-
Most hatch rates fall between 50% and 75%
-
You may see up to 90% in ideal conditions
Key Takeaways
-
Candle eggs on days 5–7 and 14 to check embryo growth and air‑cell size. Avoid candling during the final three days before hatch.
-
Use a bright LED in a dark room so veins and embryo movement are easier to see.
-
Mark eggs with a pencil and keep brief notes so you can adjust humidity and catch issues early.
-
Keep each session short—ideally under 60 seconds per egg—to minimize heat and humidity loss.
-
Remove eggs that show abnormal signs (no veins, blood ring) to protect healthy embryos.
What Is Egg Candling
Purpose
According to poultry expert Gail Damerow, "Candling has several purposes, including determining an egg’s age and internal quality, and discovering if the egg is hatchable during incubation."
You use egg candling to check the inside of eggs during incubation. This process helps you spot cracks, check freshness, and see if an egg is fertile. Before incubation, candling eggs can reveal shell cracks or freshness, both of which affect hatchability. After a few days of incubation, egg candling shows if an embryo is growing. Later, you can see if the embryo develops as expected. You should never collect wild bird eggs. Always follow local laws and animal welfare rules.


How It Works
Egg candling uses a bright light to shine through the egg. When you candle eggs, you see the inside without opening the shell. The light reveals the air cell, yolk, and any signs of embryo development. During incubation, you can spot veins, movement, and changes in the air cell. This method lets you check if embryos grow properly or if there are any problems. By using egg candling, you can manage incubation more effectively and remove eggs that do not develop. You improve your chances of a healthy hatch by checking eggs at the right times.
When Not to Candle
You should avoid candling eggs too often or at the wrong times. Too much egg candling can harm the embryo and lower hatch rates. Here are some risks of frequent or improper candling:
-
Handling eggs too much can introduce bacteria and cause infection.
-
Stress from frequent candling can hurt the developing embryo.
-
Excessive candling can dry out the egg, which is bad for embryo growth.
-
Opening the incubator too often can cause heat and humidity loss.
-
Candling too early may lead you to discard good eggs by mistake.
-
Dirty hands or tools can contaminate eggs.
You should limit candling eggs to key points in incubation, such as day 5–7 and day 14. Avoid candling in the last three days before hatch. Always wash your hands before and after handling eggs.
Candling Eggs Tools & Setup
LED Candlers
You need a high-output LED candler to see inside your eggs clearly. A bright LED reveals the first signs of embryo growth, such as dark spots and veins. You can monitor weekly changes in the embryo with this tool. Most LED candlers are easy to use and have a simple on/off button. You should choose a model that fits comfortably in your hand and provides enough light for poultry, waterfowl, or exotic eggs.
|
Specification |
Details |
|---|---|
|
Light Source |
High-output LED |
|
Suitable for |
Poultry, waterfowl, exotic eggs |
|
Power Requirement |
4 x AA batteries or 110V |
|
Usage Instructions |
Use in a dark room, rotate egg to observe internal features |
|
Safety |
LED light does not harm embryos |
Dark Room Setup
Set up your candling station in a room with no direct sunlight. A dark environment helps you see the veins, embryo, and air cell inside the egg. Keep the temperature stable, between 70°F and 80°F, to avoid stressing the eggs. Hold each egg with the large end up. Rotate the egg gently at a 45° angle. This movement lets you spot veins, the embryo, and the air cell. Limit handling to under 60 seconds per egg to protect the developing chick.
Tip: Always wash your hands before and after candling. Never collect or candle wild bird eggs. Follow local laws and animal welfare standards.
Marking Eggs
Marking eggs helps you track their progress. Use a regular pencil with a soft lead. Avoid markers or ink, which can harm the embryo. Number each egg and outline the air cell with gentle strokes. Do not press hard on the shell. Keep a notebook to record each egg’s development and environmental changes. This habit helps you adjust humidity and spot problems early.
-
Use a pencil, not ink or marker.
-
Outline the air cell to monitor growth.
-
Record details in a notebook.
-
Handle eggs gently when marking.
Dark or Thick Shells
Some eggs have dark or thick shells, which make candling harder. Pigmentation and shell thickness block light. You can overcome this by using a brighter flashlight or a pocket light with at least 210 lumens. Always candle in a dark room for best results. If you still struggle to see inside, try different angles or increase the light intensity.
-
Dark or thick shells need brighter light.
-
A pocket light with 210 lumens works well.
-
Rotate eggs slowly to find the best view.
Candling eggs with the right tools and setup helps you monitor embryo growth and air cell changes. You improve your chances of a healthy hatch by following these steps and handling eggs with care.
Candling Fertile Eggs Timeline
Candling fertile eggs at the right times helps you track development and improve your hatch results. Each species has its own candling schedule by day. You should always handle eggs gently and avoid candling in the last two to three days before hatch. Never collect or candle wild bird eggs. Always follow local laws and animal welfare standards.
Chicken Eggs
For chicken eggs, you should follow a clear candling schedule by day. Start with your first candling on day 5–7. At this stage, look for spider-like veins and a small dark spot. By day 14, candle again to check for a growing shadow and thickening veins. You may do a quick check before hatch if needed, but avoid candling in the last three days.
|
Day |
Developmental Signs Observed |
|---|---|
|
5–7 |
Veins like a spider‑web and a small embryo spot; movement may be subtle |
|
7 |
Growing shadow and clearer eye/embryo; stronger veins |
|
14 |
Larger embryo; active vessels near shell edges; air‑cell expansion |
|
18 |
Mostly dark egg with a clear air cell; prepare for lockdown |
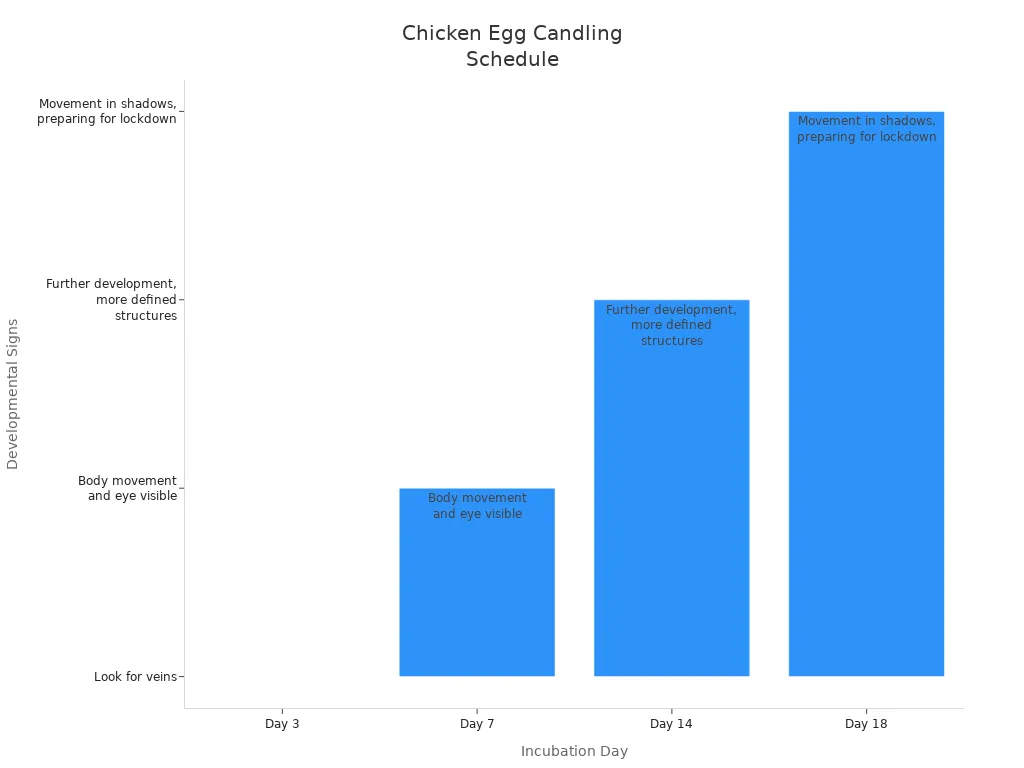
Tip: On day 7, candling signs include visible veins and a dark embryo spot. If you see no veins, the egg may not be fertile.
Duck & Turkey Eggs
When candling duck and turkey eggs, you should candle first on day 7 and again on day 14. For Muscovy ducks, use day 10 and day 18 as your main candling points. Look for clear veins and a growing embryo. The candling duck/quail/turkey eggs process is similar to chickens, but the timeline shifts a bit. Always avoid candling in the last three days before hatch.
Quail Eggs
Quail eggs have a shorter incubation period. Candle your fertile eggs on day 6–8 for the first check. Look for veins and a small embryo. Candle again on day 12–14 to see more development. Quail eggs often have speckled or dark shells, so use a bright light for candling.
Goose Eggs
For goose eggs, candle between day 7–10 for your first check. Look for veins and early movement. Candle again on day 14–18 to see a larger shadow and a bigger air cell. Goose eggs have thick shells, so take extra care during candling.
Egg Candling Signs
Normal Development
When you candle eggs, you look for clear signs that show healthy growth. On day 5–7, you should see spider-like veins and a small dark spot. These are classic day 7 candling signs. The veins spread out from the center, forming a network over the yolk sac. This pattern means the embryo is getting the nutrition it needs. If you tilt the egg gently, you may notice subtle movement inside.
By day 10–14, the shadow inside the egg grows larger. The veins thicken and reach toward the shell edges. The air cell at the blunt end of the egg also expands. You may see the developing embryo move or wiggle. These changes show that the embryo is progressing well.
As you reach the late stage of incubation, most of the egg appears dark. Only the air cell remains clear and easy to see. The embryo fills almost the entire shell. Sometimes, you spot movement or even an internal pip, which means the chick is preparing to hatch. The air cell may look uneven as the hatching process begins.
Here is a table that summarizes key visual indicators at each stage:
|
Incubation Day |
Key Visual Indicators |
|---|---|
|
Day 7 |
- Blood vessels visible in a spider-like pattern |
|
Day 14 |
- Larger embryo occupying more space |
|
Day 18 |
- Fully occupied shell with only air cell visible |
During candling eggs, you should always handle them gently and avoid disturbing wild bird eggs. Follow local laws and animal welfare standards.
Tip: Healthy embryos move in response to light and show well-defined blood vessels. The air cell should get larger as the hatch approaches.
Abnormal Signs
You may sometimes find eggs that do not show normal development. These eggs can be infertile or may have stopped growing. When you candle eggs, look for these abnormal signs:
-
Clear eggs with no veins or dark spot. These are infertile and should be removed. This is the main difference in fertile vs infertile egg.
-
Blood ring, which looks like a red circle inside the egg. This sign means the embryo died early.
-
Small dark area with broken or disrupted blood vessels. This points to early death.
-
Absence of movement and breakdown of blood vessels in later stages. This means the embryo died late.
-
Even darkness throughout the egg with no visible air cell or veins. This shows the egg is not viable.
-
Cracked shells. These eggs should be discarded.
If you see any of these signs during candling eggs, you should remove the affected eggs to protect the rest. Always wash your hands before and after handling eggs. Keep your workspace clean to prevent contamination.
Here is a quick checklist for abnormal signs:
-
No veins or dark spot by day 7
-
Blood ring present
-
No movement in late stages
-
Broken or missing blood vessels
-
Cracked shell
You improve egg viability by removing eggs that show abnormal signs. Always remember not to interfere with wild bird eggs and to respect local regulations.
Note: Tracking egg viability helps you manage your hatch and spot problems early. Candling eggs at the right times lets you see both normal and abnormal development.
Air Cell & Humidity
Air Cell Growth
When you candle eggs, the air cell at the large end should gradually expand. Outline it lightly with a pencil each time so you can compare growth. As a rough guide for chickens, the air cell is noticeably larger by lockdown; use this trend—rather than a single number—to judge humidity.
Tip: Always handle eggs gently. Never take or touch wild bird eggs. Follow your local laws and animal care rules.
Here is what the air cell size tells you about humidity:
-
A small air cell means the humidity is too high.
-
A big air cell means the humidity is too low.
-
The air cell should get bigger as the egg grows.
Adjusting Humidity
You need to control humidity for healthy embryo growth. Most forced air incubators stay at about 99.5°F. Still air incubators use about 101°F. Put your thermometer at the same height as the eggs. This gives you the right temperature reading. You can check humidity by watching the air cell or by weighing the eggs.
|
You can fine‑tune humidity by adding or reducing exposed water surface inside the incubator. Some models include sensors that help you monitor relative humidity. As a reference for chicken eggs, losing around 12% of weight by day 18 indicates you are on track. |
Description |
|---|---|
|
Air Cell Tracking |
Mark air cell outline during candling |
|
Weight Loss |
Aim for about 12–14% total weight loss by hatch (for chickens) |
|
Humidity Adjustment |
Use water channels or pans to add moisture; increase ventilation or surface area to reduce it |
|
Sensor Systems |
Automated sensors and steam injection for control |
You can use water pans or spray bottles to add moisture. Some systems use sensors to watch humidity and make changes. Steam can help spread moisture in the incubator. Eggs should lose about 12% of their weight by day 18. If eggs lose less than 10%, fewer chicks may hatch.
Note: The right humidity keeps eggs from drying out or getting too wet. Always check the air cell when candling to help you make changes.
Shipped Eggs
Handling Air Cells
When you receive shipped eggs, you must treat them with extra care. Shipping can cause the air cell inside some eggs to become detached or wobbly. You should always unpack the eggs gently and place them upright in an egg carton with the large end up. Let the eggs rest in the same room as your incubator for 12 to 24 hours. This resting period helps stabilize the eggs after their journey.
After resting, candle the eggs to check for detached air cells. If you find any eggs with wobbly or detached air cells, keep them upright in a paper egg carton. Do not turn these eggs for the first five days of incubation. This step gives the air cell time to settle and reattach. You can start turning the eggs normally after five days if the air cell looks stable. Always handle the eggs gently and avoid opening the incubator too often.
Tip: Never collect or interfere with wild bird eggs. Always follow local laws and animal welfare standards.
Resting & Turning
Resting shipped eggs is important for hatch success. You should let the eggs acclimate for 12 to 24 hours before starting incubation. This time allows the eggs to recover from shipping stress. For eggs with detached air cells, wait two to three days before turning. Use a paper egg carton to keep the eggs upright and tilt it slightly for gentle turning. If you do not use an automatic turner, mark each egg with an "X" on one side and an "O" on the other. Turn the eggs every eight hours by hand.
Stop turning the eggs three days before the expected hatch date. Limit candling to two times during incubation to reduce handling. Always keep the eggs upright and avoid laying them on their sides. Handle all eggs with care, especially those with detached air cells. Minimize jostling and keep the incubator closed as much as possible.
|
Step |
Action |
|---|---|
|
Resting |
12–24 hours upright, large end up |
|
Initial Turning |
Delay for 2–3 days if air cell is detached |
|
Normal Turning |
Resume after air cell stabilizes |
|
Final Days |
Stop turning three days before hatch |
Note: Careful handling of shipped eggs increases your chances of a healthy hatch. Always respect wildlife and legal guidelines.
Candling Eggs Safety
Minimize Handling
Always be gentle when you handle eggs during candling. Try not to keep eggs out of the incubator for more than 60 seconds. This keeps the eggs warm and humid, which helps the embryos grow. Plan your candling so you do not disturb the eggs too much. Hold each egg softly so you do not crack the shell. Only take eggs out when you need to check them.
-
Try to handle eggs as little as you can.
-
Candle eggs in a dark room to keep embryos calm.
-
Keep eggs out of the incubator for a short time.
-
Be gentle so you do not break the shells.
-
Only candle eggs when you really need to.
Tip: Never take or candle wild bird eggs. Always follow your local laws and animal care rules.
Cleanliness
A clean workspace and tools help keep eggs safe from germs. Wash your hands well before and after you candle eggs. Make sure your candling tools are clean and germ-free. If you wash eggs before candling, dry them all the way so they do not get too wet. Store eggs at the right temperature and humidity to stop bacteria from growing.
|
Hygiene Protocols |
Description |
|---|---|
|
Handwashing |
Wash and dry hands before and after candling to reduce contamination risk. |
|
Candler & Work Surface |
Wipe the candler and table with a mild, egg‑safe cleaner; keep the area dry. |
|
Egg Handling |
Do not wash hatching eggs; dry‑wipe only if needed and handle gently. |
|
Storage Before Setting |
Hold hatching eggs around 55–60°F (13–16°C) with moderate humidity; avoid refrigeration. |
|
Incubator Hygiene |
Clean and dry the incubator between batches; avoid harsh aerosols around eggs. |
Record Keeping
Keeping good notes helps you watch each egg’s progress. Write down what you see every time you candle eggs. Record the date, egg number, and any changes you notice. These notes help you find problems early, like cracks or eggs set the wrong way. Good records help you make better choices and get more chicks to hatch.
Note: Writing down your candling results helps you fix problems and learn more each time you hatch eggs.
Keep Learning
Incubation Guides
You can always find new ways to get better at candling. There are many guides that show you how to hatch eggs step by step. These guides tell you how to set up your incubator and watch the humidity. They also help you track air cell growth. You can use these guides to learn about candling at different times. They show you how to spot healthy eggs as they grow.
Here is a table with some helpful resources for learning about candling and incubation:
|
Resource Title |
Description |
Link |
|---|---|---|
|
Incubation Guides |
Step‑by‑step articles on settings, timelines, and troubleshooting. |
|
|
How to Candle Chicken Eggs |
Day‑by‑day examples and photos for chickens. |
|
|
When to Candle Chicken Eggs |
Best checkpoints and what to look for at each stage. |
|
|
Species Timelines |
Duck, turkey, quail, and goose incubation timelines. |
You can also read The Beginner's Guide to Incubation. This guide explains the basics for different eggs. It helps you see how candling works and what to look for at each stage. You can find more tips in the Incubation Guides section. There are also pages for Chicken Egg Incubation, Duck Egg Incubation, Turkey Egg Incubation, and Quail Egg Incubation.
Remember, never take or candle wild bird eggs. Always follow your local laws and animal care rules.
Species-Specific Tips
Each egg type needs special care when candling and incubating. You should learn how chicken, duck, turkey, quail, and parrot eggs are different. Some eggs have thicker shells, so you need a brighter light. Other eggs may need different humidity or turning schedules.
You can join online groups to share advice and ask questions about candling eggs. Here is a table of forums where you can talk with other people who hatch eggs:
-
You can read more tips in the Chicken Egg Incubation, Duck Egg Incubation, Turkey Egg Incubation, and Quail Egg Incubation pages.
-
Always handle eggs gently and write down your candling results.
-
Ask questions in forums if you need help with tricky eggs or candling problems.
Tip: Keep learning and practicing candling. You will get better at spotting healthy eggs and making changes for each species. Always respect wildlife and follow the law.
You can improve your hatching cycle by following a few simple candling steps. Use a small flashlight or egg candler in a dark room to check each egg. Look for veins and a growing embryo during candling. Watch the air cell to help you adjust humidity. Regular candling lets you spot problems early and remove eggs that will not hatch. Keep notes on each candling session. Join a community or read more guides to learn new candling tips. Always respect wildlife and follow local laws.
-
Effective candling helps you monitor embryo growth.
-
Patience and attention to detail make candling more successful.
-
Avoid excessive candling to protect the embryos.
FAQ
How often should you candle fertile eggs?
You should candle eggs twice during incubation. Check on day 5–7 and again on day 14. Avoid candling in the last three days before hatch. This schedule helps you track embryo growth and air cell changes.
What signs show a healthy embryo during candling?
Look for spider-like veins and a small dark spot by day 7. By day 14, you should see a larger shadow and thick veins. Movement inside the egg means the embryo is growing well.
What should you do if you see a blood ring or no veins?
Remove eggs with blood rings or no veins. These eggs will not hatch. Keeping them can harm other eggs. Always wash your hands before and after handling eggs.
Can you candle eggs with dark or thick shells?
Yes, you can candle these eggs. Use a bright LED light in a dark room. Rotate the egg slowly to find the best view. You may need a flashlight with higher lumens.
Is it safe to collect wild bird eggs for candling?
No, you should never collect or candle wild bird eggs. Always follow local laws and animal welfare standards. Respect wildlife and protect natural habitats.


0 Comments