
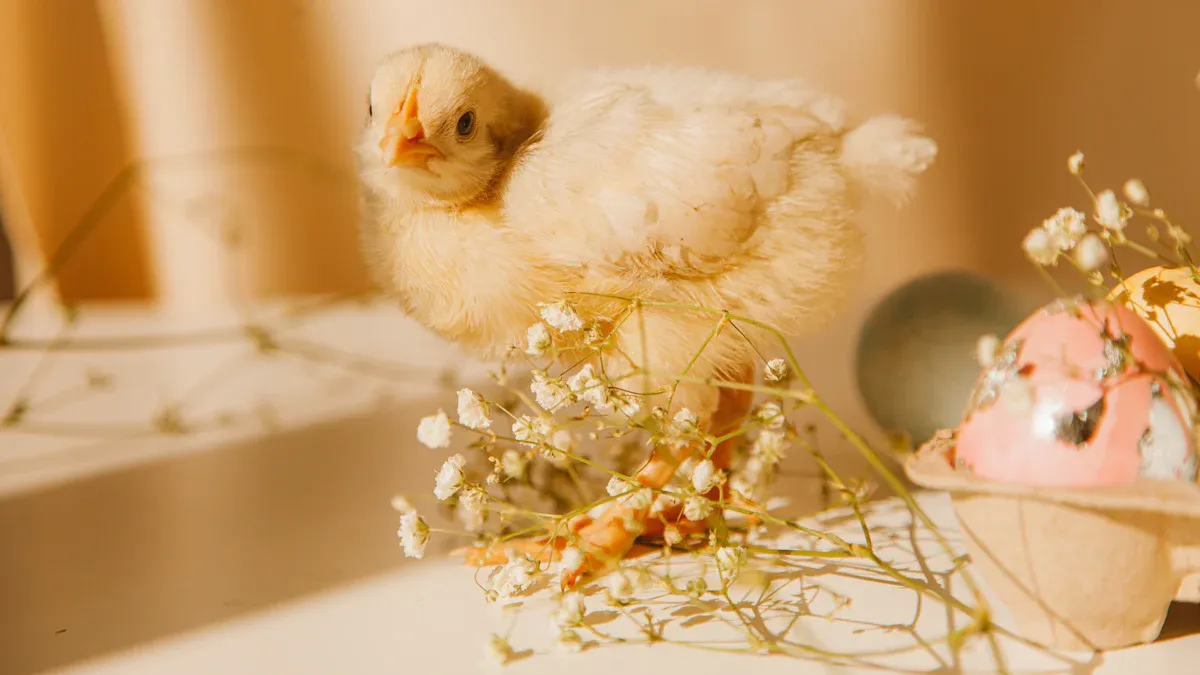
You may feel worried when you see a quail chick struggle. Most chicks hatch by themselves, but sometimes you must help. Quail assisted hatching needs good timing and gentle care. Look for signs that a chick needs help. Helping too early or too late can hurt the chick. Studies show some things cause hatching problems. Storing eggs longer than 24 days or early fertilization failure are common reasons. Use this guide to help your chicks hatch safely. Go slow, watch carefully, and be patient during quail assisted hatching. If you do it right, your chicks have a better chance to live.
|
Factor |
Description |
|---|---|
|
Egg Storage Duration |
Storing eggs too long makes hatching harder. The best limit is 24 days for quail eggs. |
|
Fertilization Failure |
Early embryo death often causes hatching to fail. |
Key Takeaways
-
Wait at least 12–24 hours after a chick pips before helping. Most chicks need time to rest and absorb the yolk.
-
Keep humidity high at 65–75% during lockdown to prevent shrink-wrap and sticky chick problems.
-
Always wash your hands and use clean tools before assisting to avoid infections.
-
Look for signs of distress, like weak chirping or no movement, before deciding to help a chick.
-
If you see blood or an unabsorbed yolk sac, stop all actions and return the egg to the incubator.
Hatch Timeline by Species
Understanding the typical hatching timeline for each quail species helps you decide when to wait and when to consider helping. Every chick is different, so some may take longer or shorter than average. Use these timelines as a guide, but always watch for signs of progress before you act.
|
Quail Type |
Incubation Period (Days) |
Hatching Period (Days) |
|---|---|---|
|
Coturnix Quail |
15–18 |
15–18 |
|
Button Quail |
16–18 |
16–18 |
|
Bobwhite Quail |
20–23 |
20–23 |
Tip: If a chick has not hatched by the end of the typical window, check for signs of life before you intervene. Early help can cause harm.
Coturnix Quail Hatching Pace
Coturnix quail usually pip and hatch quickly. After the first external pip, you often see the chick finish hatching within 12–14 hours. Some chicks may take up to 24 hours from pip to hatch. Their shells are thin, so they lose water faster. This makes Coturnix more sensitive to low humidity and shrink-wrap risk. Wait at least 12 hours after pip before you think about helping.
-
Most Coturnix chicks hatch on their own.
-
If you see no progress after 24 hours, start checking for problems.
-
Always keep humidity high during hatching.
Button Quail Variability
Button quail show more variation in hatching pace. Their eggs are small and the shells are thin, which increases the risk of shrink-wrap. Some Button chicks hatch fast, while others take longer. You should wait at least 18 hours after pip before you consider helping. Watch for signs of distress, but remember that slow hatching is common for this species.
Bobwhite Quail Waiting Window
Bobwhite quail have the longest incubation period. After external pip, Bobwhite chicks often rest for a long time to absorb the yolk. You should wait at least 24 hours after pip before you think about helping. Do not rush. Early intervention can cause shrink-wrap or injury.
-
Bobwhite eggs have thicker shells.
-
Chicks may need extra time to finish hatching.
-
Only help if you see no movement or progress after the waiting window.
Note: Always use these timelines as a guide. Some chicks may need more time. Early intervention can be risky.
Shrink-Wrap and Sticky Chick Risks
Quail eggs have very thin shells. They also have a lot of surface compared to their size. This lets water leave the egg fast during incubation. Button quail eggs lose water even faster than others. You need to watch them more closely. Because of these things, quail can get shrink-wrap or sticky chick problems more easily.
Causes of Shrink-Wrap
Shrink-wrap happens when the inside membrane dries out. It sticks tightly to the chick. The chick cannot move or get out. Low humidity or opening the incubator too much makes this worse. Button quail get shrink-wrap more often than Coturnix. Their shells are thinner.
|
Condition |
Environmental Factors |
|---|---|
|
Shrink-Wrapped Chicks |
Humidity below 45% or above 85% during hatching. Incubator opened too often. |
|
Sticky Chicks |
High humidity throughout incubation. Temperature swings. |
Prevention Tips:
Keep humidity at 65–75% RH during lockdown.
Do not open the incubator unless you must.
Make sure air moves gently and temperature stays steady.
Identifying Sticky Chick
Sticky chick means the egg’s fluids dry up and turn sticky. The chick gets stuck to the shell and cannot move. You might see sticky spots on the chick’s body. Its fuzz sticks to its skin. The chick feels cold and weak. Healthy chicks look fluffy and move around. Sticky chicks stay stuck to the shell and look tired.
|
Condition |
Description |
Cause of Condition |
|---|---|---|
|
Shrink wrap |
Membrane dries tight around chick, stopping movement. |
Low humidity during incubation. |
|
Sticky chick |
Liquids dry to glue, sticking chick to shell and skin. |
High humidity during lockdown. |
|
Wet sticky |
Chick is swollen, wet, and sticky. |
High humidity throughout incubation. |
|
Drowning |
Outer membrane dry, inner membrane wet, binding chick. |
High humidity throughout incubation. |
Quick Recognition Checklist:
-
Shrink-wrap: Chick cannot turn, membrane is dry and tight.
-
Sticky chick: Sticky stuff on body, fuzz stuck to skin, chick is cold.
-
Healthy chick: Fluffy, alert, moves away when touched.
🐣 If a chick is stuck and cannot move after 24 hours from pip, look for shrink-wrap or sticky chick signs before you help.
When to Assist — Decision Rules
Knowing when to step in can save a chick’s life. You need to watch closely and use a clear guide to assisted hatching. Not every slow hatch means you should help. Sometimes, waiting is the best choice. Use the following decision table and checklist to decide if a chick needs help.
Signs a Chick Needs Assistance
You should look for specific signs a chick needs help. These signs show the chick cannot finish hatching alone. Use this table to guide your decision:
|
Situation |
What You See |
What to Do |
|---|---|---|
|
Pip made, no progress after 24 hours |
Chick pipped shell, but no further cracks or movement |
Consider assisting |
|
Membrane dried and tight (shrink-wrap) |
Membrane sticks to chick, chick cannot turn or move |
Prepare to assist |
|
Chick started zipping, then stopped |
Zipping line started, but chick stopped moving |
Assist if no progress |
|
Labored breathing or weak chirping |
Chick breathes hard, chirps weakly, seems tired |
Check for distress |
|
No movement, but still alive |
Chick pipped, but no movement for several hours |
Assess for help |
Tip: Always wait at least 12–24 hours after the first pip before you start assisting during a hatch. Most chicks need time to rest and absorb the yolk.
You may also notice signs of distress, such as loud, repeated chirping or a chick that cannot turn inside the shell. If you see these, check if the membrane looks dry or if the chick has stopped making progress. These are clear signs a chick needs assistance.
Checklist for Assisting During a Hatch:
-
Wait 12–24 hours after pip before you act.
-
Look for dried membrane or stuck chick.
-
Listen for distress chirping.
-
Watch for no progress or movement after pip.
-
Check if the chick started zipping but stopped.
-
Only assist if you see these signs.
When Not to Intervene
Sometimes, you should not help. Unnecessary assisted hatching can cause harm. If you help too soon, you risk hurting the chick or causing long-term problems. Here are common mistakes to avoid:
-
Do not assist if the chick is still making progress, even if it is slow.
-
Do not help before 12 hours have passed since pip.
-
Do not open the incubator often. This can cause shrink-wrap.
-
Do not force the shell if you see blood or unabsorbed yolk.
Helping at the wrong time can lower hatch rates and increase chick deaths. It can also cause health problems, like weak thyroid function or poor growth. Supporting weak chicks starts with patience and careful observation.
⚠️ Warning: Only assist when you see clear signs a chick needs help. If you are unsure, wait and watch. When to seek help? If you feel unsure or see something unusual, ask an experienced breeder or vet.
Summary Table: Decision Rules for Assisted Hatching
|
Step |
Wait Time After Pip |
Signs to Watch For |
Action |
|---|---|---|---|
|
Initial pip |
0 hours |
Small crack or hole in shell |
Wait and observe |
|
No progress |
12 hours |
Chick resting, some movement |
Keep waiting |
|
No progress |
24 hours |
No movement, dried membrane, distress |
Prepare to assist |
|
Zipping started, then stopped |
Any time after pip |
Chick stopped halfway, no progress |
Assist if needed |
|
Blood or yolk visible |
Any time |
Blood vessels or yolk not absorbed |
Stop, do not assist |
By following these steps, you can avoid common mistakes to avoid and give your chicks the best chance. Remember, patience is key in hatching. Use this guide to assisted hatching to make safe choices.
Assisted Hatching Step-by-Step
Assisted hatching can save a chick’s life, but you must follow careful steps. This guide to assisted hatching will help you prepare, act safely, and know when to stop. Always remember: patience and observation are your best tools.
Preparation and Hygiene
Preparing for assisted hatching starts with a clean and safe environment. You want to protect your chicks from infection and stress. Follow these steps before you begin:
Printable Checklist for Safe Assisted Hatching
-
Wash your hands with soap and water.
-
Wear clean clothing.
-
Disinfect all tools (tweezers, cotton swabs, scissors) with alcohol or boiling water.
-
Prepare a warm, damp paper towel.
-
Set up a clean workspace near the incubator.
-
Check that the incubator holds a stable temperature (99.5°F–100°F) and humidity (≥65% RH).
-
Keep the area calm and quiet.
🧼 Tip: Prevent pathogens by keeping your hatch area clean. Avoid cross-contamination by using separate zones for clean and dirty items.
Common Hygiene Mistakes to Avoid:
-
Touching eggs or chicks with dirty hands.
-
Using unclean tools.
-
Opening the incubator too often.
Micro-Moves Technique
You must use gentle, small actions during assisted hatching. This step-by-step method helps you avoid injury and gives the chick time to finish hatching on its own.
Step-by-Step Method for Assisted Hatching
-
Candle the Egg
-
Candle the air cell to check for an external pip. If you see only an internal pip, wait and recheck in 30–60 minutes.
-
-
Assess the Membrane
-
Look at the membrane color. If it looks translucent and moist, wait. If it looks dry or white, moisten it with a warm saline cotton swab.
-
-
Check for Life
-
Watch for movement or listen for peeping. If you are unsure, pause and check again in 30–60 minutes.
-
-
Open a Viewing Window
-
At the external pip, use fine tweezers to chip a tiny window on the air cell side. Never puncture the membrane directly.
-
-
Moisten the Membrane
-
Gently dab the exposed membrane with a warm, damp cotton swab. Do not flood the chick’s beak or nostrils.
-
-
Observe Blood Vessels
-
If you see bright red, branching vessels, stop. Return the egg to the incubator for 1–3 hours and reassess.
-
-
Expand the Opening Slowly
-
When vessels fade, gently lift the outer membrane. Work in small increments every 20–40 minutes. Allow the chick to rest between steps.
-
-
Keep the Egg Moist
-
Wrap the egg in a warm, damp paper towel (leave the beak exposed) between steps to prevent drying.
-
-
Let the Chick Finish
-
Once the shell is mostly unzipped and membranes look bloodless, let the chick push free on its own.
-
🐥 Note: Always work on the air cell side. Never force the chick out. Give it time to absorb the yolk and rest.
Common Mistakes During Assisted Hatching
-
Chick’s feet over its head: The chick cannot pip the shell and needs full assistance.
-
Chick facing away from the air cell: The chick may still hatch, but you must watch closely.
-
Head at the wrong end of the egg: This happens if eggs are set incorrectly. The chick may pip at the wrong end.
Incubator Tips
-
Test your incubator before each hatch.
-
Monitor for temperature spikes and adjust as needed.
Stop Conditions (Blood, Yolk)
You must know when to stop assisted hatching to avoid harming the chick. Watch for these critical signs:
|
Stop Condition |
What You See |
What To Do |
|---|---|---|
|
Visible blood |
Blood vessels in the membrane or bleeding starts |
Stop immediately. Return to incubator. |
|
Unabsorbed yolk sac |
Yellow yolk visible outside the chick’s body |
Stop. Let the chick rest and absorb yolk. |
|
Active blood vessels |
Bright red, branching vessels in the membrane |
Stop. Wait 1–3 hours and reassess. |
|
Chick distress |
Weakness, gasping, or no movement |
Pause. Keep warm and moist. Seek help if needed. |
⚠️ Alert: If you see blood or unabsorbed yolk, stop all actions. Return the egg to a high-humidity incubator (≥65% RH) and wait. Never pull a chick free if you see these signs.
Decision Table for Assisted Hatching
|
Step |
Action Required |
Pause/Observation Interval |
|---|---|---|
|
External pip |
Wait and observe |
30–60 minutes |
|
Dry membrane, no progress |
Moisten membrane, open small window |
20–40 minutes between steps |
|
Blood vessels visible |
Stop, return to incubator |
1–3 hours |
|
No blood, chick ready |
Gently expand opening, let chick finish |
10–15 minutes between checks |
|
Blood or yolk appears |
Stop immediately, return to incubator |
Wait until safe to continue |
By following this step-by-step guide, you give your chicks the best chance to survive. Assisted hatching requires patience, careful observation, and gentle hands. Always remember: when in doubt, wait and watch.
Lockdown Environment
Making a good lockdown environment helps quail eggs hatch well. You must watch humidity and temperature, especially in the last days. Even small mistakes can cause shrink-wrap or sticky chick problems. Follow these steps to keep eggs safe while incubating.
Humidity Targets
During lockdown, raise humidity so membranes do not dry out. For most quail, keep relative humidity at 65–75% RH. This helps chicks avoid shrink-wrap and makes hatching easier. Check the table below for the right humidity for each species:
|
Species |
Lockdown Humidity (RH%) |
|---|---|
|
Coturnix Quail |
65–75 |
|
Button Quail |
65–75 |
|
Bobwhite Quail |
65+ |
To make humidity higher, add water trays or put wet sponges in the incubator. You can close vents a little, but make sure chicks get enough air. Always look at the humidity gauge while incubating.
Temperature Control
Keeping the temperature steady is just as important as humidity. Set the incubator at 99.5°F–100°F during lockdown. Big changes in temperature can hurt chicks. Do not put the incubator near windows or vents. If you see sticky chicks, raise humidity to 70% and keep the incubator closed until most chicks hatch.
-
Raise humidity to 65–70% for the last 3 days before hatching.
-
Keep temperature steady during lockdown.
-
Check both settings every few hours while incubating.
Safe Incubator Opening
Opening the incubator during lockdown can drop humidity and temperature fast. This can cause shrink-wrap and fewer chicks hatching. Do not open the incubator once pipping starts. If you need to help, open it quickly and only if needed. Use a spray bottle to mist the air before closing the lid to bring humidity back up.
-
Only open the incubator if you see clear signs a chick needs help.
-
Make changes through small holes if you can.
-
Always check humidity and temperature after you open the incubator.
🛑 Remember: Keeping conditions steady during lockdown helps your incubating chicks hatch strong and healthy.
Species Differences
Coturnix vs Button
You will notice clear differences between Coturnix and Button quail during hatching. Coturnix quail usually hatch on day 17 or 18. After the first pip, most Coturnix chicks rest for a short time, then finish hatching within 12–24 hours. Their eggshells are thin, so you must watch humidity closely. Coturnix chicks face some risk of shrink-wrap, but Button quail have an even higher risk.
Button quail eggs are smaller and lose water faster. Their shells are very thin. This means Button chicks can dry out quickly if humidity drops. You need to check Button eggs more often, especially if you see no progress after 18–24 hours from pip. If you notice a dry membrane or the chick cannot turn, prepare to assist.
Step-by-Step: Coturnix vs Button
-
Mark the pip time for each egg.
-
For Coturnix, wait at least 12 hours after pip before checking for problems.
-
For Button, check progress at 18 hours. If no movement or signs of shrink-wrap, get ready to help.
-
Always keep humidity at 65–75% RH during lockdown for both species.
📝 Tip: Button quail need closer monitoring. If you see a dry, tight membrane, act sooner than you would with Coturnix.
|
Species |
Typical Hatch Day |
Rest After Pip |
Shrink-Wrap Risk |
Shell Thickness |
|---|---|---|---|---|
|
Coturnix |
17–18 |
12–24h |
Medium |
Thin |
|
Button |
16–18 |
18–24h |
High |
Very Thin |
Bobwhite Special Considerations
Bobwhite quail have a longer incubation period. You will usually see hatching around day 21–23. After pipping, Bobwhite chicks often rest for a long time. They need this time to absorb the yolk. You should wait at least 24 hours after pip before you consider helping.
Bobwhite eggs have thicker shells. This gives them more protection from drying out, but you still need to watch for shrink-wrap if humidity drops. If you see no progress after 24–30 hours, check for signs of distress.
Decision Table: Bobwhite Hatching Help
|
Step |
Wait Time After Pip |
What to Watch For |
Action |
|---|---|---|---|
|
External pip |
0 hours |
Small crack, chick resting |
Wait and observe |
|
No progress |
24 hours |
No movement, dry membrane |
Prepare to assist |
|
Signs of distress |
Any time |
Weak chirping, no turning |
Assess for help |
🐦 Note: Bobwhite chicks can wait longer before you help. Always follow the "wait before help" rule to avoid injury.
Troubleshooting and FAQs
No Progress After 24h
If you see no progress after 24 hours from pip, check the chick closely. Sometimes, a chick rests longer before finishing hatching. Look for signs like dried membrane, weak chirping, or labored breathing. If you notice these, prepare to help. Always keep the environment warm and humid. Avoid opening the incubator too often. This can cause shrink-wrap and stress for other chicks.
Tip: Use fresh eggs for better hatch rates. Eggs older than two weeks often have more problems during hatching.
Blood Vessel Visibility
Before you assist, always check for blood vessels. If you see bright red vessels or any bleeding, pause. Return the chick to a high-humidity incubator for 1–3 hours. This gives the chick time to absorb blood and yolk. Never remove too much shell at once. If you see fresh bleeding or the chick becomes less responsive, stop and let it rest.
Pause-or-Proceed Decision Table
|
Situation |
Action |
|---|---|
|
Active blood vessels or unabsorbed yolk |
Pause, return to high humidity 1–3h |
|
Pipped ≥24h, no progress, dried membrane |
Proceed with limited assistance |
|
Labored breathing, weak chick |
Proceed with caution |
|
Fresh bleeding or less responsive chick |
Stop, stabilize, reassess |
Shrink-Wrap vs Sticky Chick
You can spot shrink-wrap when the membrane dries tight around the chick. The chick cannot turn or move. Sticky chick happens when fluids dry and glue the chick to the shell. Both problems need quick action. Moisten the membrane with a warm, damp swab. Keep the chick warm and humid. If you see no improvement, assist gently.
Common Mistakes to Avoid
-
Opening the incubator too often
-
Low humidity during lockdown
-
Removing too much shell at once
-
Ignoring blood vessels or yolk
-
Poor hygiene or temperature control
Unabsorbed Yolk Sac
If you see a yellow yolk sac outside the chick, stop all help. Place the chick back in the incubator with high humidity. Wait for 1–3 hours. Most chicks need time to absorb the yolk fully. Never pull or force the chick out.
🐥 After hatching, move chicks to a clean brooder. Use mould-free bedding and provide fresh water at all times. Feed a high-protein crumble and grind it for very young chicks. Watch for unusual behavior and keep the brooder well-ventilated. Good care helps your chicks grow strong.
You can help your chicks hatch safely by following these important tips:
-
Intervene only after a clear external pip with no progress for 18–24 hours and signs of distress.
-
Work in small steps. Stop if you see blood and return the egg to the incubator.
-
Keep the membrane moist and humidity high to protect your chicks.
-
Always wash your hands, use clean tools, and keep the area draft-free.
-
After hatching, give your chicks warmth, fluids, and a quiet space.
Stay patient and watch your chicks closely. If you face problems, reach out to experts like Tall Timbers or Wild Harts Farm for help. With care and attention, you can support healthy chicks and enjoy a successful hatch.
FAQ
How long should you wait after a chick pips before helping?
You should wait at least 12–24 hours after the first pip. Most chicks need this time to rest and absorb the yolk. Only help if you see no progress or signs of distress.
What should you do if you see blood while assisting?
Stop immediately if you see blood. Return the egg to the incubator for 1–3 hours. This pause lets the chick absorb blood and yolk. Resume only when blood vessels fade.
How can you tell if a chick is shrink-wrapped or sticky?
|
Condition |
Key Signs |
|---|---|
|
Shrink-wrap |
Dry, tight membrane, no movement |
|
Sticky chick |
Sticky fuzz, glued to shell |
Look for these signs before you decide to help.
What is the best humidity for quail hatching?
Keep humidity at 65–75% RH during lockdown. This range helps prevent shrink-wrap and sticky chick problems. Use a reliable hygrometer to check levels.
Can you help a chick if the yolk sac is not absorbed?
No. If you see a yellow yolk sac, stop all help. Place the chick back in the incubator. Wait 1–3 hours for the chick to absorb the yolk before trying again.


0 Comments