
Egg candling is a fast way to check what’s happening inside an incubating egg without cracking the shell. This guide is for backyard chicken keepers using a forced-air incubator who want to confirm fertility, track embryo growth, and catch “remove-now” issues before they spoil the rest of the batch. When you candle on a simple schedule and keep a consistent log, you tend to make fewer avoidable mistakes—like leaving eggs out too long or misreading a shadow as a problem.
Before you start: treat candling like a clean, quick check. Wash your hands for at least 20 seconds, label each egg, and keep a note for every inspection. That small routine makes your results more reliable and helps you learn faster.
Key Takeaways
-
Egg candling lets you look inside eggs without opening them. You get a “yes/no/maybe” view of development in seconds.
-
Use a bright, focused beam so veins and the air cell stand out, especially on brown or darker shells.
-
Work in a dark room, keep your hands clean, and keep eggs out of the incubator for the shortest time possible.
-
Label each egg and log what you see. Candling is most useful when you can compare checkpoints (Day 7 → Day 14 → optional Day 18).
-
Handle eggs gently and return them quickly. Stable heat and humidity matter more than “getting a perfect look.”
What egg candlers do during inspection
Light test: shell, shadows, air cell
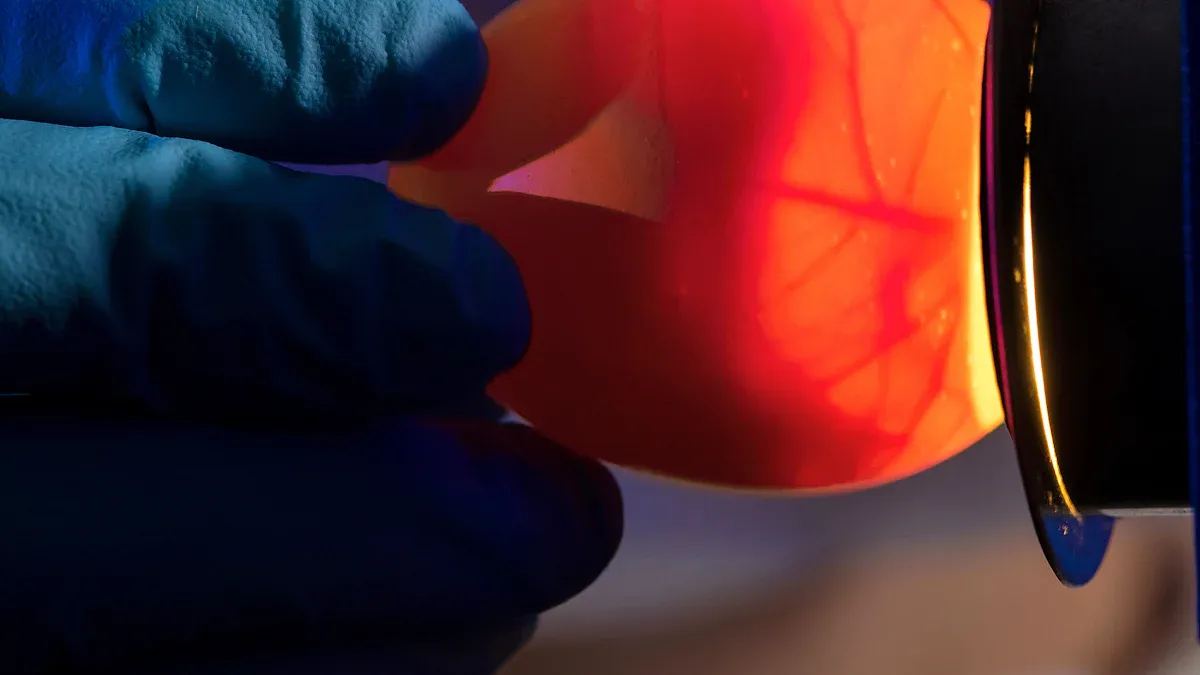
When you use egg candlers, you shine a bright light through the shell to reveal three things: the air cell, the developing blood vessels, and the embryo’s shadow. The air cell sits at the large end of the egg and looks like a clear pocket. Veins look like a branching web. A growing dark mass usually means the embryo is developing.
Tip: Hold the egg with the large end up. Rotate slowly so you can spot the air cell boundary and any clear vein patterns.
Why focused light matters
A focused beam makes candling easier because it increases contrast. You can separate normal shadows from warning signs, and you can see deeper into eggs with thicker shells or darker pigmentation. If the light is weak or spills around the shell, details blur and you’ll second-guess what you’re seeing.
When egg candling helps most
You get the biggest payoff when you candle at specific checkpoints instead of “whenever you feel like it.” At those moments, candling helps you:
-
Confirm which eggs are actually developing.
-
Track air cell growth so you can adjust humidity with a reason, not a guess.
-
Remove obvious non-viable or contaminated eggs before they become a risk to the rest of the incubator.
-
Manage incubation conditions more confidently using what you observe.
This approach works well for chicken eggs in a forced-air incubator, especially for small backyard batches where every egg matters.
Choosing egg candling devices for your setup
Types of egg candling devices
You can candle with several tools, but the goal stays the same: strong, narrow light with good control. Dedicated candlers are built for this job and are usually the easiest to use. A high-output flashlight can work if it has a tight beam. Phone flashlights are convenient, but they often struggle on darker shells and are harder to “seal” against the egg.
Tip: Test your device on an empty shell or an unfertilized kitchen egg first. If you can’t clearly see the air cell, you’ll likely struggle during incubation checks.
Quick pick guide (choose the tool that helps you see clearly without overheating the shell):
Best overall for consistent results: A dedicated egg candler because it gives a focused beam and steady handling.
-
Dedicated egg candler: strongest focus and easiest “seal” on the shell.
-
Flashlight: works if the beam is tight and bright enough for your shell color.
-
Phone light: fine for quick checks on light shells, but often too dim for dark eggs.
Brightness for dark vs light shells
Shell color changes what you can see. Darker shells block more light, so you need more brightness and better focus to see veins and the embryo’s outline. Lighter shells pass more light, so even mid-range devices can work.
-
Dark shells: prioritize brightness and a tight beam so veins show up.
-
Light shells: you can use a less powerful light and still see the air cell clearly.
-
All shells: contrast matters—work in a dark room so details don’t wash out.
Comfort and control features
Comfort equals control, and control reduces cracks and “too-long” checks. Look for a device that fits your hand, doesn’t slip, and turns on/off quickly. If you candle larger batches, a comfortable grip matters more than you expect.
Choose a device you can hold steady with one hand. That lets your other hand rotate the egg smoothly and keep time outside the incubator short.
If you want the simplest setup, consider using a dedicated candler designed for incubation checks, such as an Eggbloom egg candler collection that emphasizes a focused beam and easy handling.
Setting up your egg candling station
Dark room and workspace tips
You get clearer results when you candle in a dark room because the egg’s internal details stand out faster. Turn off overhead lights, close curtains, and use a clean table where you can work without bumping eggs. Keep your candler, pen, and log within reach so you don’t leave eggs sitting out while you search for supplies.
Tip: Make the room as dark as you can before you start. Less glare means fewer “false alarms” from reflections and shadows.
Hygiene and cross-contamination
Good hygiene reduces contamination risk and keeps your incubator environment more predictable. Wash your hands with hot, soapy water for at least 20 seconds before and after handling eggs. Keep your workspace clean by wiping surfaces before you begin, and keep food and drinks out of the candling area.
-
Wash hands thoroughly for at least 20 seconds before and after touching eggs.
-
Wipe down surfaces and tools before you candle.
-
Keep the candling area separate from food prep spaces.
Clean hands and a clean surface help you avoid preventable losses that have nothing to do with fertility.
Labeling and logging eggs
Labeling and logging help you compare what you see over time. Mark each egg with a unique ID before incubation. Then record what you see at each checkpoint. The value isn’t just the note—it’s the comparison: “Day 7 veins” versus “Day 14 growth” tells you far more than a single snapshot.
-
Use a pencil or a label that stays readable in humidity.
-
Write the date and checkpoint every time you candle.
-
Use consistent terms so you don’t confuse “clear” with “light shadow.”
Keeping a clear log helps you stay organized and makes your decisions more consistent from batch to batch.
How to candle an egg step by step
Learning how to candle an egg helps you confirm healthy development and spot risks early. The goal is a clean, fast check that protects temperature and humidity.
Preparation and gentle handling
Step 1: Prepare your workspace
Set up in a dark room. Gather your egg candler, log sheet, and pen. Wash your hands with soap and water for at least 20 seconds before you touch any eggs. Keep food and drinks away from your work area.
Step 2: Handle eggs gently
Pick up each egg with care. Hold it firmly but softly to avoid cracks. Move slowly and never tap eggs together. Keep each egg out only long enough to see the key signs. Short checks protect embryo warmth and steady humidity.
Tip: Label eggs before incubation. Your log matters most when you can compare the same egg across checkpoints.
Positioning the light and reading the air cell
Step 3: Position the egg for candling
Hold the egg above your candler with the large end facing the light. Keep the large end slightly higher than the pointy end. This position makes the air cell easiest to read.
Step 4: Rotate and observe
Turn the egg slowly between your fingers. Look for:
-
Air cell: a clear pocket at the large end.
-
Veins: branching lines that suggest active development.
-
Embryo shadow: a dark mass that grows noticeably by Day 14.
Step 5: Log your findings
Write down what you see for each egg. Note the date and checkpoint (Day 7, Day 14, optional Day 18). Mark eggs that look clear, show a blood ring, or have any “remove-now” red flags. Your notes help you act consistently instead of reacting emotionally to one confusing view.
Case Example 1:
You’re candling eggs from different breeds. White eggs show veins quickly. Dark brown eggs need more brightness and a tighter beam. You log “Veins present” for some and “Clear—recheck” for others so you don’t remove eggs too early.
Case Example 2:
At Day 7, a few eggs look clear. You mark them and re-check at Day 14. If they remain clear with no change, you remove them to reduce incubator contamination risk.
Returning eggs to the incubator
Step 6: Return eggs quickly and safely
Place each egg back in the incubator right away. Remove eggs that are cracked, leaking, smelly, or clearly non-developing. That protects the healthy eggs and keeps the incubator cleaner. After candling, confirm the incubator returns to target temperature and humidity.
Do/Don’t Checklist
Conclusion: A clean, quick check protects embryos better than a long “perfect look.”
-
Do: Wash hands, work in a dark room, use a focused light, rotate gently, and log every egg.
-
Don’t: Tap or shake eggs, leave eggs out too long, ignore cracks/leaks/odor, or skip notes.
-
Best habit: Candle on a schedule (Day 7, Day 14, optional Day 18) instead of daily.
If you want to know how to candle an egg, follow the same routine at the same checkpoints. Consistency is what turns candling from “guessing with a flashlight” into a useful management tool.
Interpreting egg candling results

Normal signs at each checkpoint
You can spot signs of development at each candling checkpoint. Use this as a practical baseline, not a promise—eggs can vary by breed, incubation settings, and handling.
-
Day 7: Veins are the clearest “yes” sign. The air cell is visible at the large end.
-
Day 14: The embryo shadow is larger, and you may see movement.
-
Day 18: The egg looks mostly dark with a distinct air cell. Movement can be subtle.
These signs support more confident tracking, including monitoring chick development across species and clutch sizes.
Early loss and remove-now cues
Conclusion: remove obvious “no-development” or contamination-risk eggs at the checkpoint—waiting on clear red flags increases risk to the rest of the incubator.
-
Clear egg (no veins, no change by the next checkpoint): likely infertile or early loss → mark and recheck, then remove if unchanged.
-
Blood ring: classic early embryo loss → remove and sanitize hands/work area.
-
Murky/cloudy contents or uneven dark spot that doesn’t grow: possible loss → remove if it stays abnormal at the next check or if odor/leak appears.
Late-stage changes and caution
Late-stage candling can look “boring” because the chick fills most of the egg. That’s often normal. Only act fast when you see contamination cues.
Conclusion: Near hatch, “mostly dark” is usually good—odor or leakage is not.
-
Mostly dark + clear air cell: typical late development → continue incubation.
-
Large air cell: can be normal moisture loss → monitor and adjust humidity only if your trend is consistently off.
-
Severe odor or visible leakage: contamination risk → remove immediately and sanitize.
What you can see vs can’t confirm
Egg candling gives you visual clues, not guarantees. Veins suggest development, but you can’t “prove” future hatch success with a single look. Shell color does not determine fertility. Lack of movement at one moment can simply mean the chick is resting. Gentle handling matters because shaking or tapping can harm embryos even if the candling view looks fine.
Use candling to guide decisions. When the view is ambiguous, mark the egg and compare at the next checkpoint instead of guessing.
Common egg candling mistakes to avoid
Most candling mistakes are not about the light—they’re about time, handling, and inconsistent decision rules. Fix those three and your results usually become clearer.
Over-candling and cooling
If you candle too often or leave eggs out too long, you risk cooling the embryos. Because cooling can slow development, a “perfectly seen” egg can still be harmed by a long check. Keep candling quick, and limit checks to checkpoints unless you have a specific reason (like investigating a suspected crack or leak).
Conclusion: Temperature stability beats frequent checking.
-
Best practice: Candle only on checkpoints and keep each egg out briefly.
-
Risk: extended cooling can reduce viability, especially in smaller eggs or cooler rooms.
-
Fix: set up your station first so eggs return to the incubator quickly.
Rough handling and tapping
Handle eggs gently. Never tap or shake them. Even small impacts can disrupt the developing embryo. Hold the egg steady, rotate slowly, and avoid sudden movements.
Care should be taken while candling not to leave the light against the shell for too long.
Misreading shadows and dirty shells
Dirt, stains, and shell texture can create misleading shadows. A spot on the shell is not the same as a spot inside the egg. If your view looks confusing, wipe your candler opening, re-darken the room, and re-check briefly.
-
Surface marks can look like internal shadows.
-
Dust and smudges reduce contrast and hide veins.
-
Dim rooms create glare that looks like “odd shapes.”
Conclusion: Confirm you’re seeing the inside of the egg—not the shell surface.
-
True sign: veins branch and connect like a web.
-
Common false sign: a stationary dot that never shifts as you rotate is often on the shell.
-
Fix: rotate slowly; internal features move relative to the shell as the light angle changes.
Seven top mistakes and fixes
-
Candle only at checkpoints to reduce disturbance and cooling.
-
Set your station first so eggs aren’t sitting out while you find supplies.
-
Mark “clear—recheck” instead of removing uncertain eggs at Day 7.
-
Remove only clear red flags (blood ring, odor/leak, cracks that threaten contamination).
-
Use a brighter, focused beam for dark shells so you don’t misclassify viable eggs.
-
Keep decisions consistent by using the same terms in your notes each time.
-
Never skip handwashing before and after handling eggs.
Tip: The best candling skill is consistency. Same light, same room, same schedule, same log terms.
Egg candling log, troubleshooting, and safety
Using the Quick Reference Card
The Quick Reference Card works best when it keeps you consistent. Check it before each session so you remember your schedule, your hygiene steps, and what you plan to log. Candling is a management routine, not a one-time “inspection.”
Printable candling log template
Conclusion: the simplest log is the one you will actually use every time.
-
Egg ID: a short code (A1, A2, B1) written on the shell.
-
Checkpoint: date + Day number (e.g., “Feb 24 — Day 7”).
-
Observation → Decision: “Veins → Keep,” “Clear—recheck,” “Blood ring → Remove.”
Mini log template (copy/paste format):
Egg ID:
Checkpoint (Date + Day):
Air cell (small/normal/large):
Veins (none/visible/strong):
Embryo shadow (none/small/growing):
Decision (Keep/Recheck/Remove):
Result interpretation table
Conclusion: sort what you see into three buckets so you don’t overreact to normal variation.
-
Normal: veins, growth over time, clear air cell boundary → keep incubating.
-
Questionable: odd shadows or slow change → mark and compare at the next checkpoint.
-
Remove-now: blood ring, strong odor/leak, obvious cracks or contamination cues → remove and sanitize.
Troubleshooting FAQ
Q1: Why do some eggs look clear at Day 7?
A: Some are infertile, and some are just early. Mark them and recheck at Day 14 before you decide.
Q2: What does a blood ring mean?
A: It often indicates early embryo loss. Remove the egg and sanitize your hands and workspace to protect the rest of the batch.
Q3: Why do I see no movement at Day 14?
A: The chick may be resting. Compare at Day 18 before making a final call unless you see odor/leaks.
Q4: What if the air cell is too small or too large?
A: That usually points to humidity being too high (small air cell) or too low (large air cell). Adjust gradually and watch trends across multiple eggs.
Q5: What should I do with a cracked egg?
A: Remove it if it risks leaking or contamination. A cracked egg can spoil an entire batch.
Q6: Why does my egg smell bad?
A: Odor is a contamination warning. Remove the egg immediately and clean the area.
Q7: Can I candle eggs every day?
A: It’s not recommended. Frequent checks increase cooling and handling risk without adding much useful information.
Q8: How do I avoid spreading germs?
A: Wash hands for 20 seconds before and after, and keep the candling station clean and food-free.
Safety Tip: Keep food and drinks out of your candling area. Treat it like a clean workspace, not a kitchen counter.
Troubleshooting Table
Conclusion: Use symptoms to guide one clear next step instead of guessing.
-
Clear egg or no change by next checkpoint: mark → recheck → remove if unchanged.
-
Blood ring / murky contents: remove and sanitize.
-
Bad odor / leakage: remove immediately and clean hands/work area.
You can master egg candling by following a few simple steps:
-
Mark each egg with a pencil before incubation.
-
Candle eggs in a dark room for clear visibility.
-
Check for cracks, leaks, or odor and remove any high-risk eggs.
-
Log your observations at each checkpoint using consistent terms.
-
Handle eggs gently, keep checks short, and wash your hands every time.
Regular checks at Day 7 and Day 14 help you track air cell growth and embryo development. Keep your routine consistent, and use candling results to guide small, careful adjustments rather than big swings.
FAQ
How often should you candle your eggs?
You should candle at the recommended checkpoints: Day 7, Day 14, and an optional Day 18. This schedule gives you useful information without over-handling the eggs.
What if you see a blood ring inside an egg?
A blood ring is a common sign of early embryo loss. Remove the egg and sanitize your hands and workspace to protect the rest of the batch.
Can you candle eggs with brown or dark shells?
Yes. Use a brighter, focused light for brown or dark shells. Work in a darker room and rotate the egg slowly to help veins and the air cell stand out.
Is it safe for kids to help with egg candling?
Kids can help with close supervision. Have them wash hands before and after, and teach them to handle eggs gently and keep the candling area clean.
What should you do if an egg smells bad during candling?
Remove the egg immediately. A strong smell often indicates contamination. Wash your hands and wipe down your work area afterward.
Data authenticity note: This article is for educational purposes. Real-world candling results vary based on equipment, incubator calibration, room conditions, egg quality, and handling habits. If you encounter high-risk situations (for example, persistent contamination, repeated embryo loss across batches, or concerns about flock health), consider consulting a qualified veterinarian or poultry professional.


0 Comments